Router Table: Difference between revisions
m (German name) |
NitramLegov (talk | contribs) m (Styling) |
||
| Line 13: | Line 13: | ||
|used with=[[#Compatible Routers|compatible '''routers''']], [[Push Blocks|push blocks]] | |used with=[[#Compatible Routers|compatible '''routers''']], [[Push Blocks|push blocks]] | ||
}} | }} | ||
A router table turns a [[Router|handheld router]] into a stationary tool. The router gets attached to the router table upside down in order to enable the workpiece to be fed through the router (thus, it is for a router what a [[Table Saw|table saw]] is for a [[Circular Saw|circular saw]]). | A router table turns a [[Router|handheld router]] into a stationary tool. The router gets attached to the router table upside down in order to enable the workpiece to be fed through the router (thus, it is for a router what a [[Table Saw|table saw]] is for a [[Circular Saw|circular saw]]). | ||
[[File:Router table feed direction - fence.gif|thumb | [[File:Router table feed direction - fence.gif|thumb|push cuts at the fence: right to left!|none]] | ||
[[File:Router table feed direction animation.GIF|thumb | [[File:Router table feed direction animation.GIF|thumb|300px|the proper workpiece direction to make push cuts depends on '''which side of the bit you're cutting on!'''|none]] | ||
It is very important to realize that the exposed router bit is not only dangerous because of its sharp edges, but also because it can rip the workpiece out of your hand and let it fly across the workshop, or pull your hand into the danger zone. To make sure that you are in control and not the router, '''ONLY make push cuts''', i.e. '''ONLY feed workpieces through from the right to the left side if you are working in front of the router bit and vice-versa!''' You should understand why this is important after getting the [[Handheld Router Introduction|router introduction]] or reading [https://www.finewoodworking.com/2014/05/07/router-accident-is-a-great-lesson-in-climb-cutting articles about accidental climb cuts] on the internet. | It is very important to realize that the exposed router bit is not only dangerous because of its sharp edges, but also because it can rip the workpiece out of your hand and let it fly across the workshop, or pull your hand into the danger zone. To make sure that you are in control and not the router, '''ONLY make push cuts''', i.e. '''ONLY feed workpieces through from the right to the left side if you are working in front of the router bit and vice-versa!''' You should understand why this is important after getting the [[Handheld Router Introduction|router introduction]] or reading [https://www.finewoodworking.com/2014/05/07/router-accident-is-a-great-lesson-in-climb-cutting articles about accidental climb cuts] on the internet. | ||
''Please also see [[Project:Router Table]] in case you would like to join us in building your own.'' | ''Please also see [[Project:Router Table]] in case you would like to join us in building your own.'' | ||
<br clear=left> | <br clear="left"> | ||
== (Emergency) Stop == | ==(Emergency) Stop== | ||
To stop the router, you can slap the lid of the yellow switchbox or use the [[Emergency Stop|foot switch]]. When stopping inside a cut, the foot switch is highly recommended so you can keep your hands on the workpiece for full control! | To stop the router, you can slap the lid of the yellow switchbox or use the [[Emergency Stop|foot switch]]. When stopping inside a cut, the foot switch is highly recommended so you can keep your hands on the workpiece for full control! | ||
In addition to unplugging the whole setup, please make a habit of "locking" the switchbox between uses (unlocked by pushing the red cover upwards) so we have maximum protection against accidental starts. | In addition to unplugging the whole setup, please make a habit of "locking" the switchbox between uses (unlocked by pushing the red cover upwards) so we have maximum protection against accidental starts. | ||
== Setup == | ==Setup== | ||
=== Dust Extraction === | ===Dust Extraction=== | ||
[[File:Westfalia router table dust ports.JPG|left|100 px]] | [[File:Westfalia router table dust ports.JPG|left|100 px]] | ||
For edge work, you can use the top (green) dust port in the fence, but for grooves you should connect the [[Shop Vac|shop vac]] to the bottom port in the rear cover of the table (Ferm router: black dust port on the machine itself). Keep in mind that the top port will only work if there is at least a small gap in the fence! | For edge work, you can use the top (green) dust port in the fence, but for grooves you should connect the [[Shop Vac|shop vac]] to the bottom port in the rear cover of the table (Ferm router: black dust port on the machine itself). Keep in mind that the top port will only work if there is at least a small gap in the fence! | ||
| Line 34: | Line 35: | ||
It will still be pretty messy work - a router generates lots of shavings - but should help reduce the amount of fine dust flying around. | It will still be pretty messy work - a router generates lots of shavings - but should help reduce the amount of fine dust flying around. | ||
<br clear=left> | <br clear="left"> | ||
=== Fence === | ===Fence=== | ||
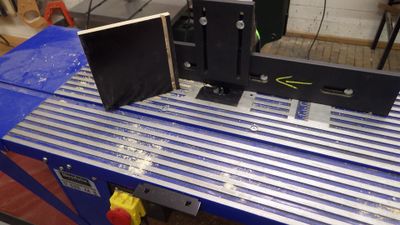
[[File:Westfalia router table fence-X.JPG|thumb|right|200 px|don't mess with the "X"!]] | [[File:Westfalia router table fence-X.JPG|thumb|right|200 px|don't mess with the "X"!]] | ||
The fence consists of several parts which need to be aligned carefully if you want it to be accurate. In most cases (working with a parallel fence), you will not need the knob labeled "X", so please don't mess with it too much...the next user will thank you! | The fence consists of several parts which need to be aligned carefully if you want it to be accurate. In most cases (working with a parallel fence), you will not need the knob labeled "X", so please don't mess with it too much...the next user will thank you! | ||
| Line 47: | Line 48: | ||
== Improvements/Upgrades == | ==Improvements/Upgrades== | ||
''Any modifications to the table or router itself should be discussed with the owner ({{NL}}) in advance and security-checked by a [[manager]] afterwards!'' | ''Any modifications to the table or router itself should be discussed with the owner ({{NL}}) in advance and security-checked by a [[manager]] afterwards!'' | ||
'''done:''' | '''done:''' | ||
* 3D printed [[Shop Vac|shop vac]] adapter (needed some further adjustment with the [[Table Saw|table saw]]) - ''is the file available somewhere?'' | *3D printed [[Shop Vac|shop vac]] adapter (needed some further adjustment with the [[Table Saw|table saw]]) - ''is the file available somewhere?'' | ||
* cut two protruding corners from the front guide bracket so it stay mounted to the table all the time without getting in the way | *cut two protruding corners from the front guide bracket so it stay mounted to the table all the time without getting in the way | ||
* make [[Push Blocks|push blocks]] | *make [[Push Blocks|push blocks]] | ||
'''further ideas:''' | '''further ideas:''' | ||
* make [[featherboards]] with slots that fit to the existing guide brackets | *make [[featherboards]] with slots that fit to the existing guide brackets | ||
* replace (at least) the star knobs connecting the fence and the table with [https://www.schraubenking.at/M6-Klemmhebel-Serie-45-P005030 locking levers] or knobs with hex nuts that can be gripped with [[wrenches]] (do those exist?) | *replace (at least) the star knobs connecting the fence and the table with [https://www.schraubenking.at/M6-Klemmhebel-Serie-45-P005030 locking levers] or knobs with hex nuts that can be gripped with [[wrenches]] (do those exist?) | ||
* make (or buy) a height/[[Depth Gauge|depth gauge]] to set the fence distance or bit height | *make (or buy) a height/[[Depth Gauge|depth gauge]] to set the fence distance or bit height | ||
==> video showing these (and more) potential upgrades: [https://www.youtube.com/watch?v=QouCoSV66NA ''Heiko Rech - Tipps zum Arbeiten mit dem Frästisch (DE)''] | ==> video showing these (and more) potential upgrades: [https://www.youtube.com/watch?v=QouCoSV66NA ''Heiko Rech - Tipps zum Arbeiten mit dem Frästisch (DE)''] | ||
== Compatible Routers == | ==Compatible Routers== | ||
These [[routers]] can be attached to the table. | These [[routers]] can be attached to the table. | ||
* [[Routers#Makita 3612BR|Makita 3612BR]] (default) | *[[Routers#Makita 3612BR|Makita 3612BR]] (default) | ||
** do not remove without good reason! | **do not remove without good reason! | ||
* [[Routers#Ferm FBF-1050E|Ferm FBF-1050E]] (backup) | *[[Routers#Ferm FBF-1050E|Ferm FBF-1050E]] (backup) | ||
** caution: [[:File:Westfalia router table off center.JPG|the mounting plate is off-center!]] | **caution: [[:File:Westfalia router table off center.JPG|the mounting plate is off-center!]] | ||
** bottom dust extraction requires the rear table cover to be removed | **bottom dust extraction requires the rear table cover to be removed | ||
== Inspiration == | ==Inspiration== | ||
Here are some examples of [[projects]] you could use the router table for: | Here are some examples of [[projects]] you could use the router table for: | ||
<gallery mode=packed heights=150> | <gallery mode="packed" heights="150"> | ||
File:Resized wardrobe drawers 06.JPG|link=[[Project:Resized Wardrobe Drawers]]|grooves like those needed for [[Project:Resized Wardrobe Drawers|self-made drawers]] | File:Resized wardrobe drawers 06.JPG|link=[[Project:Resized Wardrobe Drawers]]|grooves like those needed for [[Project:Resized Wardrobe Drawers|self-made drawers]] | ||
File:TAC 09.JPG|link=[[Project:TAC]]|cleaning up a partial-depth CNC cut with a flush trim bit ([[Project:TAC]]) | File:TAC 09.JPG|link=[[Project:TAC]]|cleaning up a partial-depth CNC cut with a flush trim bit ([[Project:TAC]]) | ||
Revision as of 17:49, 17 February 2022
| MachineInfoBox Westfalia Universal Frästisch Nr. 64 56 97 | |
|---|---|

| |
| Synonyms: | DE: Frästisch, Oberfrästisch, stationäre Oberfräse |
| Type: | tool mount |
| Material: | wood |
| Used with: | compatible routers, push blocks |
| Location: | wood workshop |
| Access Requirements: | Router Table Introduction |
| Manual: | Westfalia |
| Tutors: | Lukas NitramLegov Pakue Keno Utis |
| Similar (More or Less): | table saw |
A router table turns a handheld router into a stationary tool. The router gets attached to the router table upside down in order to enable the workpiece to be fed through the router (thus, it is for a router what a table saw is for a circular saw).


It is very important to realize that the exposed router bit is not only dangerous because of its sharp edges, but also because it can rip the workpiece out of your hand and let it fly across the workshop, or pull your hand into the danger zone. To make sure that you are in control and not the router, ONLY make push cuts, i.e. ONLY feed workpieces through from the right to the left side if you are working in front of the router bit and vice-versa! You should understand why this is important after getting the router introduction or reading articles about accidental climb cuts on the internet.
Please also see Project:Router Table in case you would like to join us in building your own.
(Emergency) Stop
To stop the router, you can slap the lid of the yellow switchbox or use the foot switch. When stopping inside a cut, the foot switch is highly recommended so you can keep your hands on the workpiece for full control!
In addition to unplugging the whole setup, please make a habit of "locking" the switchbox between uses (unlocked by pushing the red cover upwards) so we have maximum protection against accidental starts.
Setup
Dust Extraction

For edge work, you can use the top (green) dust port in the fence, but for grooves you should connect the shop vac to the bottom port in the rear cover of the table (Ferm router: black dust port on the machine itself). Keep in mind that the top port will only work if there is at least a small gap in the fence!
It will still be pretty messy work - a router generates lots of shavings - but should help reduce the amount of fine dust flying around.
Fence

The fence consists of several parts which need to be aligned carefully if you want it to be accurate. In most cases (working with a parallel fence), you will not need the knob labeled "X", so please don't mess with it too much...the next user will thank you!
There is a scale on the table to set the fence's distance from the center of the router bit, but it is rather rough and doesn't allow accurate fine measurements. A height/depth gauge, easily made from a caliper and some scrap wood, would be a nice solution (similar to this Instructable, but there are better ones around for sure).

Once you have your bit inserted, the fence's two sliding front sections should be brought as close together as possible for maximum workpiece support and a focused airflow to the dust extraction port. The top guide should be brought down until it nearly touches your workpiece. The frontal guide works the same - we should make compatible featherboards that could actually press the workpiece to the table/fence for even more support.
Unfortunately, the current screw knobs have to be turned very tightly or vibrations will cause everything to shift over time - perhaps we can exchange these knobs with locking levers so that they can be adjusted without pliers.
Improvements/Upgrades
Any modifications to the table or router itself should be discussed with the owner (Martin) in advance and security-checked by a manager afterwards!
done:
- 3D printed shop vac adapter (needed some further adjustment with the table saw) - is the file available somewhere?
- cut two protruding corners from the front guide bracket so it stay mounted to the table all the time without getting in the way
- make push blocks
further ideas:
- make featherboards with slots that fit to the existing guide brackets
- replace (at least) the star knobs connecting the fence and the table with locking levers or knobs with hex nuts that can be gripped with wrenches (do those exist?)
- make (or buy) a height/depth gauge to set the fence distance or bit height
==> video showing these (and more) potential upgrades: Heiko Rech - Tipps zum Arbeiten mit dem Frästisch (DE)
Compatible Routers
These routers can be attached to the table.
- Makita 3612BR (default)
- do not remove without good reason!
- Ferm FBF-1050E (backup)
- caution: the mounting plate is off-center!
- bottom dust extraction requires the rear table cover to be removed
Inspiration
Here are some examples of projects you could use the router table for:
grooves like those needed for self-made drawers
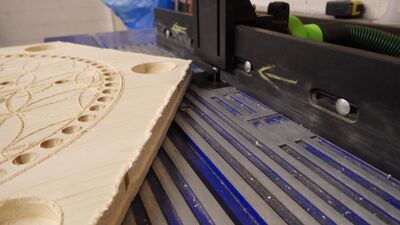
cleaning up a partial-depth CNC cut with a flush trim bit (Project:TAC)
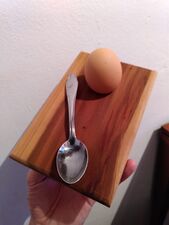
nice edges on small pieces
