Router Table: Difference between revisions
mNo edit summary |
m (Category:Facilities) |
||
| (44 intermediate revisions by 2 users not shown) | |||
| Line 1: | Line 1: | ||
A router table turns a [[Router|handheld router]] into a stationary tool. The router gets attached to the router table upside down in order to enable the workpiece to be fed through the router (thus, it is for a router what a [[Table Saw|table saw]] is for a [[Handheld Circular Saw|handheld circular saw]]). | |||
| | |||
[[File:Router table feed direction - fence.gif|thumb|push cuts at the fence: right to left!|none]] | |||
[[File:Router table feed direction animation.GIF|thumb|300px|the proper workpiece direction to make push cuts depends on '''which side of the bit you're cutting on!'''|none]] | |||
| | It is very important to realize that the exposed router bit is not only dangerous because of its sharp edges, but also because it can rip the workpiece out of your hand and let it fly across the workshop, or pull your hand into the danger zone. To make sure that you are in control and not the router, '''ONLY make push cuts''', i.e. '''ONLY feed workpieces through from the right to the left side if you are working in front of the router bit and vice-versa!''' You should understand why this is important after getting the [[Handheld Router Introduction|router introduction]] or reading [https://www.finewoodworking.com/2014/05/07/router-accident-is-a-great-lesson-in-climb-cutting articles about accidental climb cuts] on the internet. | ||
| | |||
| | |||
| | |||
| | |||
| | |||
| | |||
''Please also see [[Project:Router Table]] in case you would like to join us in building your own.'' | |||
<br clear="all" /> | |||
<!-- NOTE: The following block "imports" content from separate pages - please don't change the code! To edit the actual information, please go back and click "edit" next to the section headline you are interested in :-) --> | |||
{{#ask: | |||
[[MachineType::Router Table]] | |||
|order=ascending | |||
|format=embedded | |||
| | |embedonly=yes | ||
| | |||
| | |||
}} | }} | ||
== | ==Inspiration== | ||
Here are some examples of [[projects]] you could use the router table for: | |||
<gallery mode="packed" heights="150"> | |||
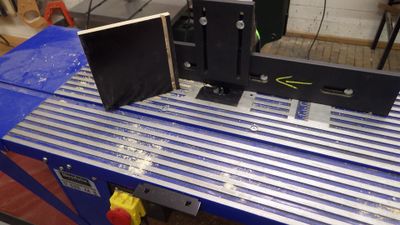
File:Resized wardrobe drawers 06.JPG|link=[[Project:Resized Wardrobe Drawers]]|grooves like those needed for [[Project:Resized Wardrobe Drawers|self-made drawers]] | |||
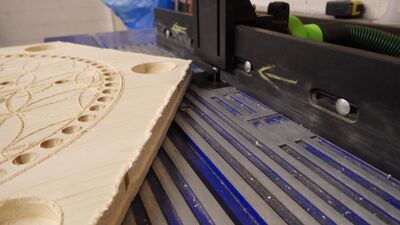
File:TAC 09.JPG|link=[[Project:TAC]]|cleaning up a partial-depth CNC cut with a flush trim bit ([[Project:TAC]]) | |||
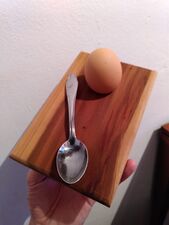
File:Eierbrettchen.jpg|left|200 px|nice edges on small pieces | |||
</gallery> | |||
[[Category: | [[Location::Wood Workshop| ]] | ||
[[Category:Facilities]] | |||
[[Category:Woodworking]] | [[Category:Woodworking]] | ||
Latest revision as of 17:43, 9 April 2023
A router table turns a handheld router into a stationary tool. The router gets attached to the router table upside down in order to enable the workpiece to be fed through the router (thus, it is for a router what a table saw is for a handheld circular saw).


It is very important to realize that the exposed router bit is not only dangerous because of its sharp edges, but also because it can rip the workpiece out of your hand and let it fly across the workshop, or pull your hand into the danger zone. To make sure that you are in control and not the router, ONLY make push cuts, i.e. ONLY feed workpieces through from the right to the left side if you are working in front of the router bit and vice-versa! You should understand why this is important after getting the router introduction or reading articles about accidental climb cuts on the internet.
Please also see Project:Router Table in case you would like to join us in building your own.
Sauter OFL2.0 Router Table
| MachineInfoBox Sauter OFL2.0 Router Table | |
|---|---|

| |
| Synonyms: | DE: Frästisch, Oberfrästisch, stationäre Oberfräse |
| Type: | Router Table |
| Material: | wood |
| Used with: | 8 mm router bits, push blocks |
| Location: | router table |
| Access Requirements: | Router Table Introduction |
| Manual: | Mafell FM1000 |
| Tutors: | Lukas NitramLegov Pakue Keno Utis |
| Similar (More or Less): | table saw |
Setup
Router Bit

Router shaft size: 8mm
This router table spindle is equipped with a lever-action chuck, therefore no tools are required to change the bit. To release the chuck look under the table and pull the lever on the spindle towards the front of the table until it is horizontal. The spindle chuck is now release and the bit can be taken out or inserted. Push the lever down again until it is vertical to look the bit back in place. Make sure it is properly seated before starting up the spindle. Ideally raise the router lift all the way up, insert the bit slightly above the desired position, then adjust it to the correct height. That way the bit shaft is inserted as much as possible and the dust extraction has the best seal with the router lift.
Changing the height is done via the adjustment knob on the top of face-plate of the router lift. Use the small tool located on the side of the router table to turn the knob. There shouldn't much torque needed to change the height; keep the top/bottom limits in mind if you feel a resistance. To avoid backlash in the lead screw, try to set the final height while raising the bit. Otherwise the lift may settle by a fraction of a millimetre.
Similarly the height can be locked/unlocked by turning the locking knob below one full rotation. Check that this lock is disengaged before adjusting the height. This lock only meant to stop vibrations changing the height of the router lift. It is not strong enough to stop you from adjusting the height (#not-a-bug #won't-fix).

The router lift has differently sizes plates that are held in place via magnets. To remove a plate use the height adjust tool to lever it out of the router lift face plate. Unused plates are stored in the 3D-printed holders in front.
There is also a digital height gauge located on the left side of the router table. Press the "C" button the zero the height. The display can't be turned off.
Fence

The fence can be adjusted in depth via the two locking knobs that clamp in the two T-profiles inside the table.
The gap for the router bit can be adjusted by moving either aluminium plate to the side. Locking knobs are in the back.
The fence has to adjustable stop blocks that allow repeatable cutting of slots. It is best to just flip them up if they are not in use to avoid misplacing them.
Whenever possible use the transparent finger guard. Set it so it's just above your workpiece.

Mitre Gauge
Similar to the table saw, the router table has a mitre gauge that runs inside the T-slot along the long side of the table. Adjust the angle as needed. The mitre gauge also has a depth stop similar to the ones on the fence. When not in use store the mitre gauge in the designated holder on the side of the table.
Don't cut into the mitre gauge!
Dust Extraction
Below the table is a designated shop vac that should turn on together with the router once the ON button is pressed. Because the dust extraction is need inside the lift as well as the fence, the vacuum hose is split. When the dust extraction at the fence is not needed unplug the hose from the fence and put the end into the "parking spot" in the back. This plugs the extraction path of the fence and allows more air to be extracted via the router lift below the table.
Closing the fence gap when not needed and using the transparent finger guard will improve the dust extraction significantly. Also when using router bits with a bearing, having the fence with an open gap behind it will avoid dust being thrown towards the back.
Videos
How to change the bit height.
Fence gap adjustment.
Adjust finger guard.
Adjust fence depth.
Change bit and plate.
Usage example.
Parts
Here is the parts list for the complete router table in case a part breaks or someone wants to copy the design. Custom 3D printed parts can be found in the GitHub Repo: Coming Soon TM
- Router spindle - SA-FM1000-OFL similar to MAFELL Fräsmotor FM 1000 PV-WS
- Router lift - Sauter OFL2.0
- Table surface - SA-HPL3.0
- Dust extractor - Kärcher NT 22/1 Ap L
- Fence - Sauter Fräsanschlag FA-SA 2.0 + Schwinganschläge
- Mitre Gauge - FO-MGC-10
- 6x Item 40 Aluminium Profile 868mm
- 4x Item 40 Aluminium Profile 438mm
- Electronics
Inspiration
Here are some examples of projects you could use the router table for:
grooves like those needed for self-made drawers
cleaning up a partial-depth CNC cut with a flush trim bit (Project:TAC)
nice edges on small pieces
