Laser Cutter
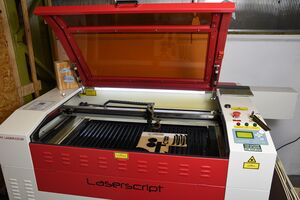
| MachineInfoBox Laserscript LS6090 | |
|---|---|

| |
| Synonyms: | DE: Laserschneider, "Lasercutter" |
| Material: | wood, glass, acrylic glass, ... (list of cuttable & engravable materials; list of only engravable materials) |
| Used with: | laser exhaust system, water chiller |
| Access Requirements: | Laser Cutter Introduction |
| Software: | Lasercut 5.3 |
| Manual: | printed copy at the machine |
| Tutors: | NitramLegov Pakue Lmnl99 Johannes Luzian Keno Utis Sebastian Björn Jaggi2 Erik |
The laser cutter must only be operated by members who have received a detailed introduction!
On the introduction page, you can find a detailed workflow from creating a DFX file to the final product.
General Information
- power: 80 Watt
- worktable size: 60x90 cm (length x width), engraving a bit smaller
- Z axis (height): 23 cm
Safety Concerns
A laser cutter is a delicate and dangerous piece of equipment and should only run under direct supervision of a qualified user. The machine needs to be supervised even more than the 3D Printers, with the operator standing by during the entire duration of a cutting job and being in close vicinity during engraving jobs.
Although the laser beam itself should be certified laser class 1 due to the massive housing and other safety features, the fumes generated when cutting various materials can be harmful to human health (see forbidden materials). A good exhaust filtering system can take care of fumes from the allowed materials but only an outside vent will really remove the smoky smell.
Location Requirements
- no dust
- 5 °C ≤ room temperature ≤ 25 °C
- max. 70 % humidity
- CO2 fire extinguisher in the area
==> in the eRoom
Rules
- supervise the entire job when cutting
- a fire can only be stopped quick enough if you open the lid immediately!
- stay in close vicinity for the entire job when engraving
- abort if you see, hear or smell anything out of the ordinary!
Forbidden Materials
- materials that contain chlorine (Cl) - it's unhealthy and also destroys the machine
- e.g. PVC ("vinyl", found in most soft plastics and records)
- artificial leather
- neoprene
- materials that contain fluorine (F) - it can kill you and also destroys the machine
- e.g. PTFE ("Teflon") - very very unhealthy!
- epoxy resins and materials bonded with epoxy resins
→ with some materials it is not clear whether it contains Cl or F. If you are not sure, don't cut or engrave it. If you notice any unusal coloration of the smoke or flame, stop the job immediately!
Materials that don't work
- Polycarbonate (PC)
- will smoke and turn black
Possible Materials (Cutting/Engraving)
Check the material settings database to see if and how something has been cut before and please add your experience as well.
In addition, you can check the official list from [Epilog].
- wood
- plywood
- particle board/chip board
- MDF and HDF are also allowed but will make frequent lens cleaning necessary due to their high glue content
- acrylic glass/Plexiglass (→ not the cheap polystyrene/Bastlerglas from hardware stores, it welds itself shut after being cut)
- cast acrylic (GS/gegossen) - "chemically better"
- very suitable for engraving because the colour changes into a milky version of the original
- extruded acrylic (XT/extrudiert) - better thickness accuracy
- very suitable for cutting
- very suitable for parts that should fit together tightly
- not as suitable for engraving because there is no colour difference
- 3D engravable, though - the grooves can be filled with paint for a nice effect
- cast acrylic (GS/gegossen) - "chemically better"
- leather, but no artificial leathers if they contain chlorine!
- paper
- colored card
- discoloration when "engraving", looks nice
- cardboard
- rubber (special kind for stamps)
- foam
- fabric
- some polyurethanes depending on additives (see this study for some reference [p. 101])
When cutting wood or acrylic glass, a small flame may be observed at the focal point but is not necessarily a bad thing. However, if it burns too much or is still on when the laser beam is already somewhere else, immediately open the cover. Because the laser automatically shuts down, the fire should go out.
Possible Materials (Engraving Only)
- glass
- including mirrors (front or back!)
- metals
- only anodized aluminium and high quality stainless steel can be engraved directly
- for most metals you should use a special marking spray
- only works on blank metal, any coatings will not allow the molecular bond triggered by the laser's heat
Cost
The tube and filters need to be replaced from time to time which will add up to several hundred €.
Therefore, an appropriate user contribution is 20 ct per minute which you should please throw into the obvious cash box immediately or in advance.
Machine Control
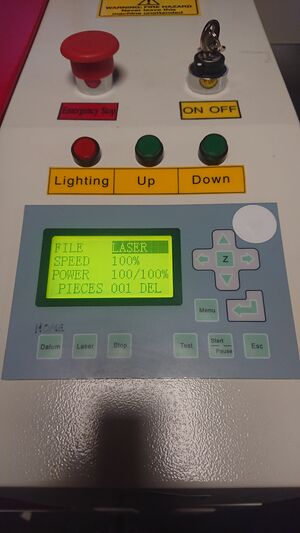
The machine itself is mainly operated by the control panel located on the right side of the machine:

Homing
When you turn on the machine, please press the "Datum" button in order to Home the machine. This is needed so that the machine knows where the laser is located after a restart. The laser will move to the upper right corner of the machine.
Moving the Laser
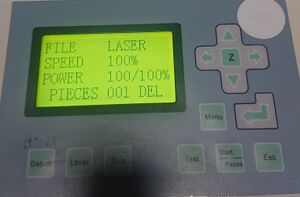
In order to move the laser to the starting point of your job, please ensure that you are in the main menu and no option is being highlighted. This can be achieved by pressing "ESC" until you see the following:

Now you can move the laser by pressing the directional buttons.
Jog Speed
In case the laser is moving too much or too little with each button press, please go to the jog set menu by using the following key combination: Menu --> Down --> Down --> Enter
In this menu, you can set the jog distance. Please confirm the new distance by pressing Enter.
Starting the Job
After uploading your job to the machine (see LaserCut_5.3#Uploading_your_Job for details), you can start the job by pressing "Start / Pause". The same button will also pause your job in between if needed.
Setting the Focus
In order to set the focus of the laser, please put your workpiece on the tray and put the focus finder (little black 3D printed thingy) on top of it. Now, move the laser above the focus finder and move the tray up (by pressing "up") until you can barely slide the focus finder through the gap. The focus is now set to the surface of your workpiece.
Troubleshooting
Laser keeps starting at the same (wrong) position
Sometimes, the starting point of the laser cutter gets set to a fixed position by accident.
While we are not yet entirely sure how this happens, here's how to fix it:
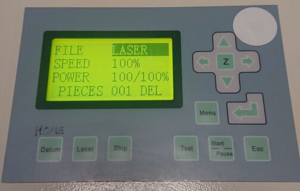
- Make sure the laser cutter is in the following condition (press
Escuntil the File name gets a grey background):
- Press
⏎so that a new menu opens - Select "Cancel" and confirm with
⏎
Useful Links
Retailer's Information
HPC, the British company we got the laser cutter from, has some resources we should keep in mind:
Downloadable Designs
- Epilog Laser Sample Club
- "Kiteman" on instructables
- Makercase Box Generator
- free section at Cartonus
Tutorials
- photo engraving on wood by Epilog
- uses CorelDRAW, but works fine in GIMP as well! Don't take the sample values too literally.
- see also our own writeup
Inspiration
- Etsy pages like this one
- Emblaser on Instagram
- "kirigami" pop up cards
- overview of sample applications from trotec
- Japanese Secret Box (in case you've got a few weeks time for designing)
- Glowforge (scroll down)
Laser Cutting Services
You could also order laser cut parts online:
- Formulor for acrylics, soft wood and paper
- China Laser Cutting Service offers low cost cutting service of acrylics and other materials
Metal Cutting
Not many laser cutters can cut metal. You could use a CNC mill instead, or try one of these services:
- Tailor Steel
- Cutworks
- Hadocut
- Risto
- geersCutting
- <know another one?>