Project:TAC: Difference between revisions
infobox update |
→Next Steps: improvement idea |
||
| (7 intermediate revisions by the same user not shown) | |||
| Line 1: | Line 1: | ||
{{ProjectInfoBox | {{ProjectInfoBox | ||
|project title="TAC" Boardgame | |project title="TAC" Boardgame | ||
|image= | |image=TAC 00.JPG | ||
|status=final tweaks & documentation | |status=final tweaks & documentation | ||
|date=(mainly) summer 2018 | |date=(mainly) summer 2018 | ||
|initiator=Flo | |initiator=Flo | ||
|team=Daniel, [[Lukas]] | |team=Daniel, [[Lukas]] | ||
|materials=[[glulam|glued laminated timber]] (''Eucalyptus diversicolor''/"Karri" for 4 players, spruce/fir for 6);<br>[https://shop.spiel-tac.de/SpielTAC_Zubehoer_fuer_TAC TAC cards & marbles], (optional) [[felt]], [[Olive Oil|olive oil]] | |materials=[[glulam|glued laminated timber]]<br>(''Eucalyptus diversicolor''/"Karri" for 4 players, spruce/fir for 6);<br>[https://shop.spiel-tac.de/SpielTAC_Zubehoer_fuer_TAC TAC cards & marbles], (optional) [[felt]], [[Olive Oil|olive oil]] | ||
|tools=[[CNC Router|CNC router]], [[Table Saw|table saw]], [[Router Table|router table]], [[Rotary Tool|rotary tool]], [[sandpaper]] | |tools=[[CNC Router|CNC router]], [[Table Saw|table saw]], [[Router Table|router table]], [[Rotary Tool|rotary tool]], [[sandpaper]] | ||
|software=[[Fusion 360]] | |software=[[Fusion 360]] | ||
|cost=40 € | |cost=40 € | ||
}} | }} | ||
One of [[Lukas]]' colleagues kept talking about the game TAC whose inventors offered [https://shop.spiel-tac.de/SpielTAC_Sechser-TAC_Mahagoni really nice & expensive deluxe boards] but also [https://shop.spiel-tac.de/SpielTAC_Zubehoer_fuer_TAC sets of everything ''except'' the board], so | One of [[Lukas]]' colleagues kept talking about the game TAC whose inventors offered [https://shop.spiel-tac.de/SpielTAC_Sechser-TAC_Mahagoni really nice & expensive deluxe boards] but also [https://shop.spiel-tac.de/SpielTAC_Zubehoer_fuer_TAC sets of everything ''except'' the board], so we started to make some boards of our own. | ||
''intended mainly as a rough [[inspiration]] page for now, but please [[{{TALKPAGENAME}}|ask]] if you have any questions!'' | Caution - design flaw: if I were to maker another 4-player board, I would rotate the inner part 45° so that each marble depot (circle) has that player's start and finish right in front of it. The original design is confusing in this respect or needs (ugly) auxiliary lines connecting depots and starts. | ||
''intended mainly as a rough [[inspiration]] page for now, but please [[{{TALKPAGENAME}}|ask]] if you have '''any''' questions that are not yet answered below!'' | |||
== Major Steps == | |||
You should find more details on these in the gallery below: | |||
* designing the board layouts (4 and 6-player versions) in [[Fusion 360]], based on photos & [https://shop.spiel-tac.de/spielanleitungen downloadable instructions] | |||
* buying the necessary [[End Mills|end mills]] and [[Router Bits|router bits]] | |||
* preparing the stock material to fit on the [[WorkBee]] | |||
* [[CNC Routing|CNC routing]] the boards | |||
* cutting & trimming the boards "manually" with [[Table Saw|table saw]] and [[router]] | |||
** could have been omitted if we had bought a longer [[End Mill|end mill]] for the outer contour | |||
* (optional) rounding or chamfering the top edges | |||
* cleaning up rough [[routing]] paths with knives and [[sandpaper]] | |||
** tedious, but easy to do while watching a movie ;-) | |||
** need for this could be decreased by using other [[End Mills|end mills]] and/or different [[CAM Settings|CAM settings]] | |||
* (optional) oiling or otherwise finishing the wood | |||
* playing the game! | |||
<br clear=all> | <br clear=all> | ||
== Gallery == | == Gallery == | ||
<gallery mode=packed-hover heights= | <gallery mode=packed-hover heights=140> | ||
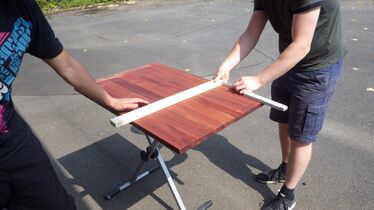
File:TAC 01.JPG|preparing to cut a practice piece from one of our stock boards | File:TAC 01.JPG|preparing to cut a practice piece from one of our stock boards | ||
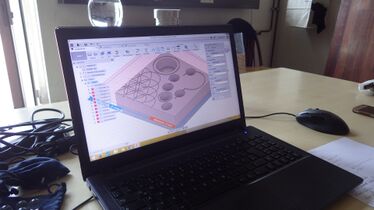
File:TAC 02.JPG|design of the practice piece with all the needed shapes in [[Fusion 360]] | File:TAC 02.JPG|design of the practice piece with all the needed shapes in [[Fusion 360]] | ||
| Line 26: | Line 43: | ||
File:TAC 06.JPG|back to pictures of the 4-player game: undecorated version completely [[routing|routed]] | File:TAC 06.JPG|back to pictures of the 4-player game: undecorated version completely [[routing|routed]] | ||
File:TAC 07.JPG|the decorated version required some manual corrections with a [[Rotary Tool|rotary tool]] because the warped board was not engraved evenly by the [[CNC Router|CNC router]] | File:TAC 07.JPG|the decorated version required some manual corrections with a [[Rotary Tool|rotary tool]] because the warped board was not engraved evenly by the [[CNC Router|CNC router]] | ||
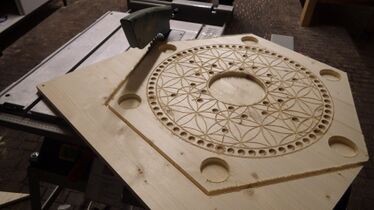
File:TAC 08.JPG|since our [[End Mills|end mills]] were too short to cut all the way through the workpiece at the edges, the rough shape was cut out on the [[Table Saw|table saw]]... | |||
File:TAC 09.JPG|...and trimmed to the partial-depth outline with a flush-cut [[router]] bit | |||
File:TAC 10.JPG|after the outline was finished, the edges of the 4-player board were prettified with a roundover [[Router Bit|router bit]] | |||
File:TAC 11.JPG|4-player board ready to leave the [[Wood Workshop|workshop]] with only minor steps left | |||
File:TAC 12.JPG|a chamfer bit was used to finalize the edges of the 6-player board on the [[Router Table|router table]] | |||
File:TAC 13.JPG|chamfering the edges of the 6-player board on the [[Router Table|router table]] | |||
File:TAC 14.JPG|chamfered edge of the 6-player board (before sanding) | |||
File:TAC 15.JPG|the soft spruce/fir wood was best cleaned up with [[sandpaper]] after [[routing]] | |||
File:TAC 16.JPG|completely sanded area of the 6-player board | |||
File:TAC 17.JPG|finally, the 6-player board (spruce/fir) was finished with [[Olive Oil|olive oil]] | |||
File:TAC 18.JPG|since the 4-player board's [[hardwood]] fibers were easily cut by a knife, [[sanding]] and the resulting brightening of the ''Eukalyptus'' wood could be largely avoided during the cleanup process | |||
File:TAC 19.JPG|partially cleaned up area of the 4-player board - without sanding marks because a knife could be used on this wood | |||
File:TAC 20.JPG|cleaned up area of the 4-player board | |||
File:TAC 21.JPG|the center of the 4-player board ("card pit"?) was covered in green [[felt]] for a nice look | |||
File:TAC 22.JPG|''[[Alleskleber]]'' was used to stick the [[felt]] to the board | |||
File:TAC 23.JPG|for nice and even adhesion in a round cutout, it works well to apply pressure with something round (like a CD) | |||
File:TAC 24.JPG|finished 4-player board | |||
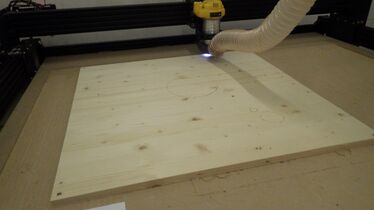
File:TAC 00.JPG|finished 6-player board in use | |||
</gallery> | |||
== Next Steps == | |||
* make a card holder | |||
* make a nice rulebook | |||
* '''improvement idea:''' add lines connecting "pools" and start positions on the 4-player version | |||
== Other Versions == | |||
An American who stumbled across this project page made a double-sided [[Laser Cutting|laser cut]] version and kindly sent us some photos! | |||
<gallery mode=packed-hover heights=140> | |||
File:LaserTAC01.jpg|four-player side | |||
File:LaserTAC02.jpg|six-player side | |||
</gallery> | </gallery> | ||
Latest revision as of 00:22, 10 April 2025
| ProjectInfoBox "TAC" Boardgame | |
|---|---|
| |
| Status: | final tweaks & documentation |
| Release Date: | (mainly) summer 2018 |
| Initiator: | Flo |
| Team: | Daniel, Lukas |
| Materials Used: | glued laminated timber (Eucalyptus diversicolor/"Karri" for 4 players, spruce/fir for 6); TAC cards & marbles, (optional) felt, olive oil |
| Tools Used: | CNC router, table saw, router table, rotary tool, sandpaper |
| Software Used: | Fusion 360 |
| Approx. Cost: | 40 € |
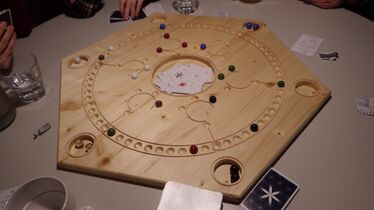
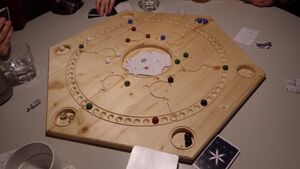
One of Lukas' colleagues kept talking about the game TAC whose inventors offered really nice & expensive deluxe boards but also sets of everything except the board, so we started to make some boards of our own.
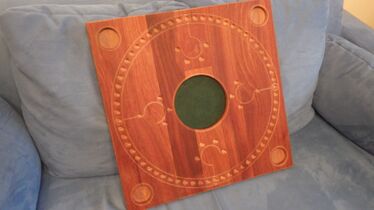
Caution - design flaw: if I were to maker another 4-player board, I would rotate the inner part 45° so that each marble depot (circle) has that player's start and finish right in front of it. The original design is confusing in this respect or needs (ugly) auxiliary lines connecting depots and starts.
intended mainly as a rough inspiration page for now, but please ask if you have any questions that are not yet answered below!
Major Steps
You should find more details on these in the gallery below:
- designing the board layouts (4 and 6-player versions) in Fusion 360, based on photos & downloadable instructions
- buying the necessary end mills and router bits
- preparing the stock material to fit on the WorkBee
- CNC routing the boards
- cutting & trimming the boards "manually" with table saw and router
- could have been omitted if we had bought a longer end mill for the outer contour
- (optional) rounding or chamfering the top edges
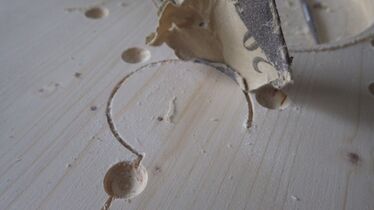
- cleaning up rough routing paths with knives and sandpaper
- tedious, but easy to do while watching a movie ;-)
- need for this could be decreased by using other end mills and/or different CAM settings
- (optional) oiling or otherwise finishing the wood
- playing the game!
Gallery
-
preparing to cut a practice piece from one of our stock boards
-
design of the practice piece with all the needed shapes in Fusion 360
-
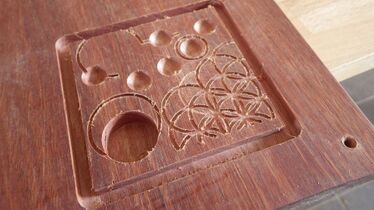
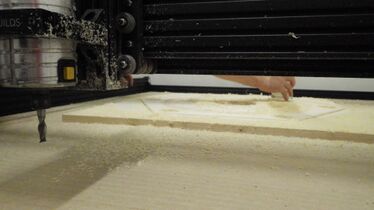
(partially) failed practice piece: one of the tool changes caused the CNC router to move along the X axis - always home after a tool change!
-
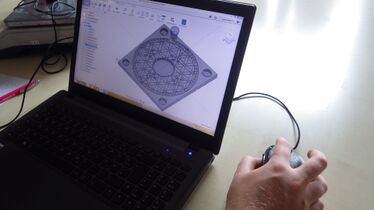
on to the full game - design in Fusion 360
-
partially routed 6-player board on the WorkBee
-
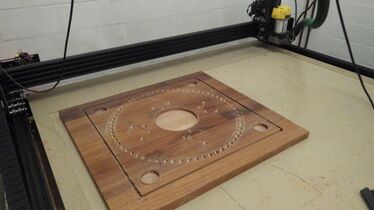
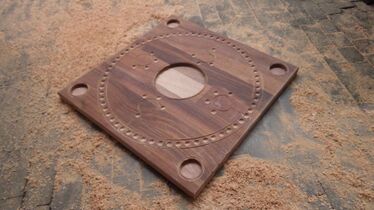
back to pictures of the 4-player game: undecorated version completely routed
-
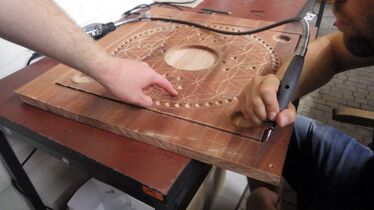
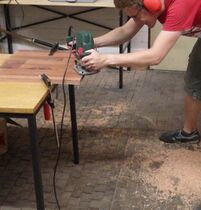
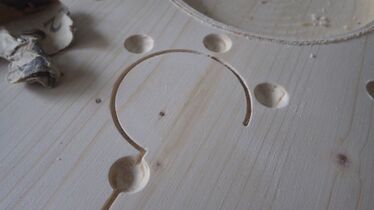
the decorated version required some manual corrections with a rotary tool because the warped board was not engraved evenly by the CNC router
-
...and trimmed to the partial-depth outline with a flush-cut router bit
-
after the outline was finished, the edges of the 4-player board were prettified with a roundover router bit
-
4-player board ready to leave the workshop with only minor steps left
-
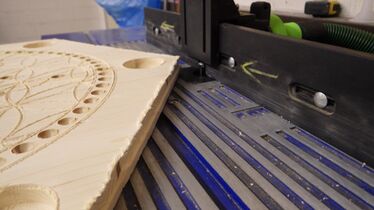
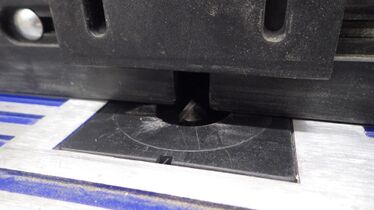
a chamfer bit was used to finalize the edges of the 6-player board on the router table
-
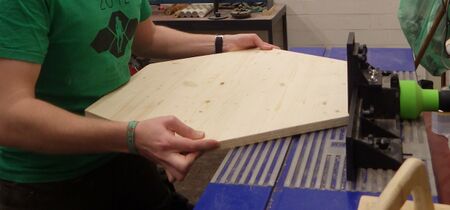
chamfering the edges of the 6-player board on the router table
-
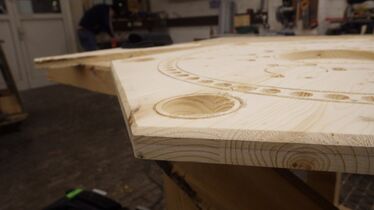
chamfered edge of the 6-player board (before sanding)
-
completely sanded area of the 6-player board
-
finally, the 6-player board (spruce/fir) was finished with olive oil
-
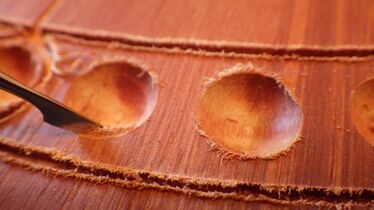
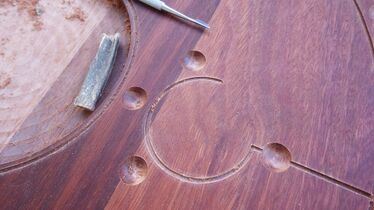
partially cleaned up area of the 4-player board - without sanding marks because a knife could be used on this wood
-
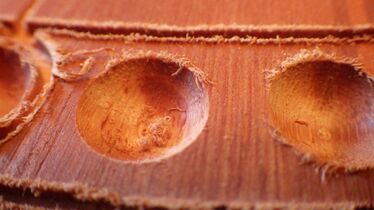
cleaned up area of the 4-player board
-
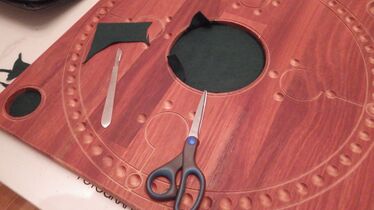
the center of the 4-player board ("card pit"?) was covered in green felt for a nice look
-
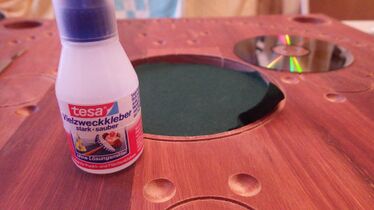
Alleskleber was used to stick the felt to the board
-
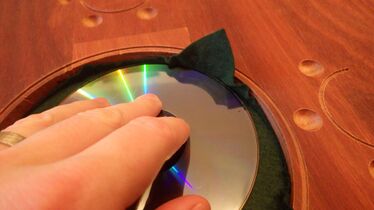
for nice and even adhesion in a round cutout, it works well to apply pressure with something round (like a CD)
-
finished 4-player board
-
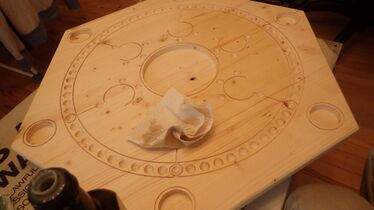
finished 6-player board in use
Next Steps
- make a card holder
- make a nice rulebook
- improvement idea: add lines connecting "pools" and start positions on the 4-player version
Other Versions
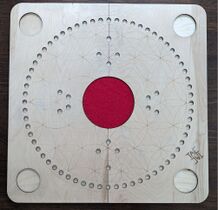
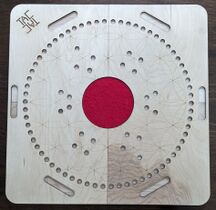
An American who stumbled across this project page made a double-sided laser cut version and kindly sent us some photos!
-
four-player side
-
six-player side
