Project:VHS Couch Table
| ProjectInfoBox VHS Couch Table | |
|---|---|

| |
| Status: | finished |
| Release Date: | Feb 2017 |
| Initiator: | Gesa |
| Team: | Lukas |
| Materials Used: | see bill of materials |
| Tools Used: | cordless drill, scroll saw, table saw, rivet gun, twist drill bits, tap, wood drill bits, caliper, pencil, hex key |
| Approx. Cost: | 11 € for metal parts |
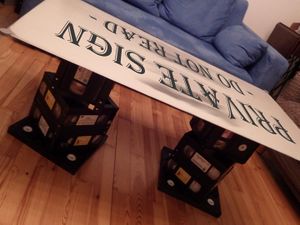
With VHS becoming obsolete, many household find themselves with a bunch of formerly treasured cassettes that are now little more than hazardous waste - except if you incorporate them into furniture!
We made sturdy and appealing legs for our couch table out of 22 cassettes each.
Published with more details on Instructables: VHS Couch Table Legs!
Design Goals
The new legs will replace beer crates, so they should match or surpass them in size and stability. The cassettes with nice labels, e.g. Disney movies, should be readable in the end.
A wooden top will be added in the end to increase the area the tabletop rests on and to allow a dual use as side tables/nightstands when the couch is converted to a bed.
BOM
"Bill of materials" per leg:
- 22 VHS cassettes
- up to twelve with nice labels you want to display
- 22 angle brackets
- or bent 4 cm strips of plumber's tape (approx. 1 m total)
- one 6 cm strip of plumber's tape
- 8 plastic strips (you get two or three out of one cassette)
- 62 blind rivets, 3.2 × 8 mm
- plywood (we used 9 mm thick scraps)
- two 28 × 28 cm squares
- two more irregular pieces, approx. 15 × 13 cm
- 4 M5 × 16 mm countersunk screws
Assembly
The main problem is that the cassette bodies are made of PP which can't be glued. Screws, on the other hand, may not have enough to grip into in the thin material.
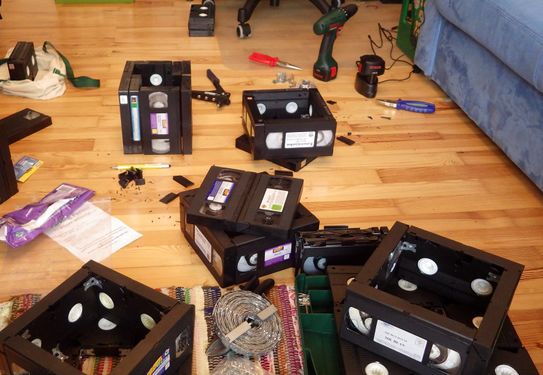
We ended up using blind rivets and makeshift brackets out of plumber's tape (to save money, not visible anyway) to put the cassettes together in rings. Vertical assembly from the inside would have been extremely tricky with our rivet gun so we added a few pieces of cassette shell from the outside.
As every bracket was slightly different from the next one, adding pencil marks in various places was a good idea to ensure the correct fit.
The wooded tops were cut from Baltic birch plywood on the table saw and received two large holes each to resemble a VHS cassette. Thinner inserts were cut to fit exactly between the top cassette edges and glued to the tops. Finally, the wood was lightly sanded and attached to the VHS cassettes with metric screws and matching threads cut directly into the plastic. The result is a reinforcement through aligning the top section of each tower as well as a pretty good handle for carrying the table legs (or side tables!) around.
Tape Winding Trick
We thought it would look more interesting if "watched" and "unwatched" cassettes would alternate, and used this trick to quickly wind them:
- push a pin (e.g. from one of the rivets you've already used) into the hole in the back of the cassette, near the center
- test whether the tape runs freely if you turn one of the white spools by hand
- put an M8 hex head screw into a drill chuck, insert the screw head into the spool you want to wind and let the motor do the work for you
Caution
- drilling into the tape doesn't end well - pull it out of the way beforehand or be very careful and switch to the reverse drill direction as soon as you're through the plastic
- there are some screws and metal pins in the cassettes that should also be avoided
- tapes are considered hazardous waste and must not be put into regular household garbage!
- depending on how old they are, heavy metals may shed as dust and you should wear gloves if you need to touch them
Gallery
- build impressions
