Pyrography Burners: Difference between revisions
From CoMakingSpace Wiki
m first clear all is necessary, second one taken care of on subpages(?) |
m comment explaining the embedding query |
||
| Line 32: | Line 32: | ||
<br clear=all> | <br clear=all> | ||
<!-- NOTE: The following block "imports" content from separate pages - please don't change the code! To edit the actual information, please go back and click "edit" next to the section headline you are interested in :-) --> | |||
{{#ask: | {{#ask: | ||
[[Machinetype::Pyrography Burner]] | [[Machinetype::Pyrography Burner]] | ||
Revision as of 08:29, 13 July 2022
| MachineInfoBox Pyrography Burners | |
|---|---|

| |
| Synonyms: | pyrograph; DE: Brandkolben, Brandmalkolben, Brennkolben, "Brenn-Peter", Elektroschreiber |
| Material: | wood, cork, leather |
| Access Requirements: | Heat Introduction |
| Tutors: | Lukas NitramLegov Pakue Johannes Luzian Keno Erik |
| Similar (More or Less): | branding irons, encaustic pens (Wachsmalkolben) |
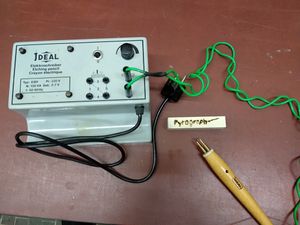
A pyrography burner can be used to burn freehand drawings and small patterns into wood, e.g. for marking or decorational purposes. Using a laser cutter is much easier for intricate designs.
Although many of these burners look like a soldering iron, please refrain from using one for soldering - remains of charred wood in your solder will not exactly improve the connections and remains of solder may taint the pyrography.
Health & Safety
- only solid untreated wood, cork or leather should be burned with this tool as other materials may release harmful fumes (see Wikipedia)
- make sure you have good ventilation even if "your" fumes are not especially harmful
- obviously, the burner gets hot and should not be touched while plugged in or shortly after
- use a metal stand to rest the tool when it is hot
- regularly check the fit of your tip - especially the screw-in tips of cheap models often don't stay in properly, but we won't invest in a fancier burner until we see how popular the technique is
Use
Sketching your design in pencil beforehand is always a good idea, and scribing it with a pricking awl may help you guide the burner along its lines.
Move the burner along its path until you achieved the desired look - the slower, the darker!
Example Project
Thise shelf was decorated with a pyrography burner:

Further Reading
- Wikipedia: Pyrography - inspiration for the really artsy ones; list of inappropriate materials