Project:File Handles: Difference between revisions
("cover" photo) |
(→Further Thoughts: some inspiration for shapes) |
||
| (4 intermediate revisions by the same user not shown) | |||
| Line 22: | Line 22: | ||
# Balance: Make sure the hole you drill into the handle is nice and straight, and the file can be inserted sufficiently. If it does not go in deep enough, widening the hole may be an option. ''In a first try with fir wood, the mean diameter of the file shaft was a good drill diameter.'' | # Balance: Make sure the hole you drill into the handle is nice and straight, and the file can be inserted sufficiently. If it does not go in deep enough, widening the hole may be an option. ''In a first try with fir wood, the mean diameter of the file shaft was a good drill diameter.'' | ||
== | == Step by Step == | ||
<gallery mode=packed-hover heights=150 caption="try it yourself (mouseover/click for explanations)!"> | |||
File:file handles 01.jpg|cut a ferrule ''(Zwinge)'', e.g. from steel pipe | |||
File:file handles 02.JPG|use [[calipers]] to measure the diameter you need at the tip of the handle | |||
File:file handles 03.JPG|cut a [[Woodturning Blanks|turning blank]], e.g. from [[Scrap Wood|scrap wood]] | |||
File:file handles 04.JPG|set up the turning blank between centers on the [[Wood Lathe|wood lathe]] | |||
File:file handles 05.JPG|after roughing out a cylinder, use a [[Parting Tool|parting tool]] to make a tenon that will fit into the ferrule | |||
File:file handles 06.JPG|do some smoothing with a [[Skew Chisel|skew chisel]] | |||
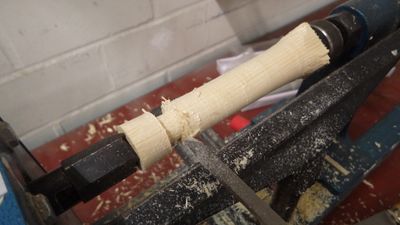
File:file handles 07.JPG|play around a bit to make the handle more comfortable | |||
File:file handles 08.JPG|sand the handle, ideally still on the lathe | |||
File:file handles 09.JPG|cut off excess material and take the handle off the lathe | |||
File:file handles 10.JPG|drill a straight hole into the handle | |||
File:file handles 11.png|do NOT use a hammer to drive in the file - the hardened steel could break - but instead push it in as far as you can and then hit the workbench surface with the handle's end a few times | |||
File:file handles 12.JPG|done! | |||
</gallery> | |||
== Further Thoughts == | == Further Thoughts == | ||
| Line 31: | Line 45: | ||
* perfectly straight holes could be drilled on the lathe if we get a compatible chuck | * perfectly straight holes could be drilled on the lathe if we get a compatible chuck | ||
* different drill diameters could help with the file insertion - make stepped holes?<sup> [https://www.woodworker.de/forum/threads/feilengriff-selber-machen-h%C3%BClse-notwendig.105060/]</sup> | * different drill diameters could help with the file insertion - make stepped holes?<sup> [https://www.woodworker.de/forum/threads/feilengriff-selber-machen-h%C3%BClse-notwendig.105060/]</sup> | ||
* oiling, waxing or otherwise [[finishing]] the handle may also be an option if you want to try that out | |||
* the handles don't have to be "boring" - especially for smaller sizes, various designs may be useful ([https://matthias-fenner.de/c/werkzeuge/feilengriffe some inspiration]) | |||
[[Category:Self-Made Tools]] | [[Category:Self-Made Tools]] | ||
[[Category:Woodturning]] | |||
Latest revision as of 14:34, 3 May 2019
| ProjectInfoBox Self-Made File Handles | |
|---|---|

| |
| Status: | in progress (also see issue #6) |
| Release Date: | fall 2018 |
| Initiator: | Lukas |
| Materials Used: | scrap wood, steel pipe |
| Tools Used: | wood lathe |
| Approx. Cost: | 0,- € |
For anyone interested in woodturning, making some file handles is a great entry project! We have a bunch of naked files in the metal workshop, and if a poorly made handle should break while filing there is no real risk, much different to some other tool handles you could try to make once you're more experienced.
Here's a basic guide to help you in the process, feel free to add more content or ask whenever something is not clear :-)
Theory
What you want to have in the end are basically three features: the handle should feel nice and not break, and the file should be somewhat balanced.
- Feel: This part is rather simple - just turn and remove material until you are happy with the handle's shape! You can also take existing tool handles you like as a guide, of course. In the end you should give it a nice sanding so nobody gets splinters from using your handle, ideally you'll do this while the piece is still on the lathe.
- Stability: Harder wood might help a bit, but every handle is in danger of splitting when you drive in the file! To prevent ruining your precious piece, include a ferrule (Zwinge) in the design. You can make one very easily by just cutting and filing a piece of metal pipe, it should have a wide enough diameter for the file shaft and some wood around it. More experimentation is needed, but about 3x the file shaft diameter might be a good measure.
- Balance: Make sure the hole you drill into the handle is nice and straight, and the file can be inserted sufficiently. If it does not go in deep enough, widening the hole may be an option. In a first try with fir wood, the mean diameter of the file shaft was a good drill diameter.
Step by Step
- try it yourself (mouseover/click for explanations)!
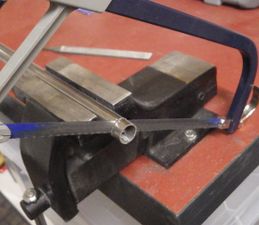
cut a ferrule (Zwinge), e.g. from steel pipe
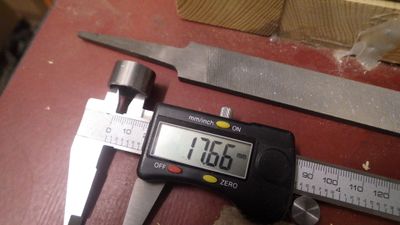
use calipers to measure the diameter you need at the tip of the handle
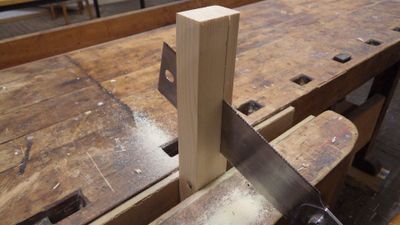
cut a turning blank, e.g. from scrap wood

set up the turning blank between centers on the wood lathe
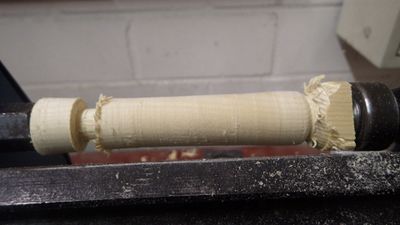
after roughing out a cylinder, use a parting tool to make a tenon that will fit into the ferrule
do some smoothing with a skew chisel
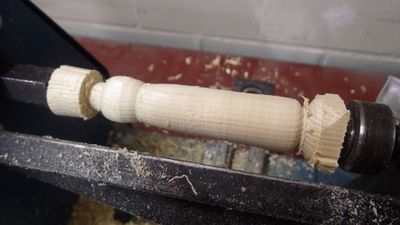
play around a bit to make the handle more comfortable
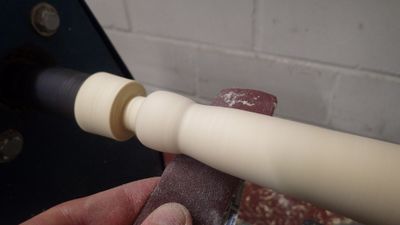
sand the handle, ideally still on the lathe
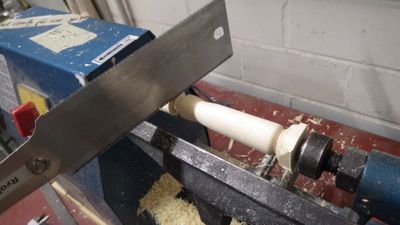
cut off excess material and take the handle off the lathe
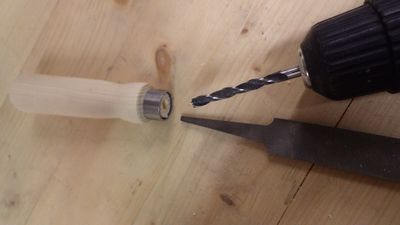
drill a straight hole into the handle
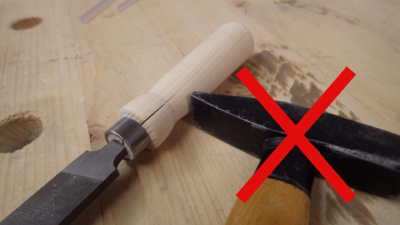
do NOT use a hammer to drive in the file - the hardened steel could break - but instead push it in as far as you can and then hit the workbench surface with the handle's end a few times
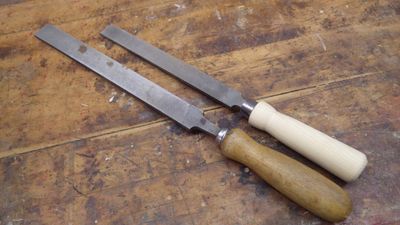
done!


Further Thoughts
- it's important to get a proper fit in the ferrule - although usable, the first attempt resulted in a split handle due to a mistake of less than 1 mm
- ideas: measure properly next time, heat up pipe before putting it on the wood if it's really tight, make the wood wet before inserting the file(?)
- smaller files (key files or needle files) may not need a ferrule but should then be epoxied into a large enough hole
- perfectly straight holes could be drilled on the lathe if we get a compatible chuck
- different drill diameters could help with the file insertion - make stepped holes? [1]
- oiling, waxing or otherwise finishing the handle may also be an option if you want to try that out
- the handles don't have to be "boring" - especially for smaller sizes, various designs may be useful (some inspiration)