Uploads by Lukas
From CoMakingSpace Wiki
This special page shows all uploaded files.
| Date | Name | Thumbnail | Size | Description | Versions |
|---|---|---|---|---|---|
| 22:21, 14 March 2022 | Warning icon.svg (file) | 4 KB | a simple warning icon drawn with Inkscape: the triangle is made with the "star" tool and the exclamation mark is a random font that looked nice (Britannic Bold) | 1 | |
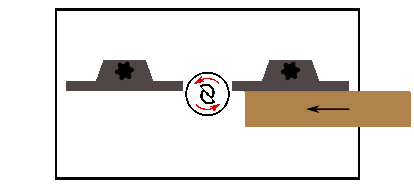
| 20:58, 17 February 2022 | Router table feed direction - fence.gif (file) |  |
114 KB | cropped top & bottom margin for better text flow | 2 |
| 06:06, 5 February 2022 | Hammer A3-31 - Werkstückmaße.svg (file) |  |
155 KB | text to paths | 2 |
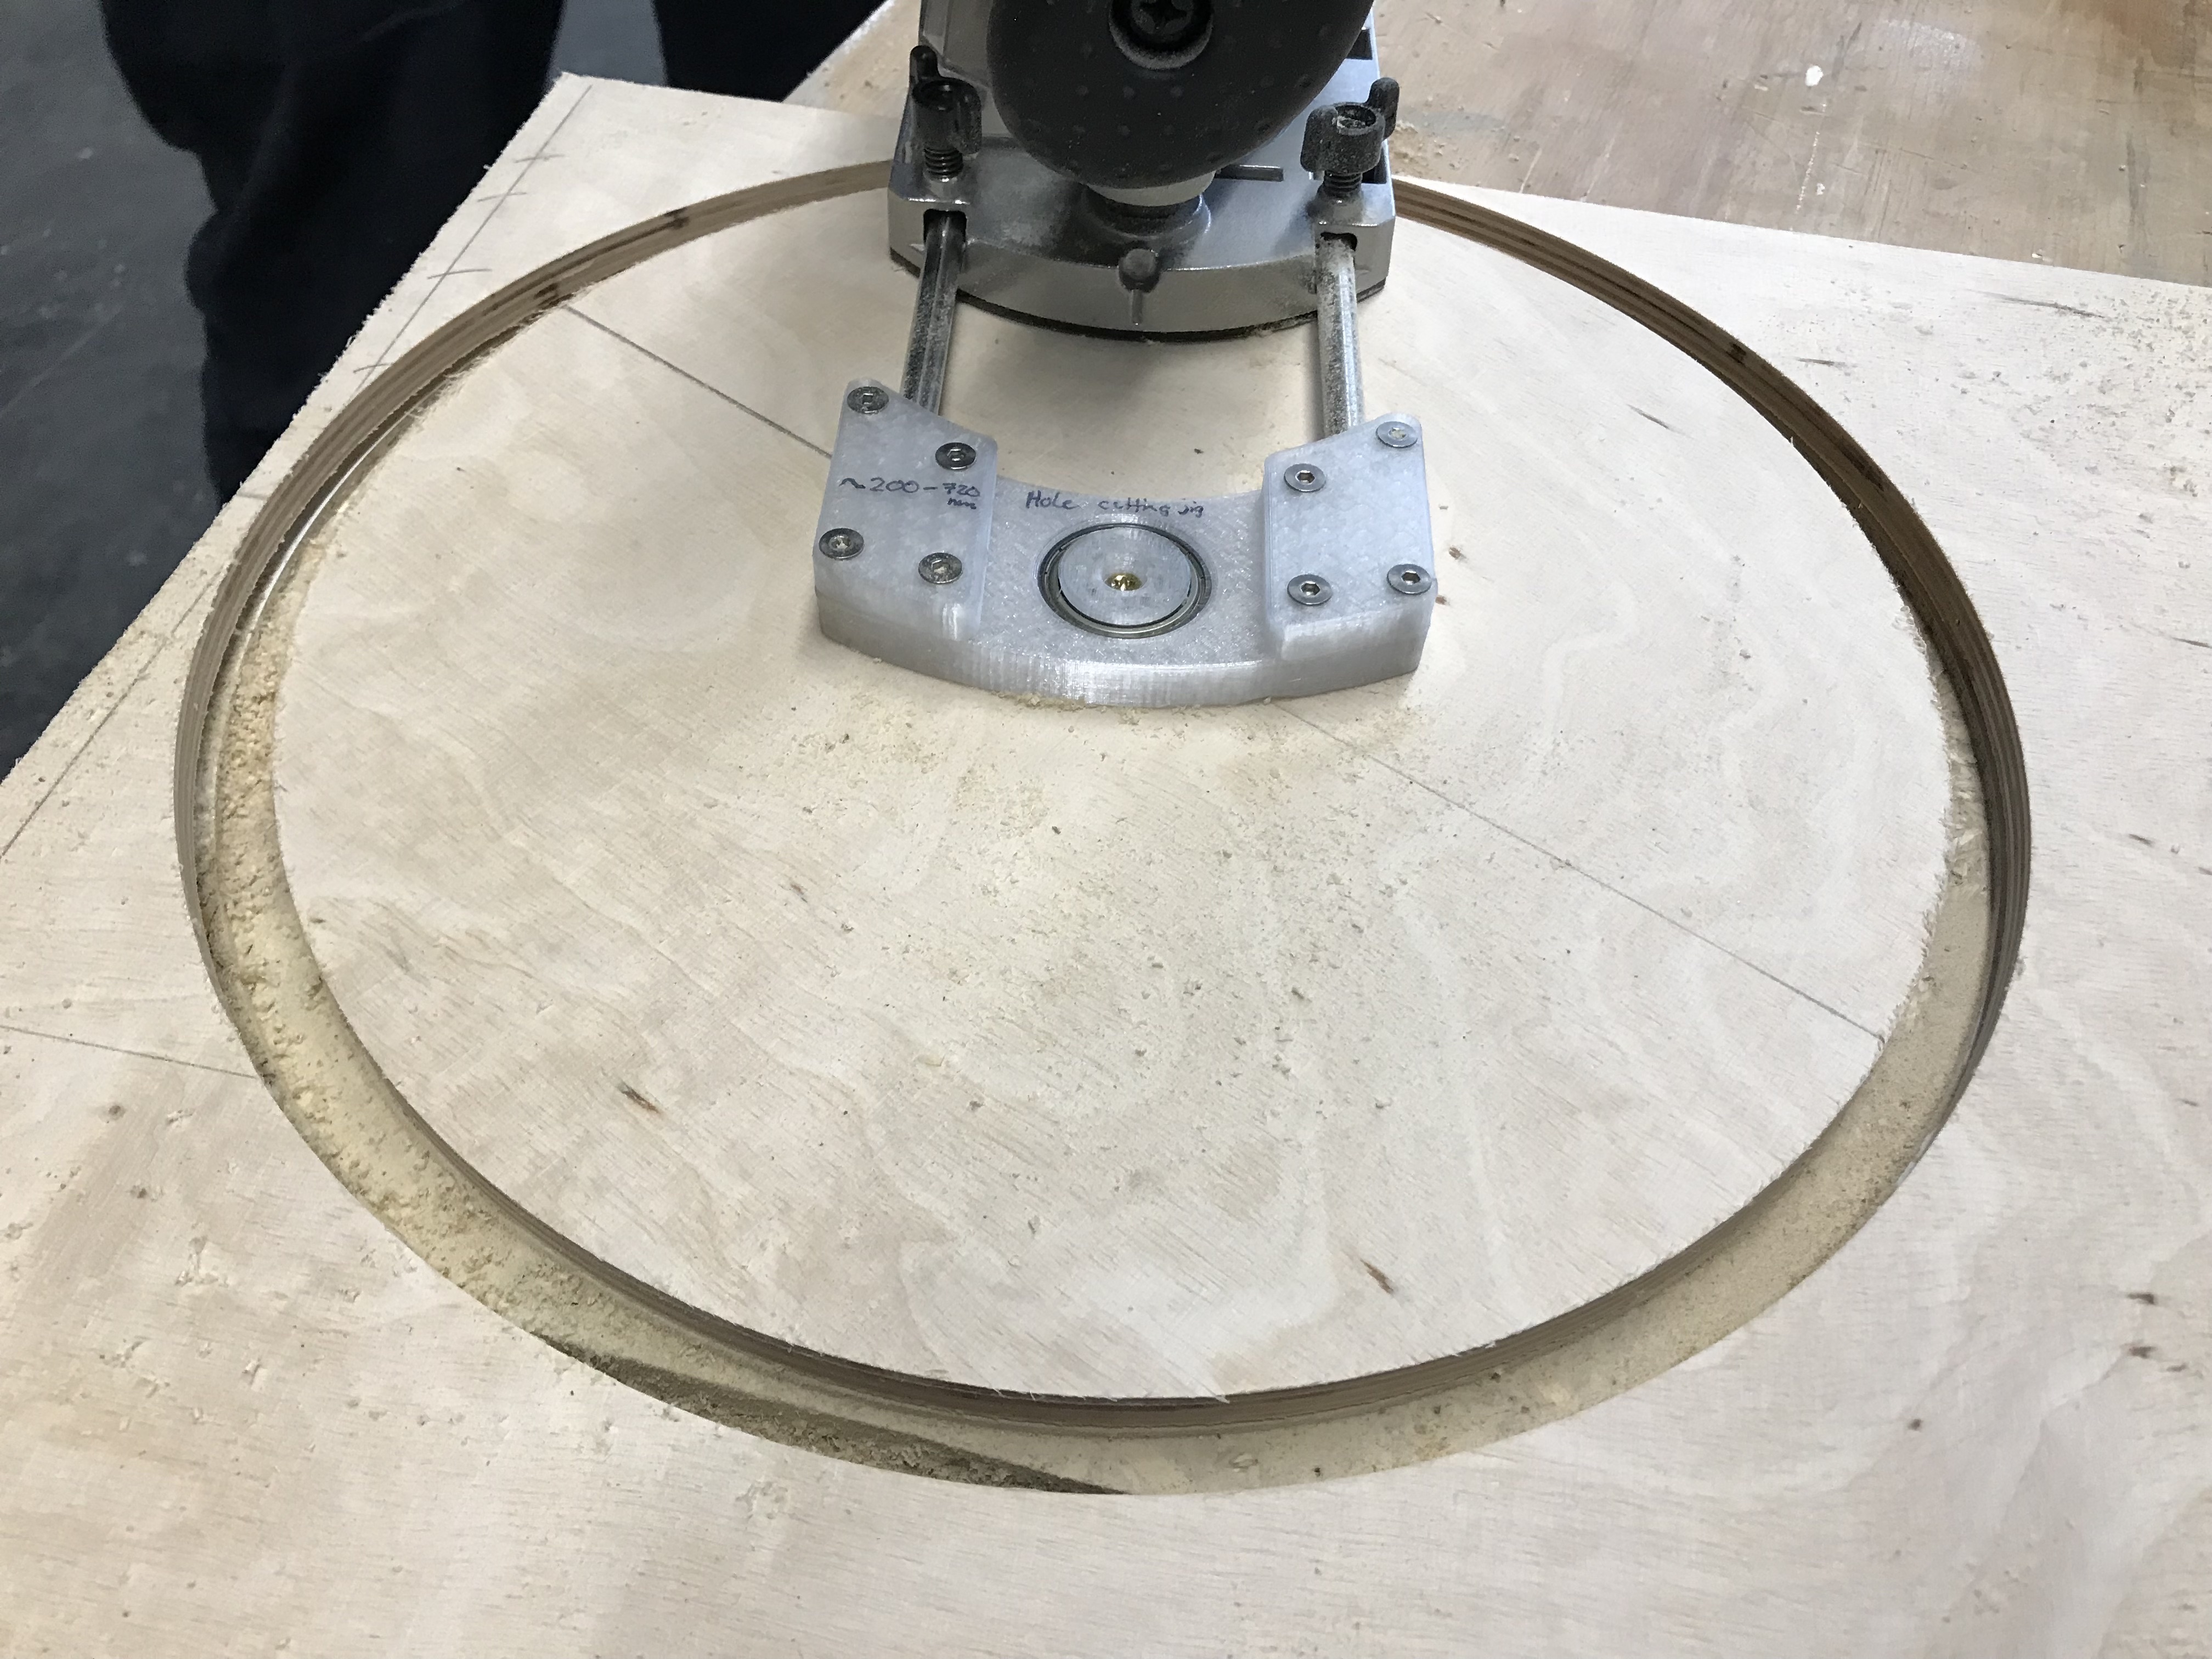
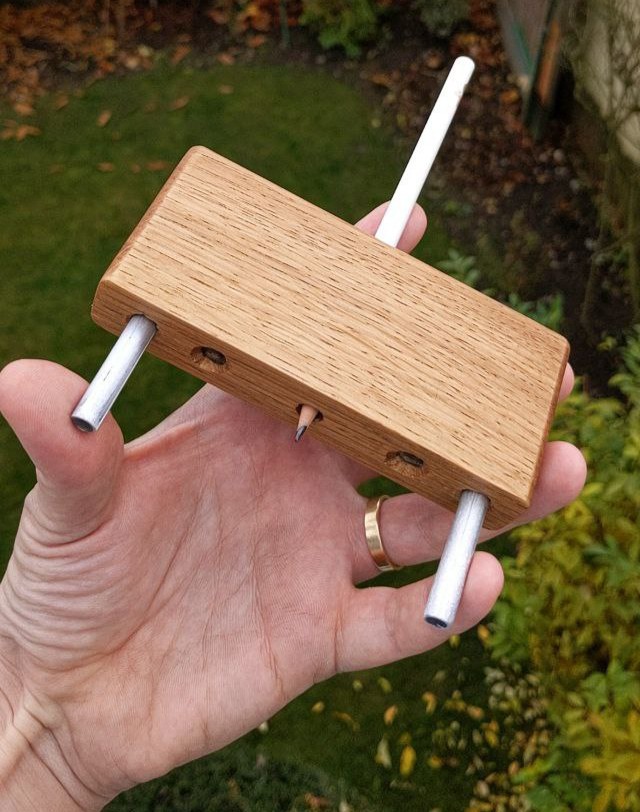
| 12:56, 24 December 2021 | Circle routing jig in use.jpeg (file) |  |
1.86 MB | {{P}}'s circle routing jig moments after a perfect plywood disc has been cut out Photo by {{P}} | 1 |
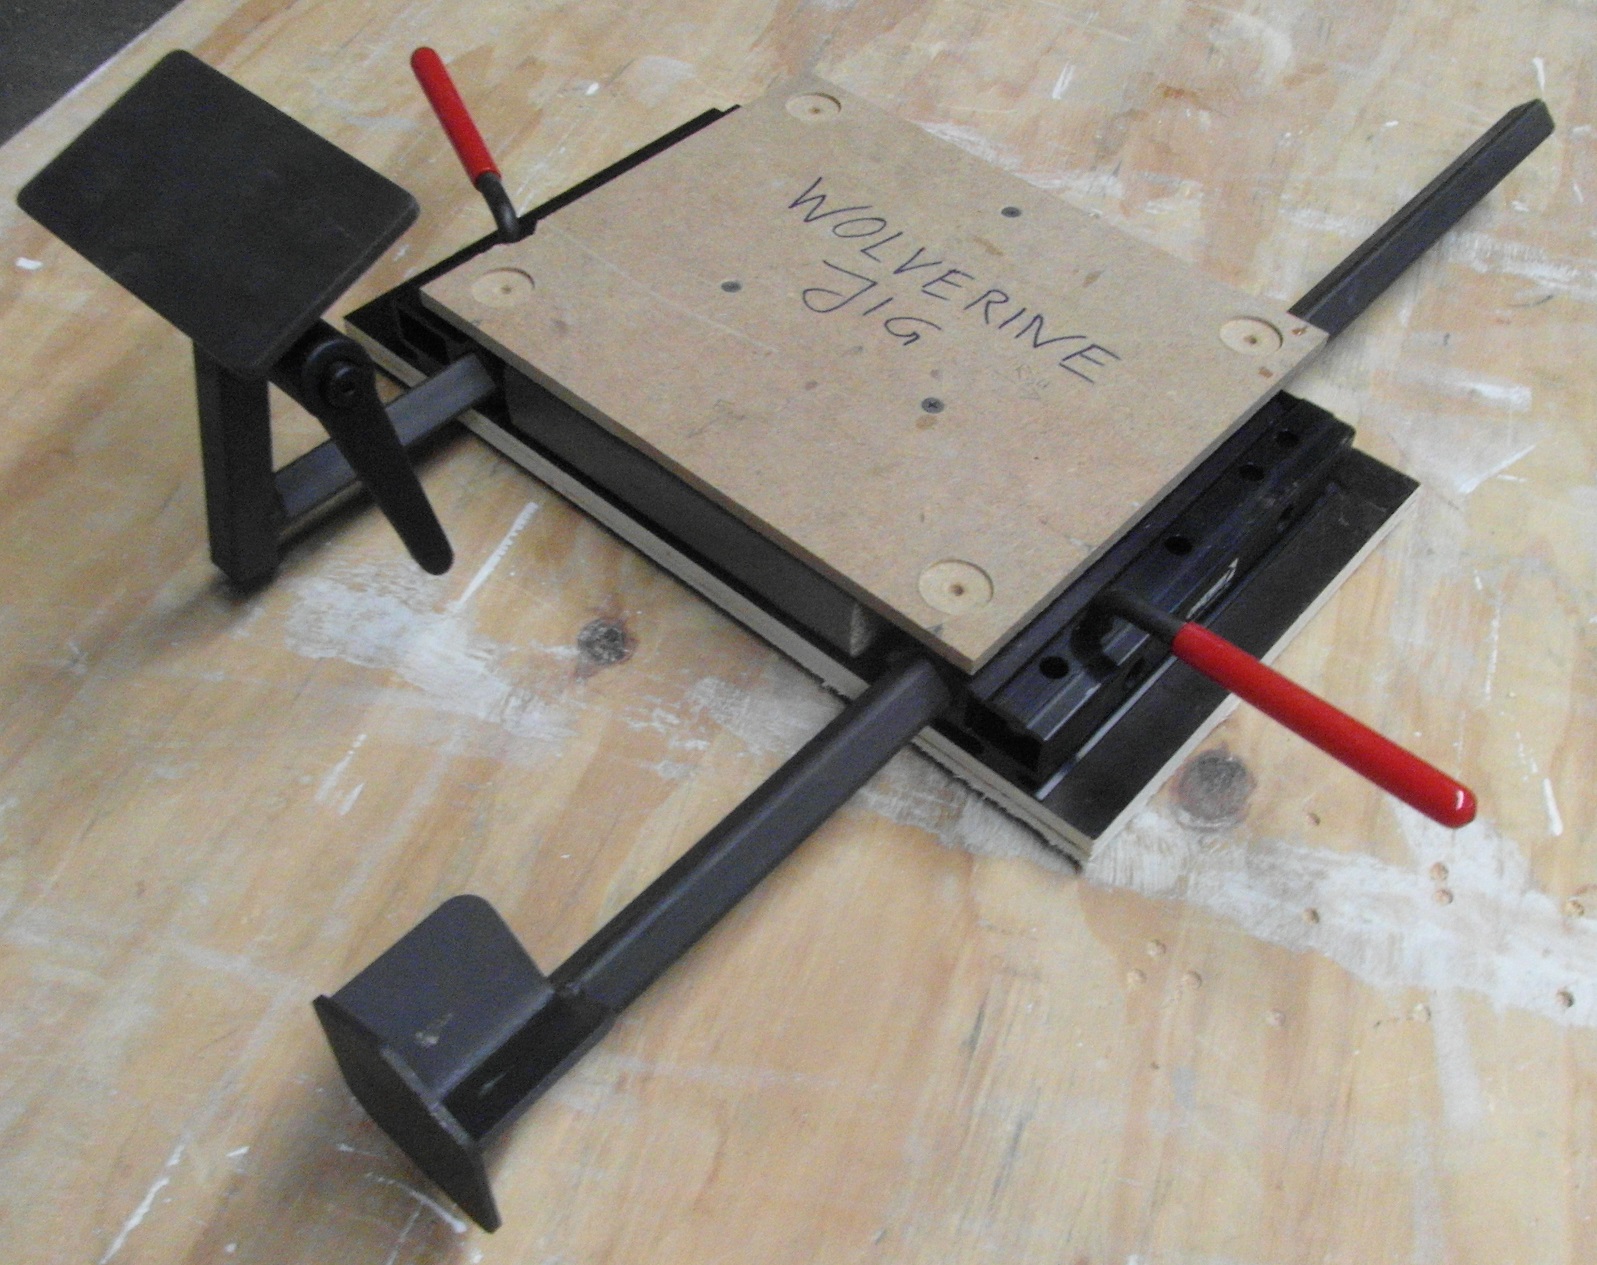
| 15:00, 1 December 2021 | Wolverine base.JPG (file) |  |
598 KB | our Wolverine jig without a grinder on top | 1 |
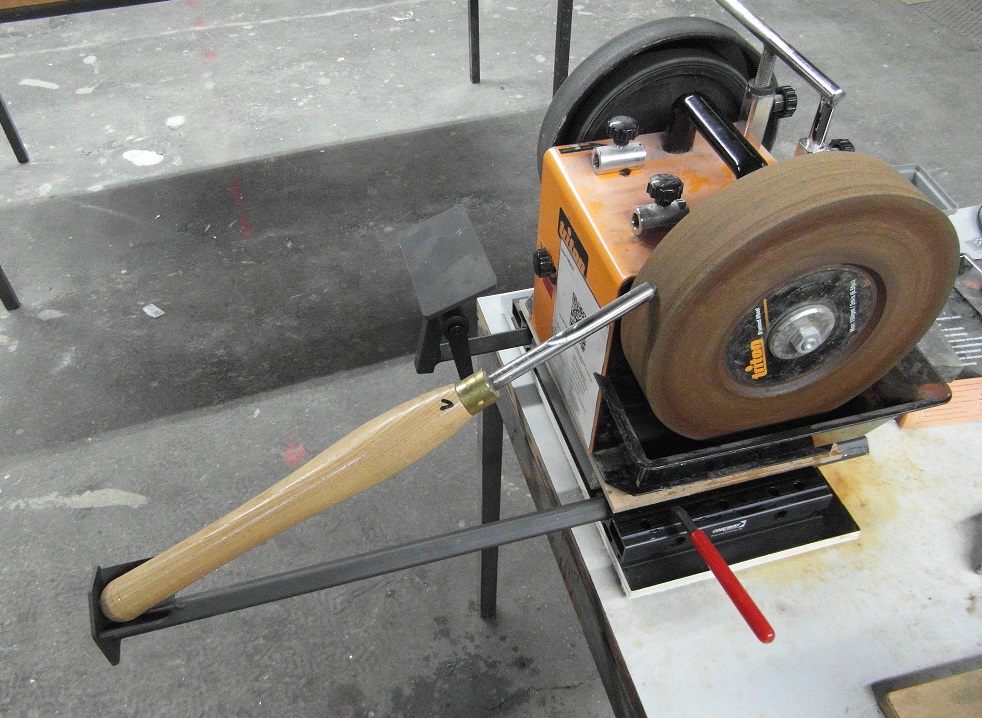
| 14:58, 1 December 2021 | Wolverine in use.JPG (file) |  |
312 KB | sharpening a woodturning gouge with the Wolverine jig | 1 |
| 13:20, 27 November 2021 | Centerline gauge.jpg (file) |  |
128 KB | centerline gauge, made and photographed by Keno | 1 |
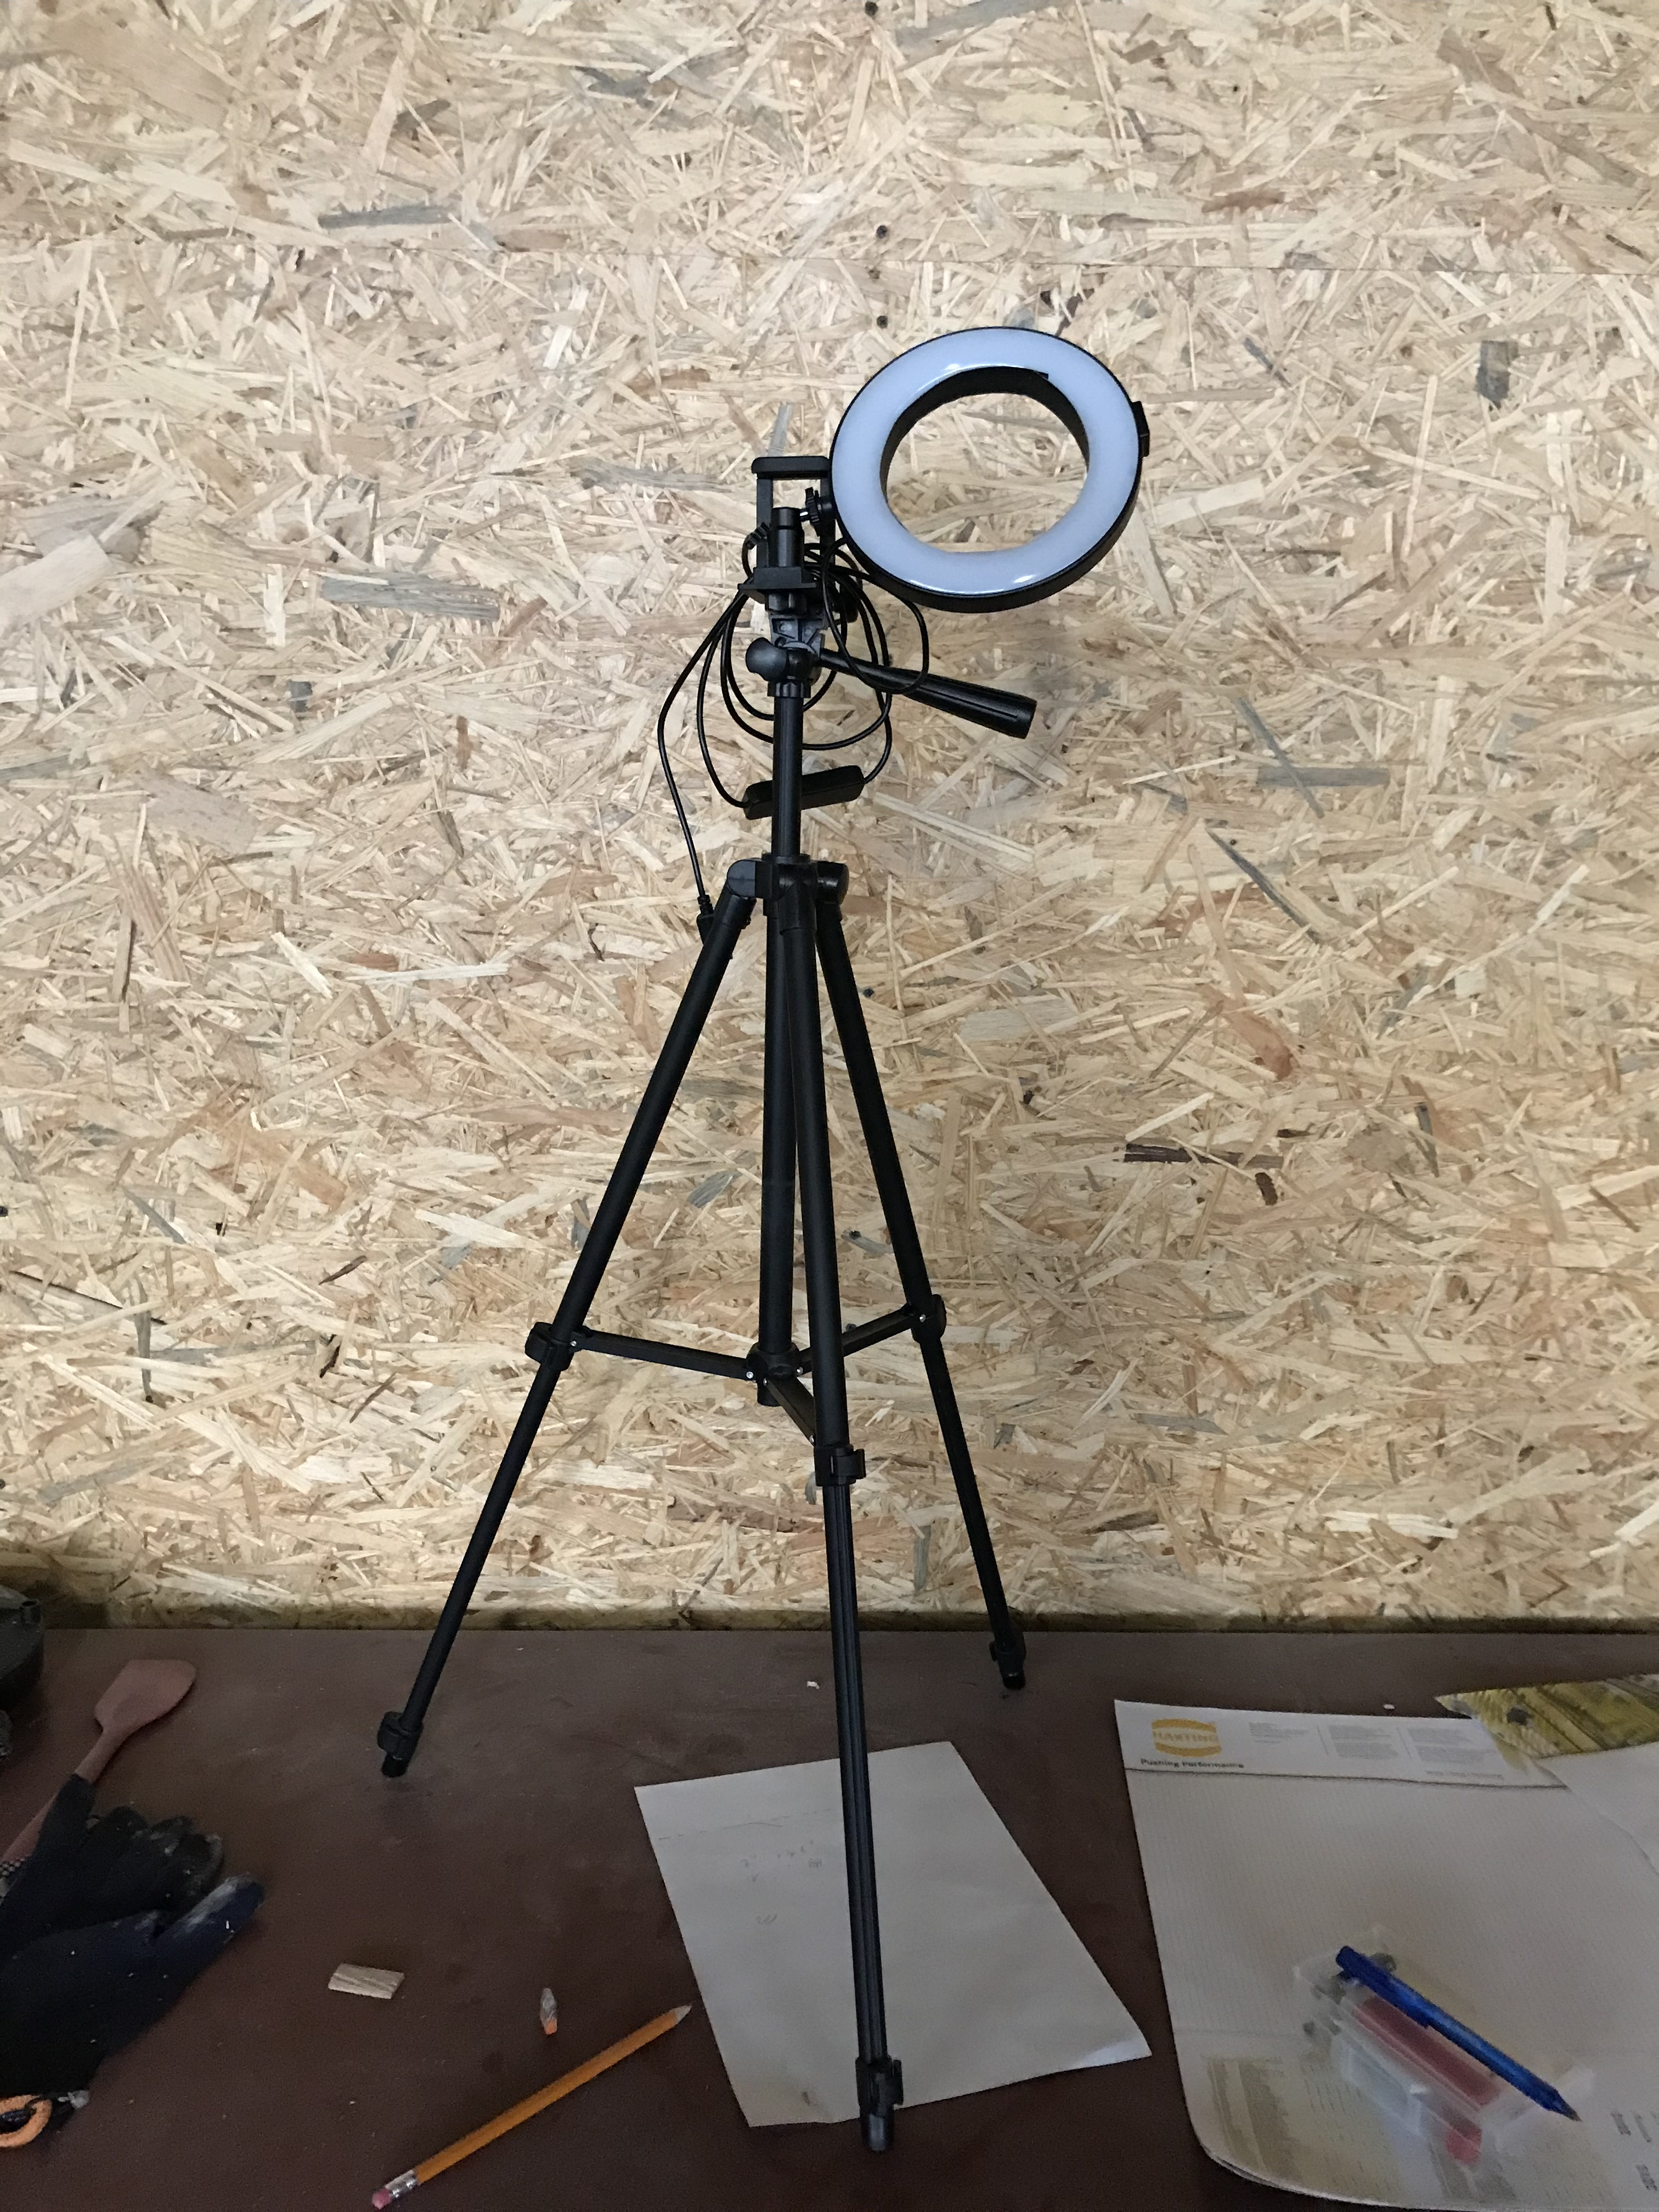
| 16:23, 7 November 2021 | Smartphone Ringlight.jpeg (file) |  |
2.47 MB | removed EXIF data with GIMP to correct rotation | 2 |
| 00:04, 4 November 2021 | Biscuits explained.svg (file) |  |
21 KB | illustration of the way biscuits keep boards aligned during a glue-up quickly drawn in Inkscape | 1 |
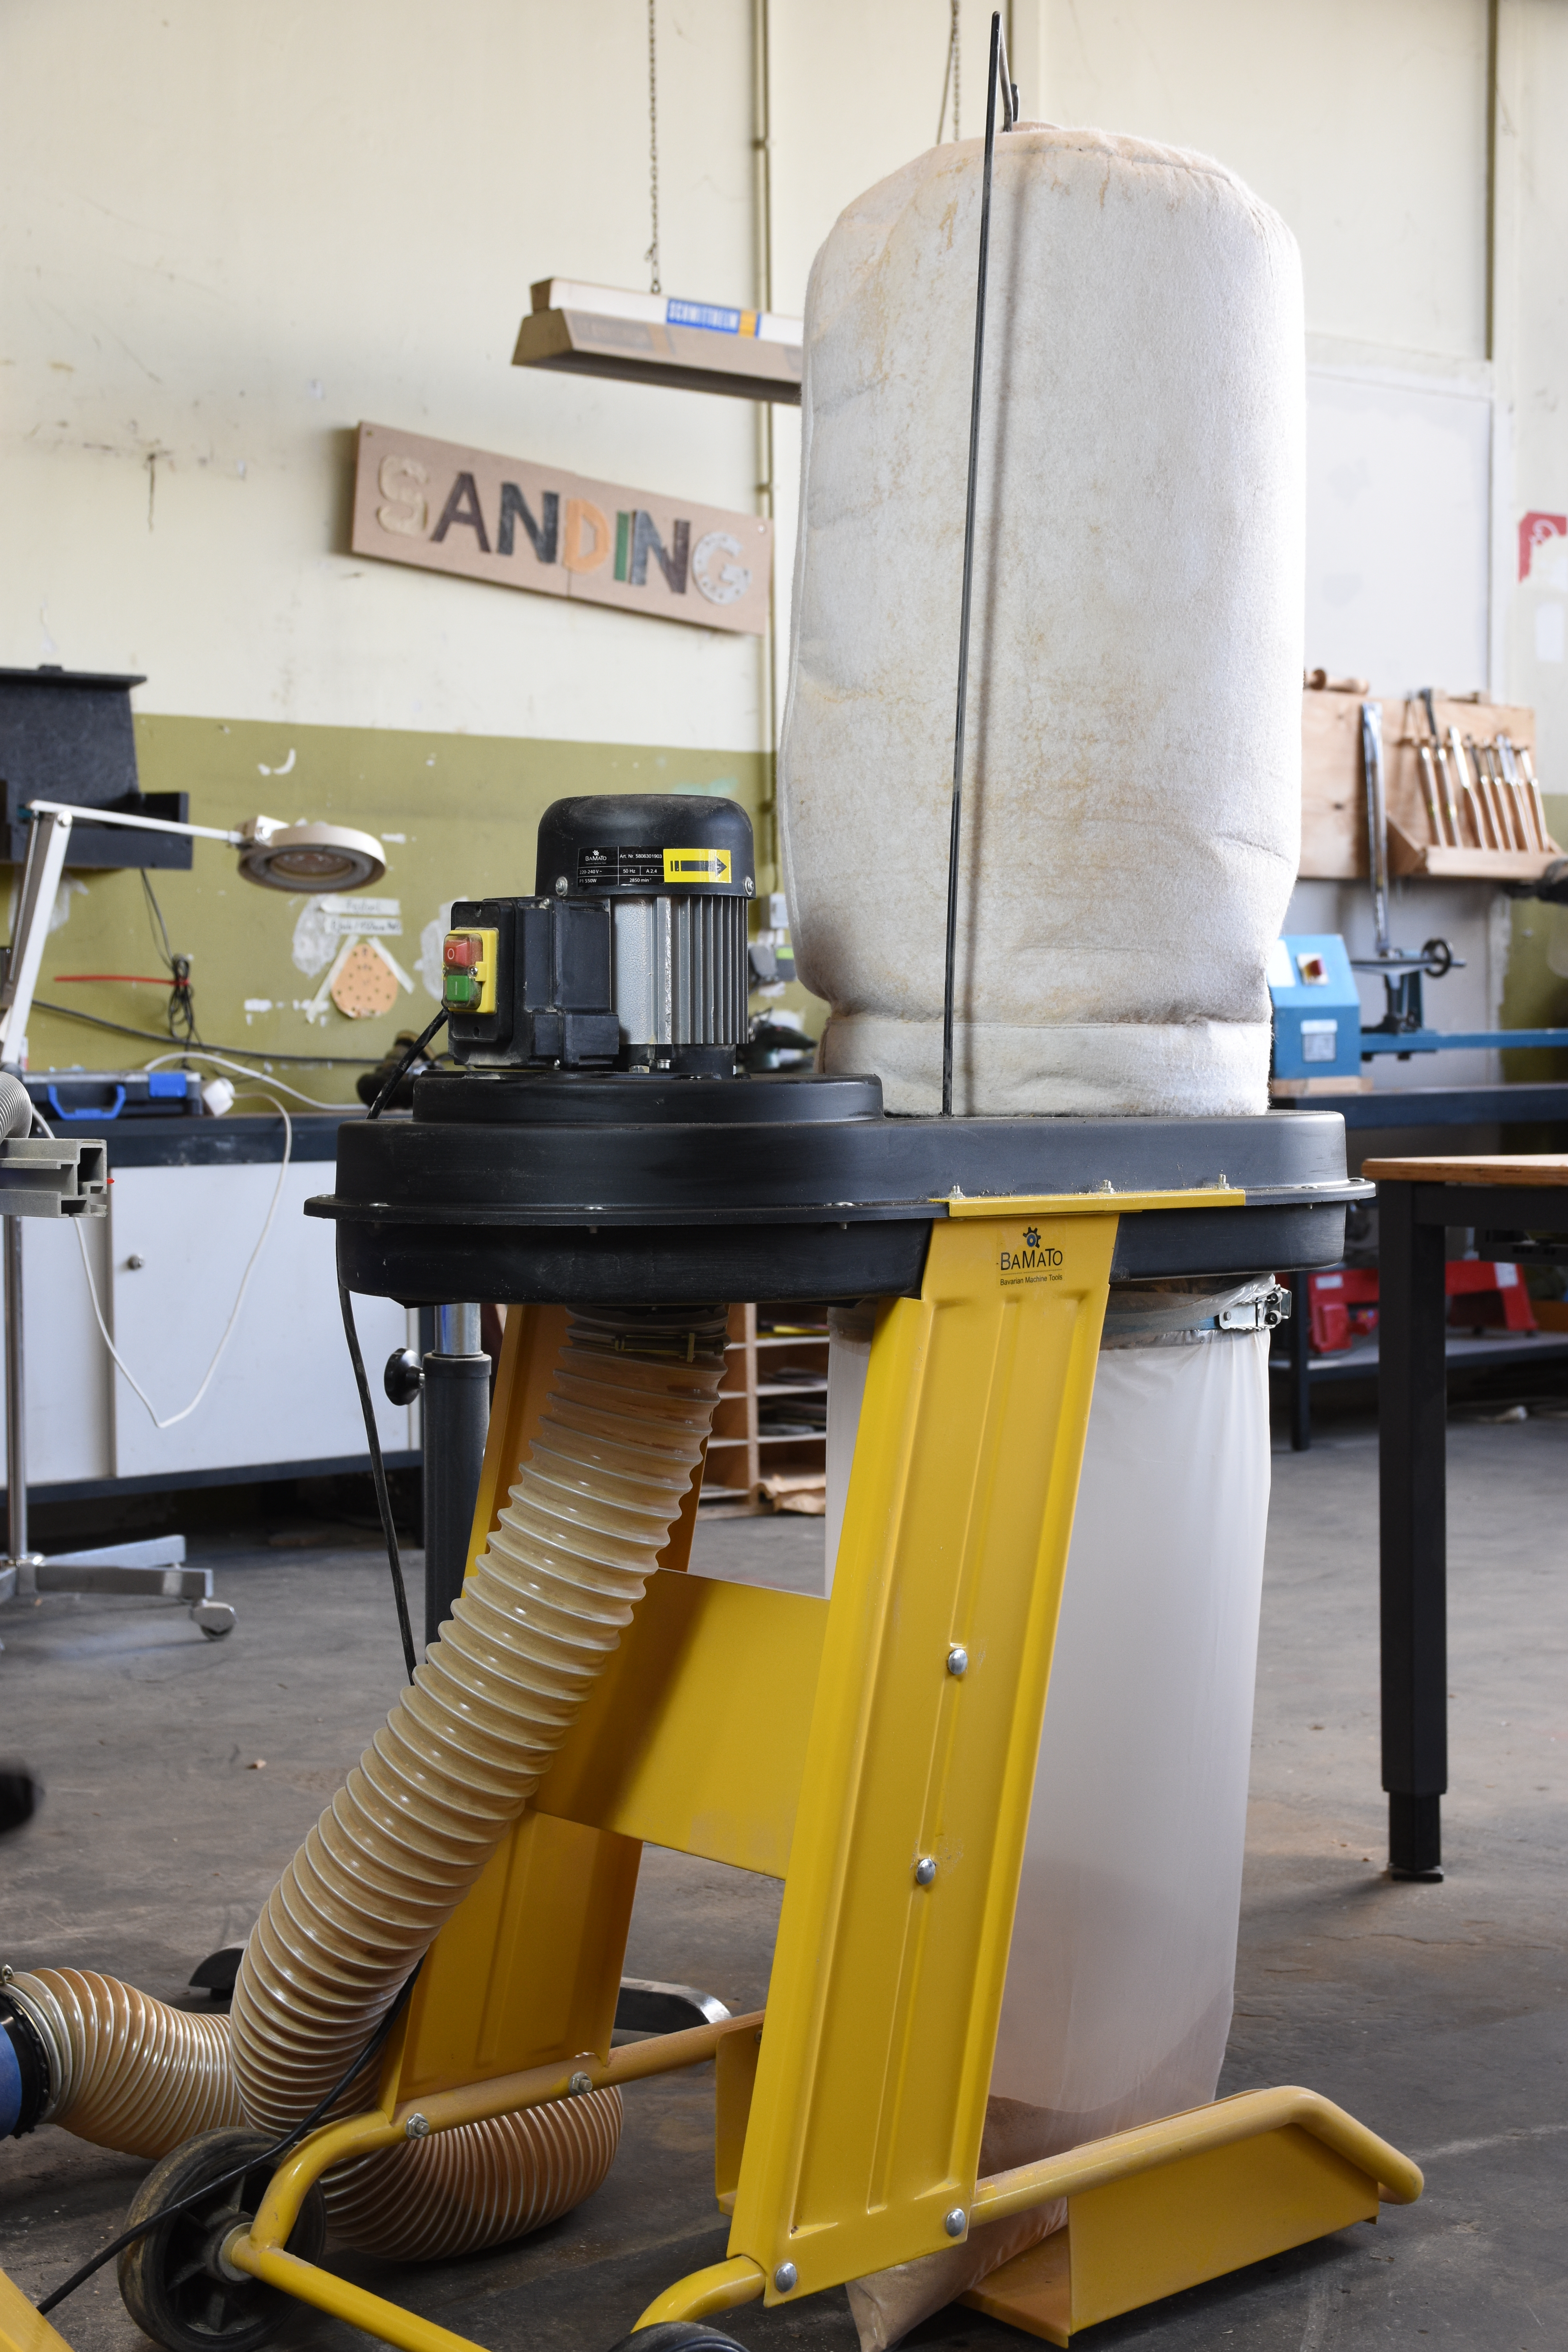
| 01:53, 28 October 2021 | Bamato.jpg (file) |  |
15.44 MB | EXIF deleted in GIMP to fix rotation | 3 |
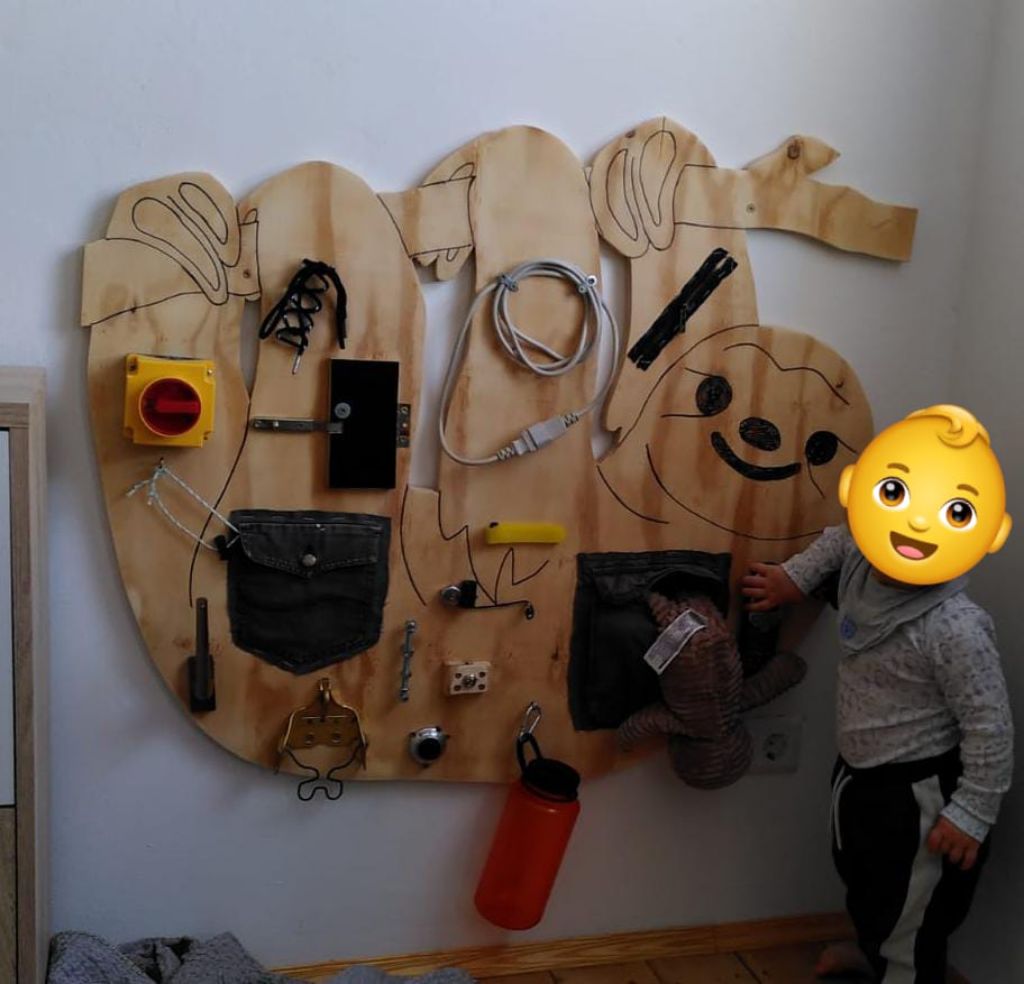
| 23:24, 7 October 2021 | Activity sloth.jpg (file) |  |
89 KB | toddler activity board in a sloth shape! | 1 |
| 20:56, 20 July 2021 | Danger - sharp objects.svg (file) |  |
5 KB | warning icon EN ISO 7010 W022 - "warning of sharp objects"/''"Warnung vor spitzem Gegenstand"'' This sign means you may easily cut yourself on something. source: https://commons.wikimedia.org/wiki/File:ISO_7010_W022.svg (public domain) Category:Safety Icons | 1 |
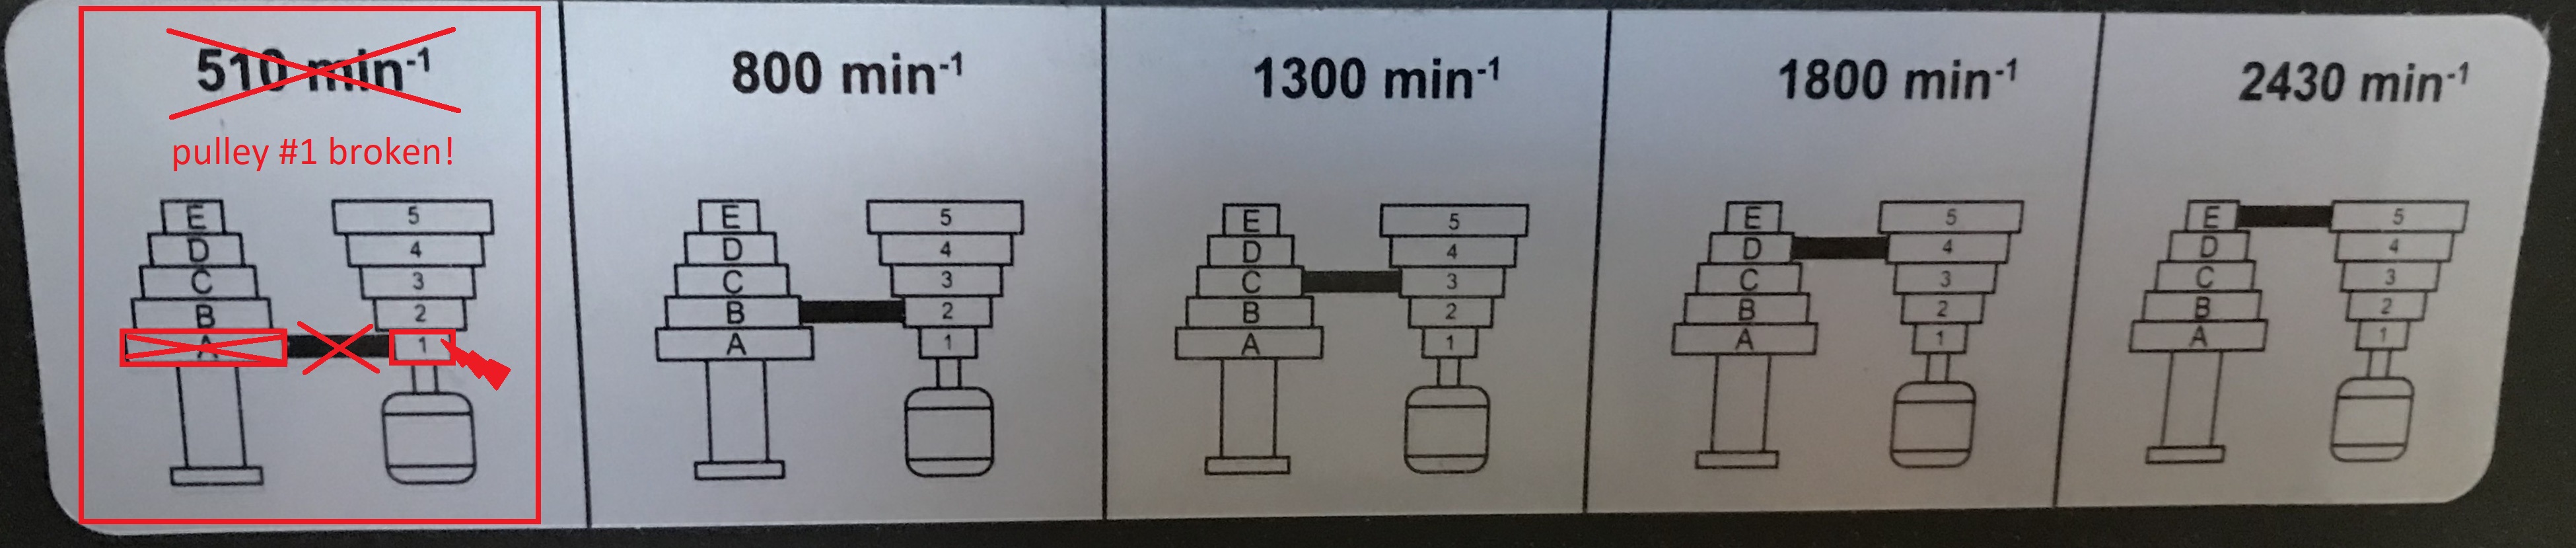
| 23:24, 7 July 2021 | Scheppach Drill Speeds.JPG (file) | 540 KB | slowest speed not usable due to broken pulley | 2 | |
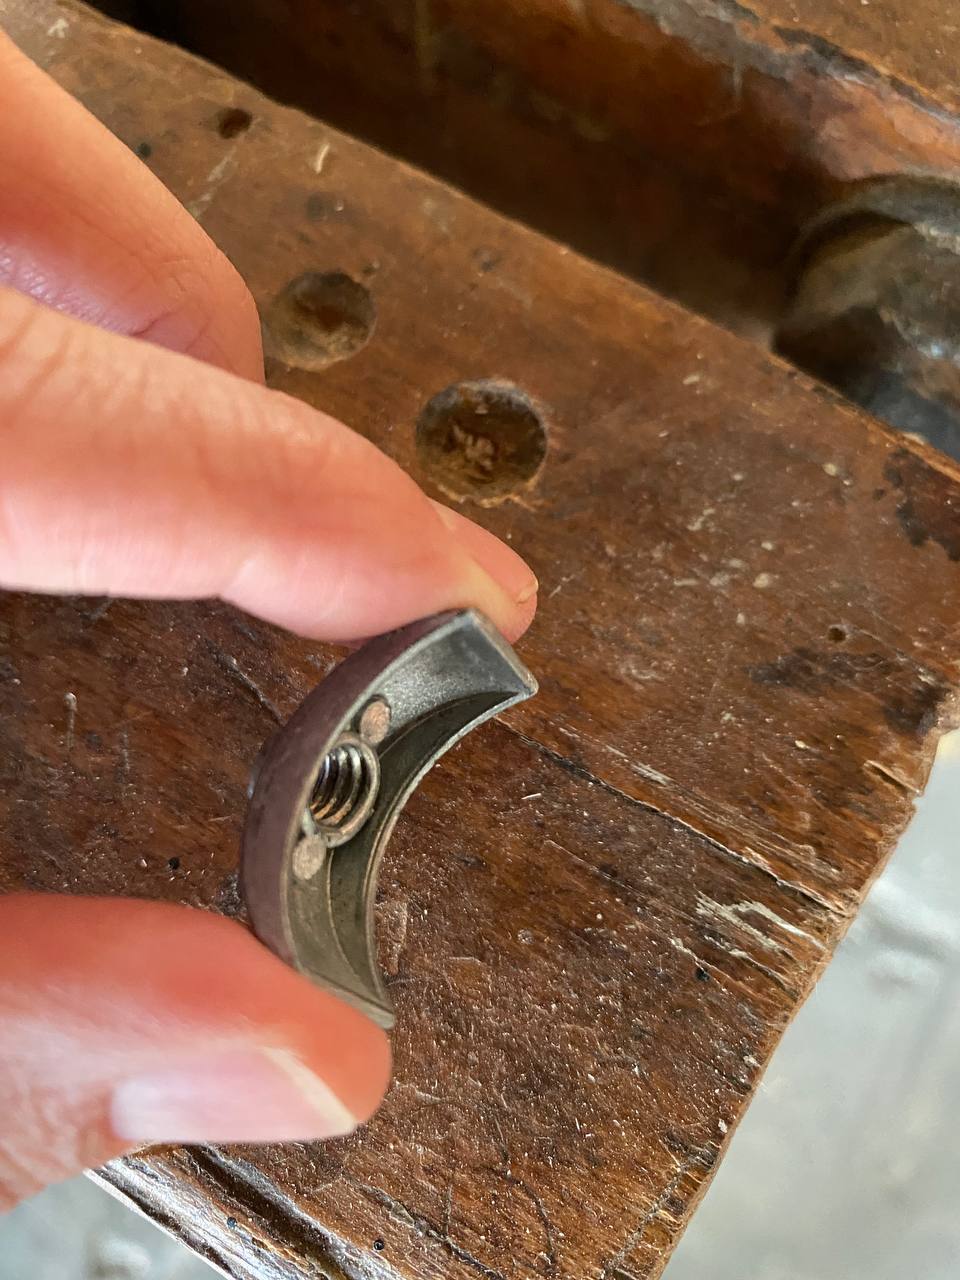
| 15:07, 26 April 2021 | Halbmond Mutter.jpg (file) |  |
151 KB | "Halbmond Schraubenmutter" photo by Hanna | 1 |
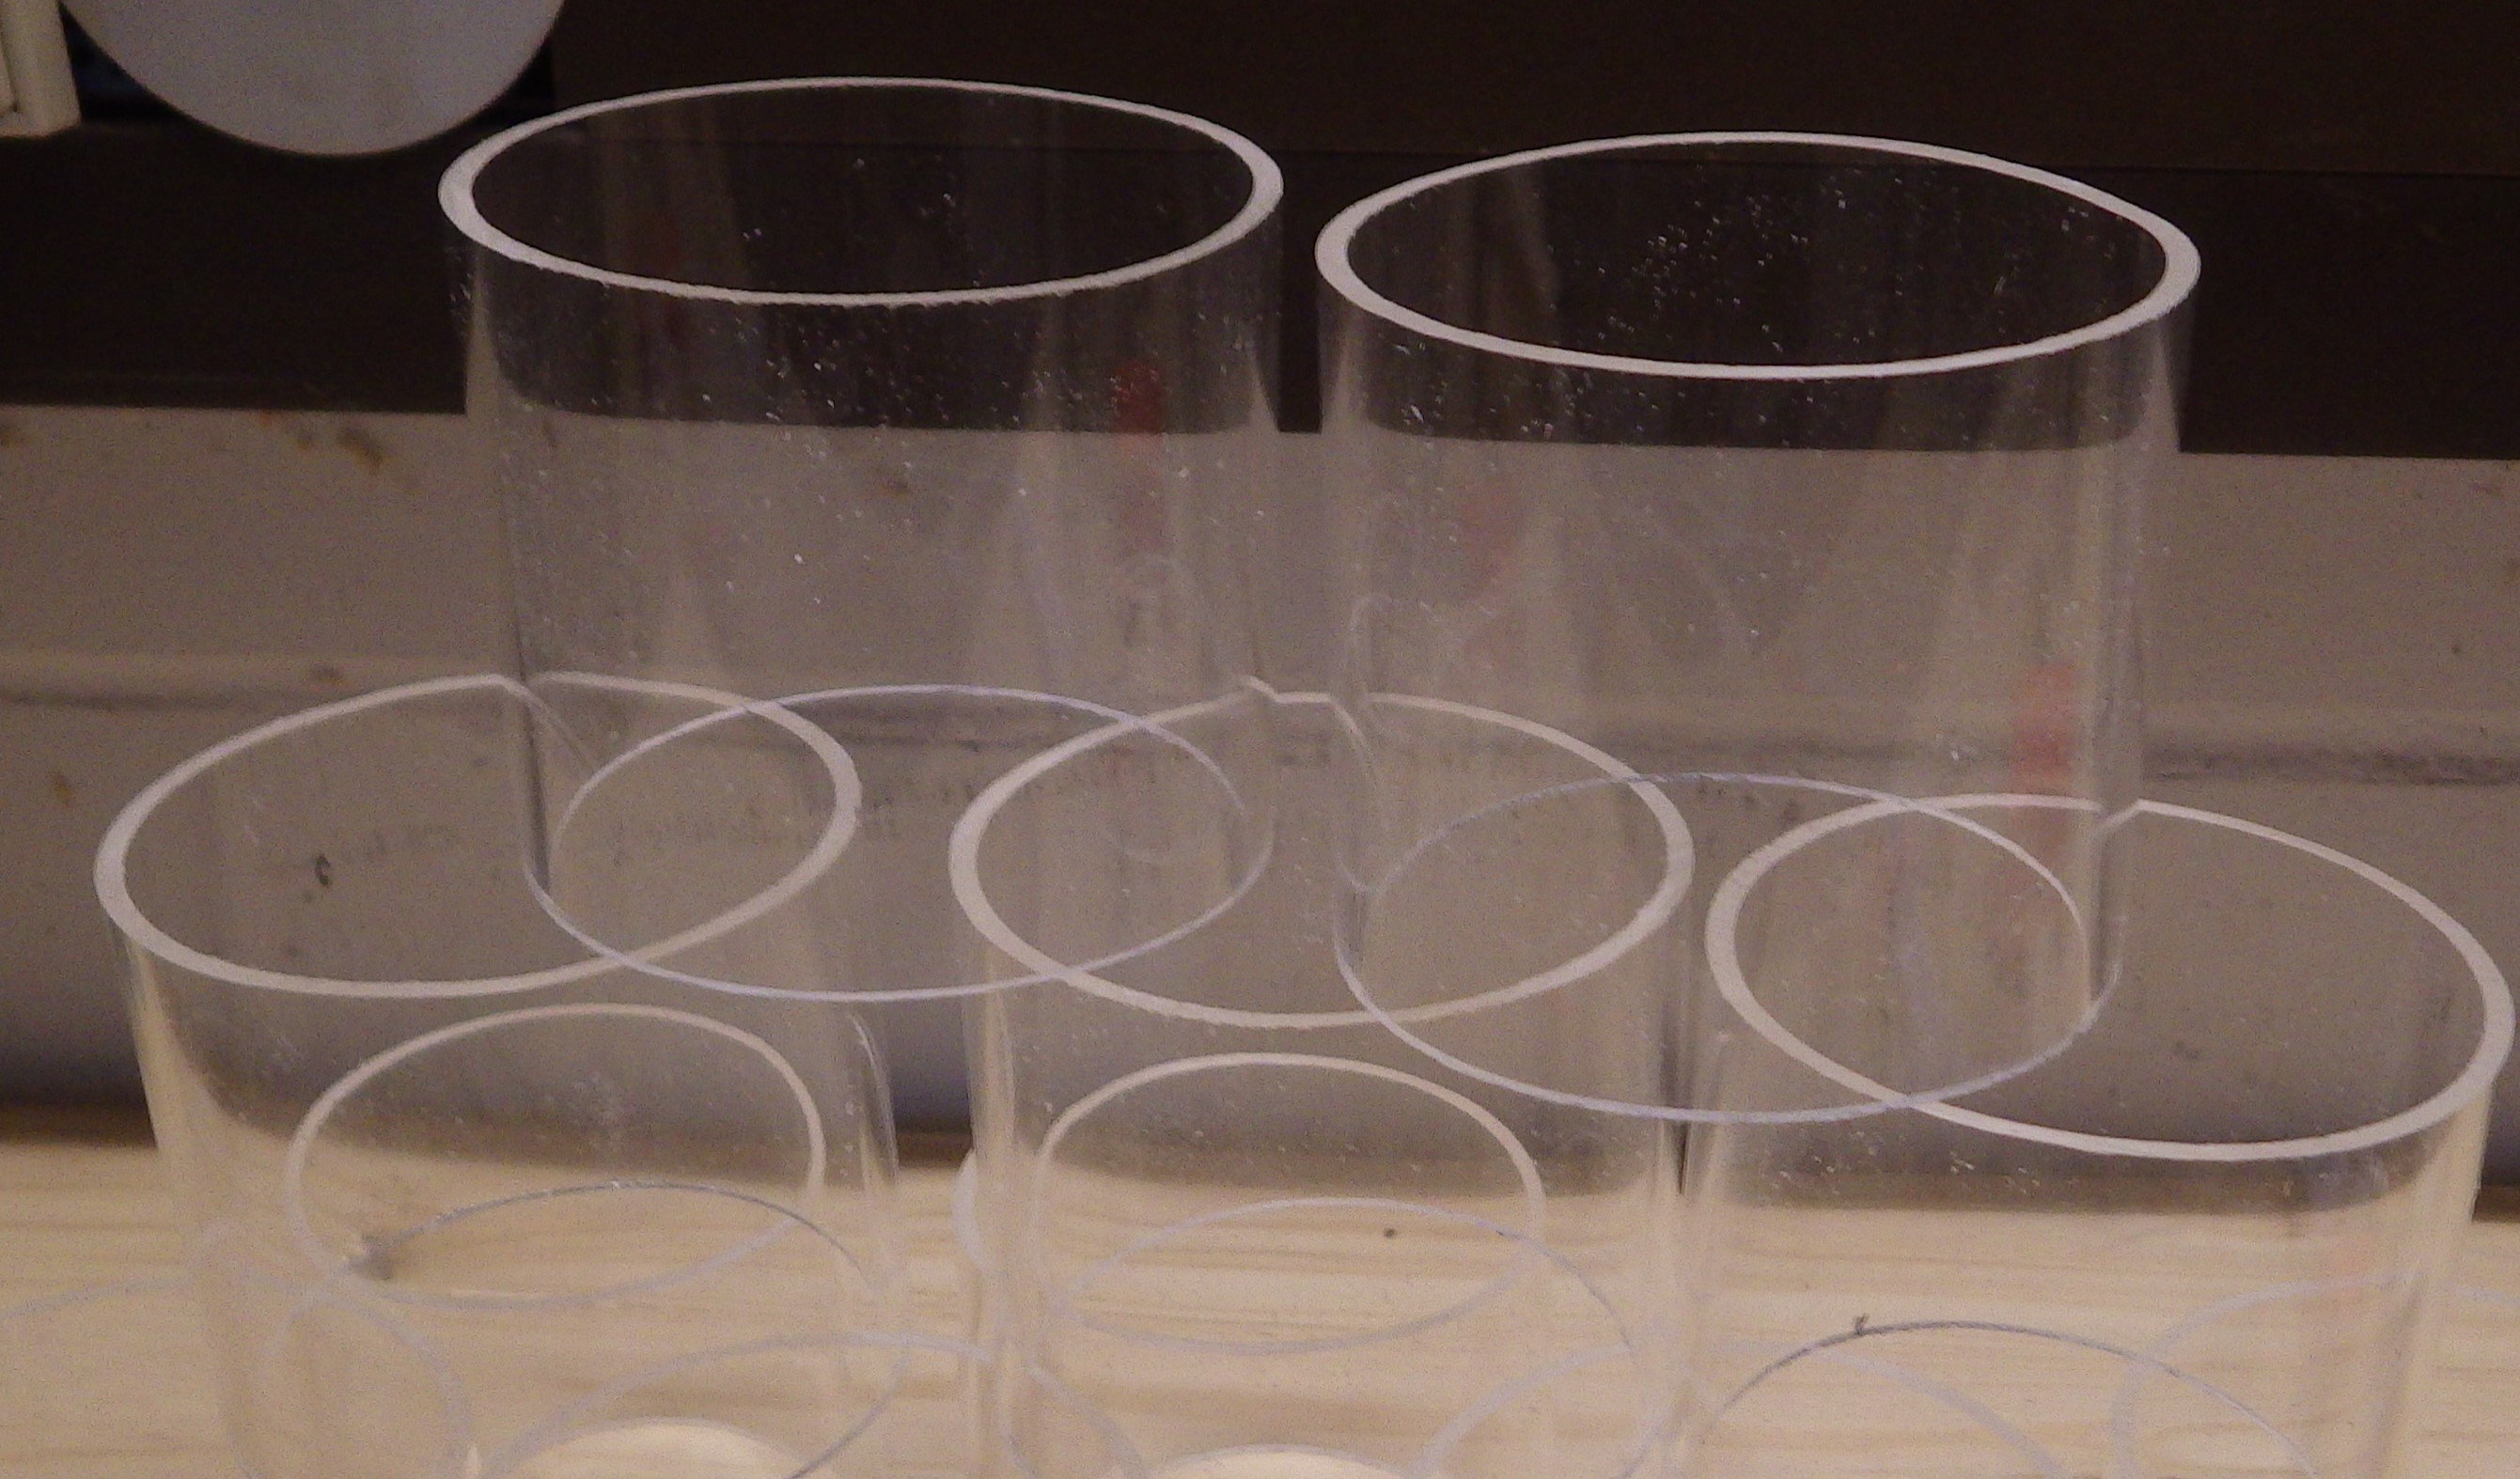
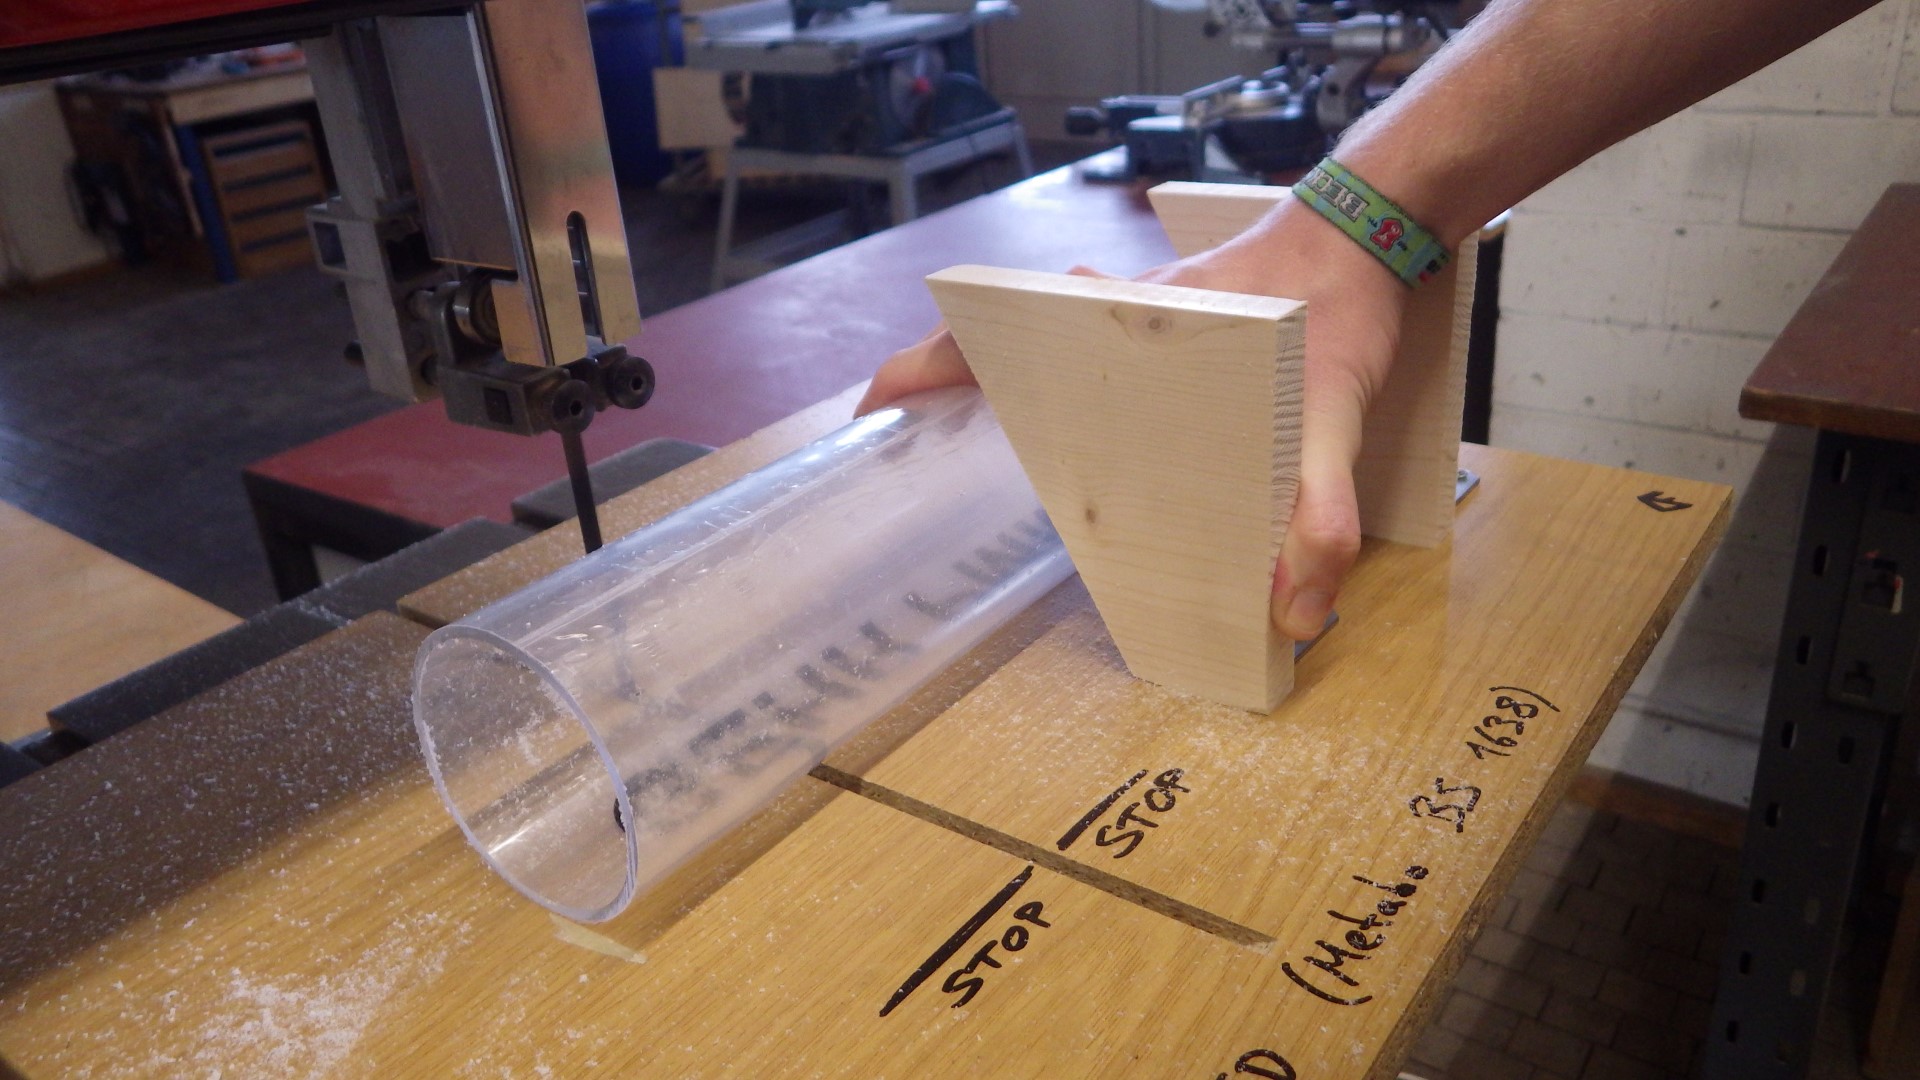
| 23:37, 30 December 2020 | Acrylic glass tubes.jpg (file) |  |
753 KB | acrylic glass is transparent, i.e. hard to photograph...but these tubes are better than nothing ;-) | 1 |
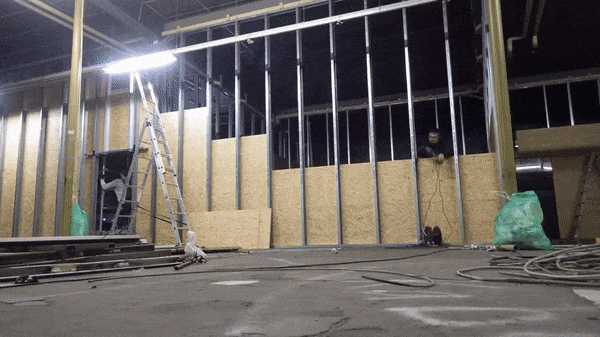
| 15:08, 30 December 2020 | Trockenbau-Zeitraffer Wand hoch.gif (file) |  |
2.96 MB | Zeitraffer eines Trockenbau-Abschnitts mit einem Bild pro Minute. GIF mit [https://ezgif.com/ EZGIF.com] erstellt und leicht komprimiert. | 1 |
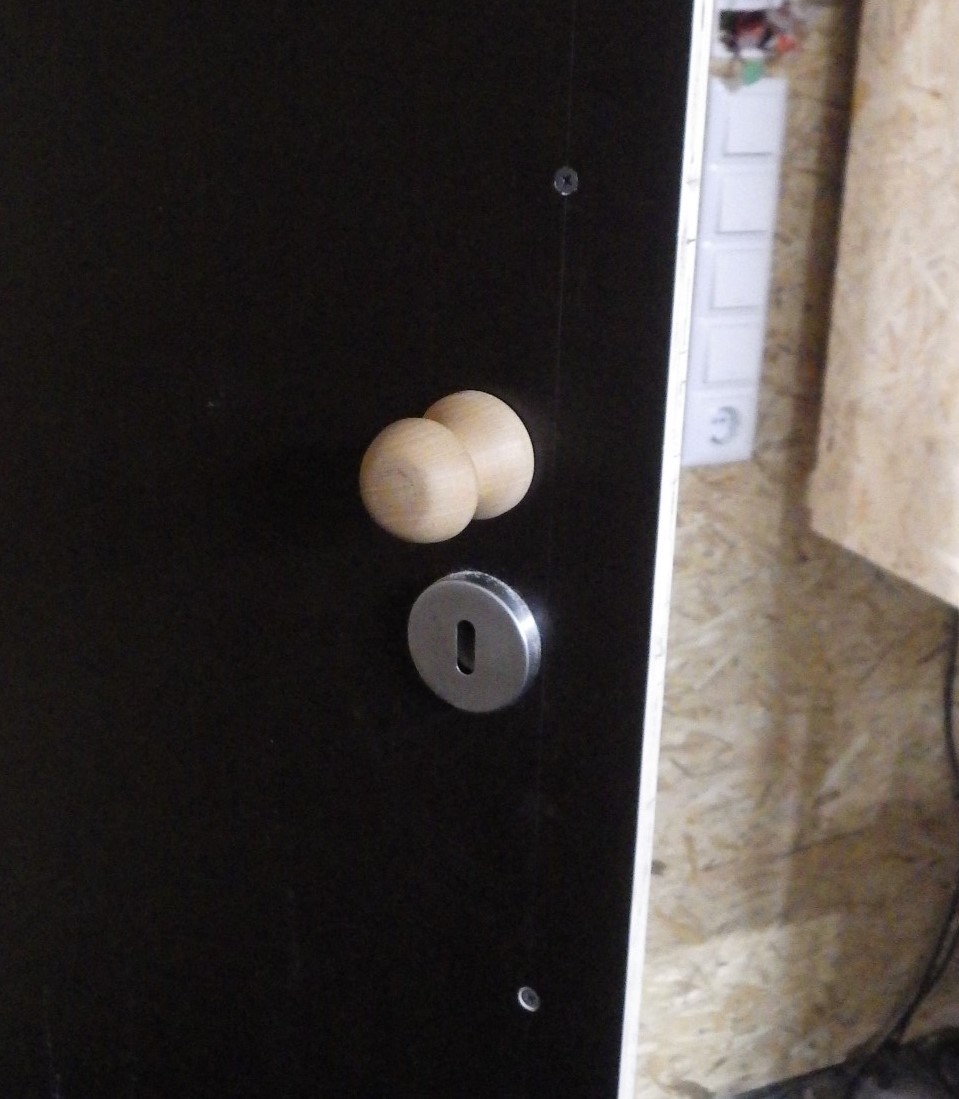
| 14:50, 30 December 2020 | Schalltür10.JPG (file) |  |
227 KB | für die Tür zum Elektronikraum wurde noch ein schicker Knauf aus Buche gedrechselt Project:Schallschutztüren | 1 |
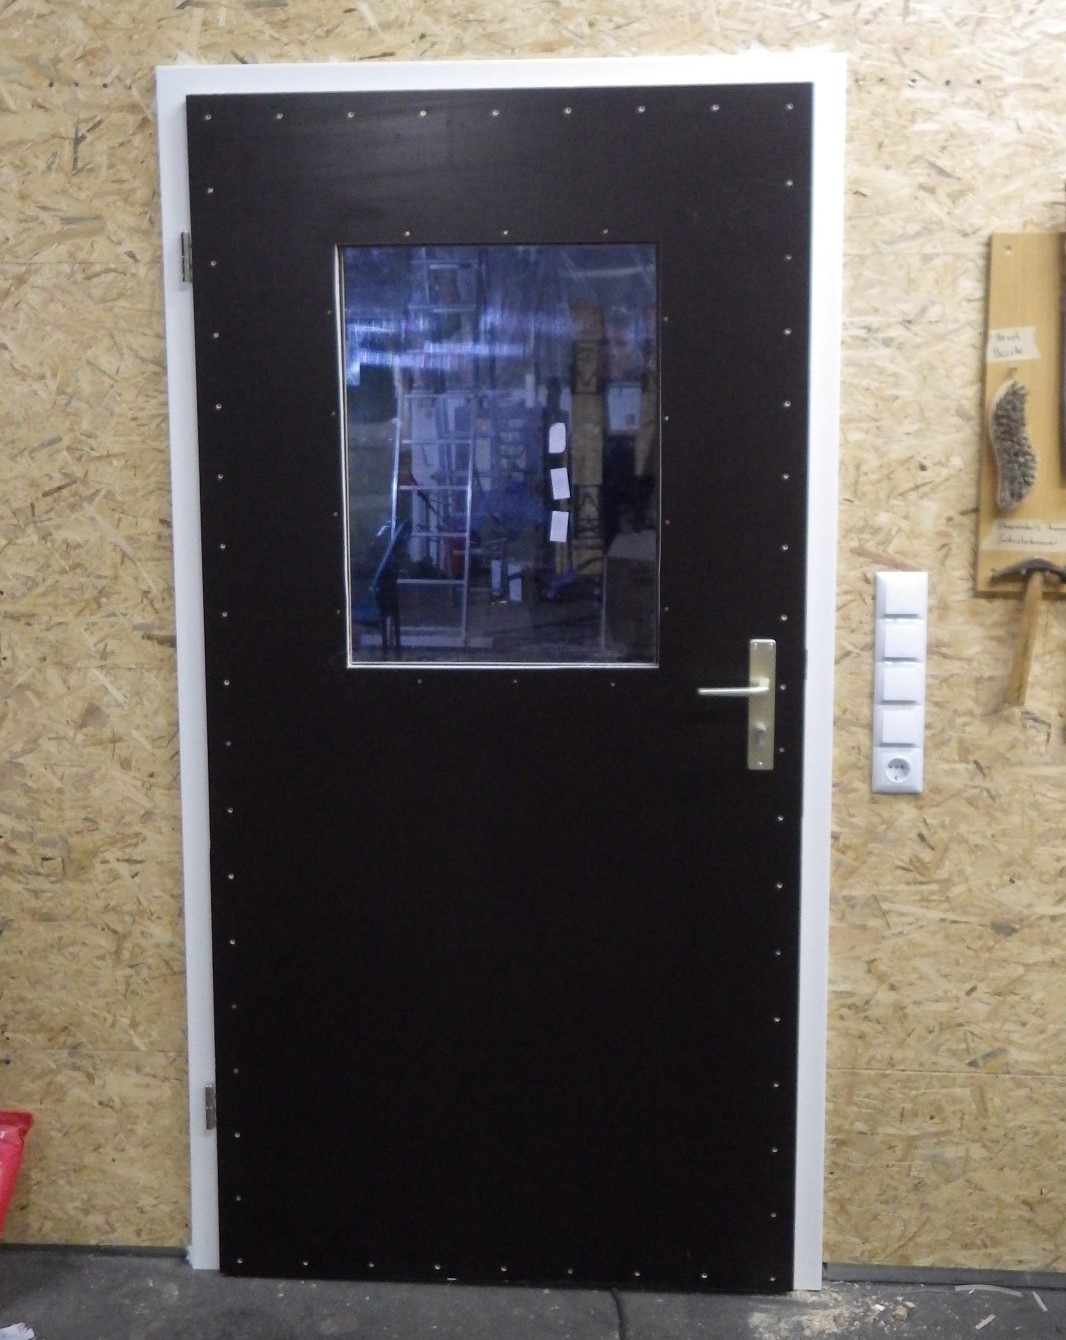
| 14:49, 30 December 2020 | Schalltür9.JPG (file) |  |
383 KB | eingebaute Tür zum Elektronikraum mit dezenten schwarz passivierten Trockenbauschrauben Project:Schallschutztüren | 1 |
| 14:47, 30 December 2020 | Schalltür8.JPG (file) |  |
316 KB | eingebaute Tür zum Gemeinschaftsraum mit wiederverwendetem Polycarbonatfenster und deutlich sichtbaren gelb passivierten Spanplattenschrauben Project:Schallschutztüren | 1 |
| 14:39, 30 December 2020 | Schalltür6-2.JPG (file) |  |
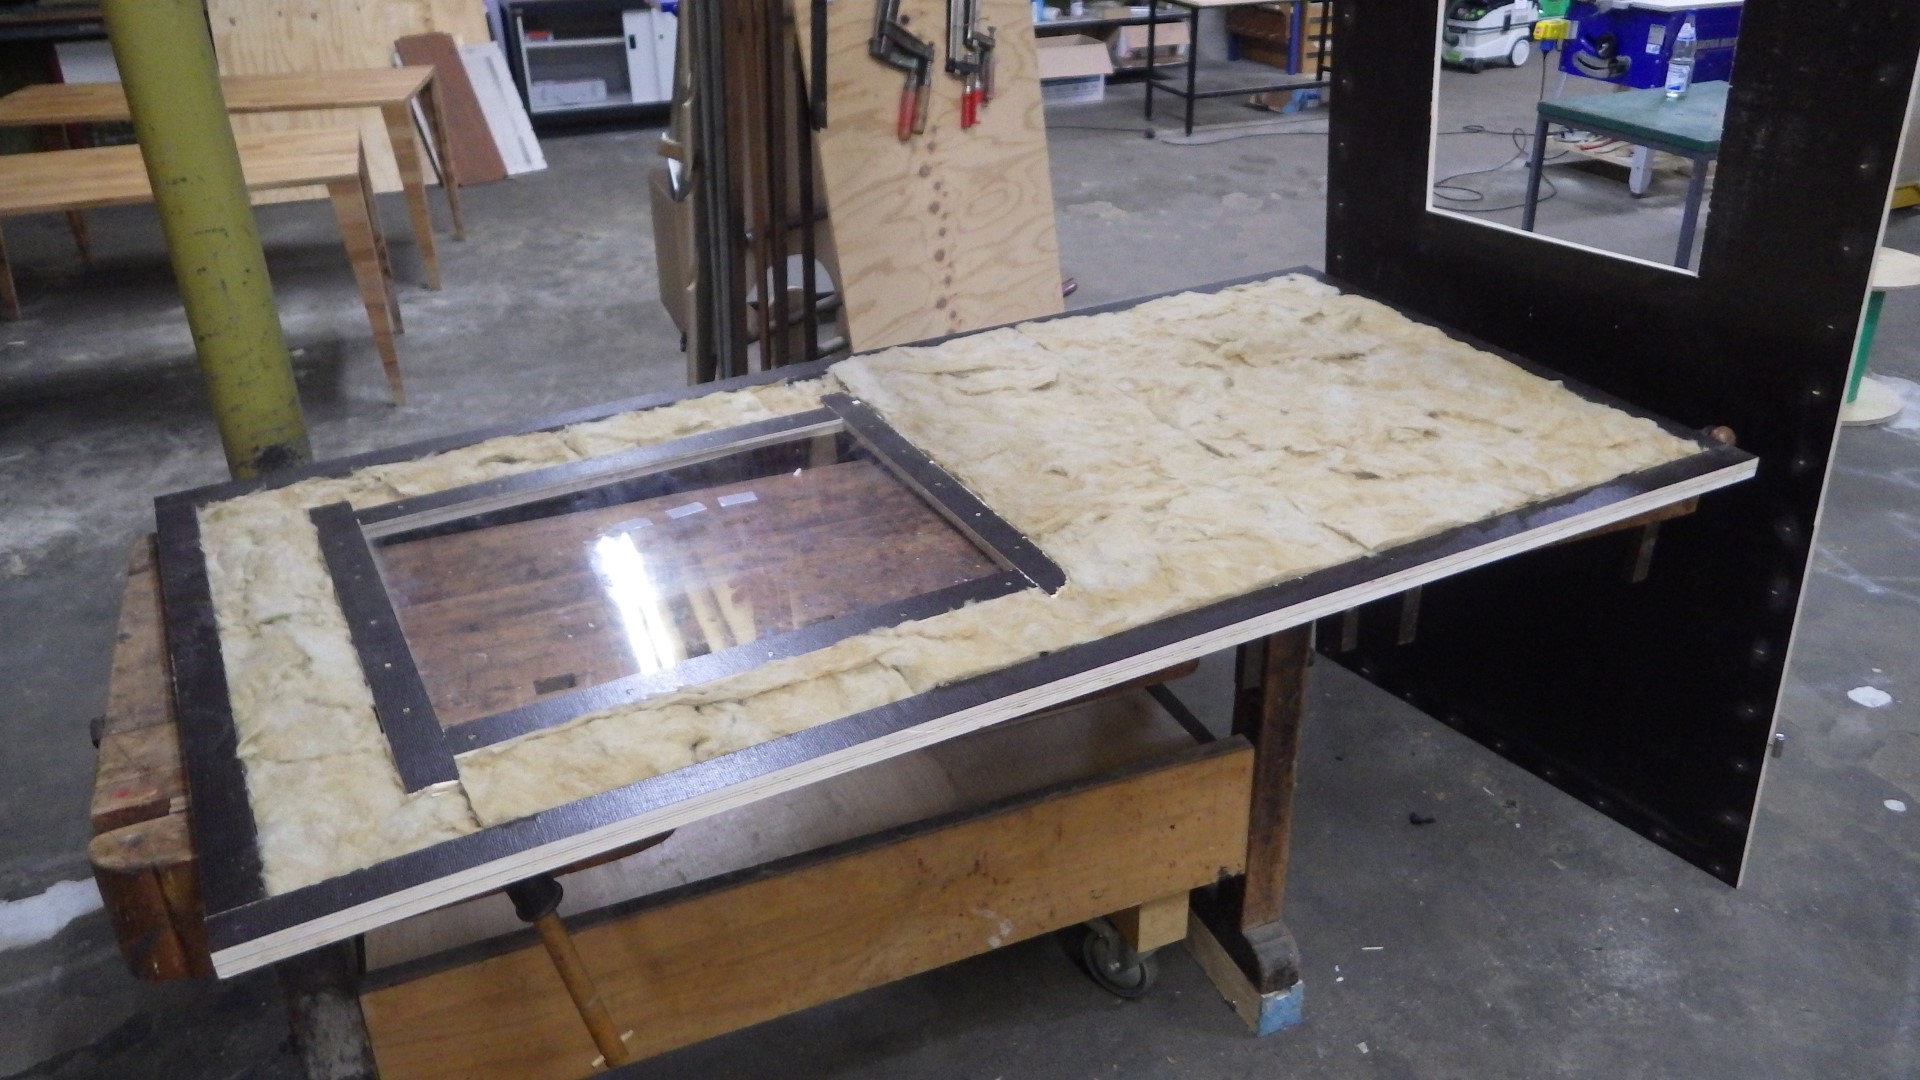
440 KB | vor der abschließenden Montage wurde eine Schicht Mineralwolle in die Tür gelegt - Ziel war eine möglichst vollständige Füllung '''ohne Stopfen''', was die Wirkung deutlich reduziert hätte Project:Schallschutztüren | 1 |
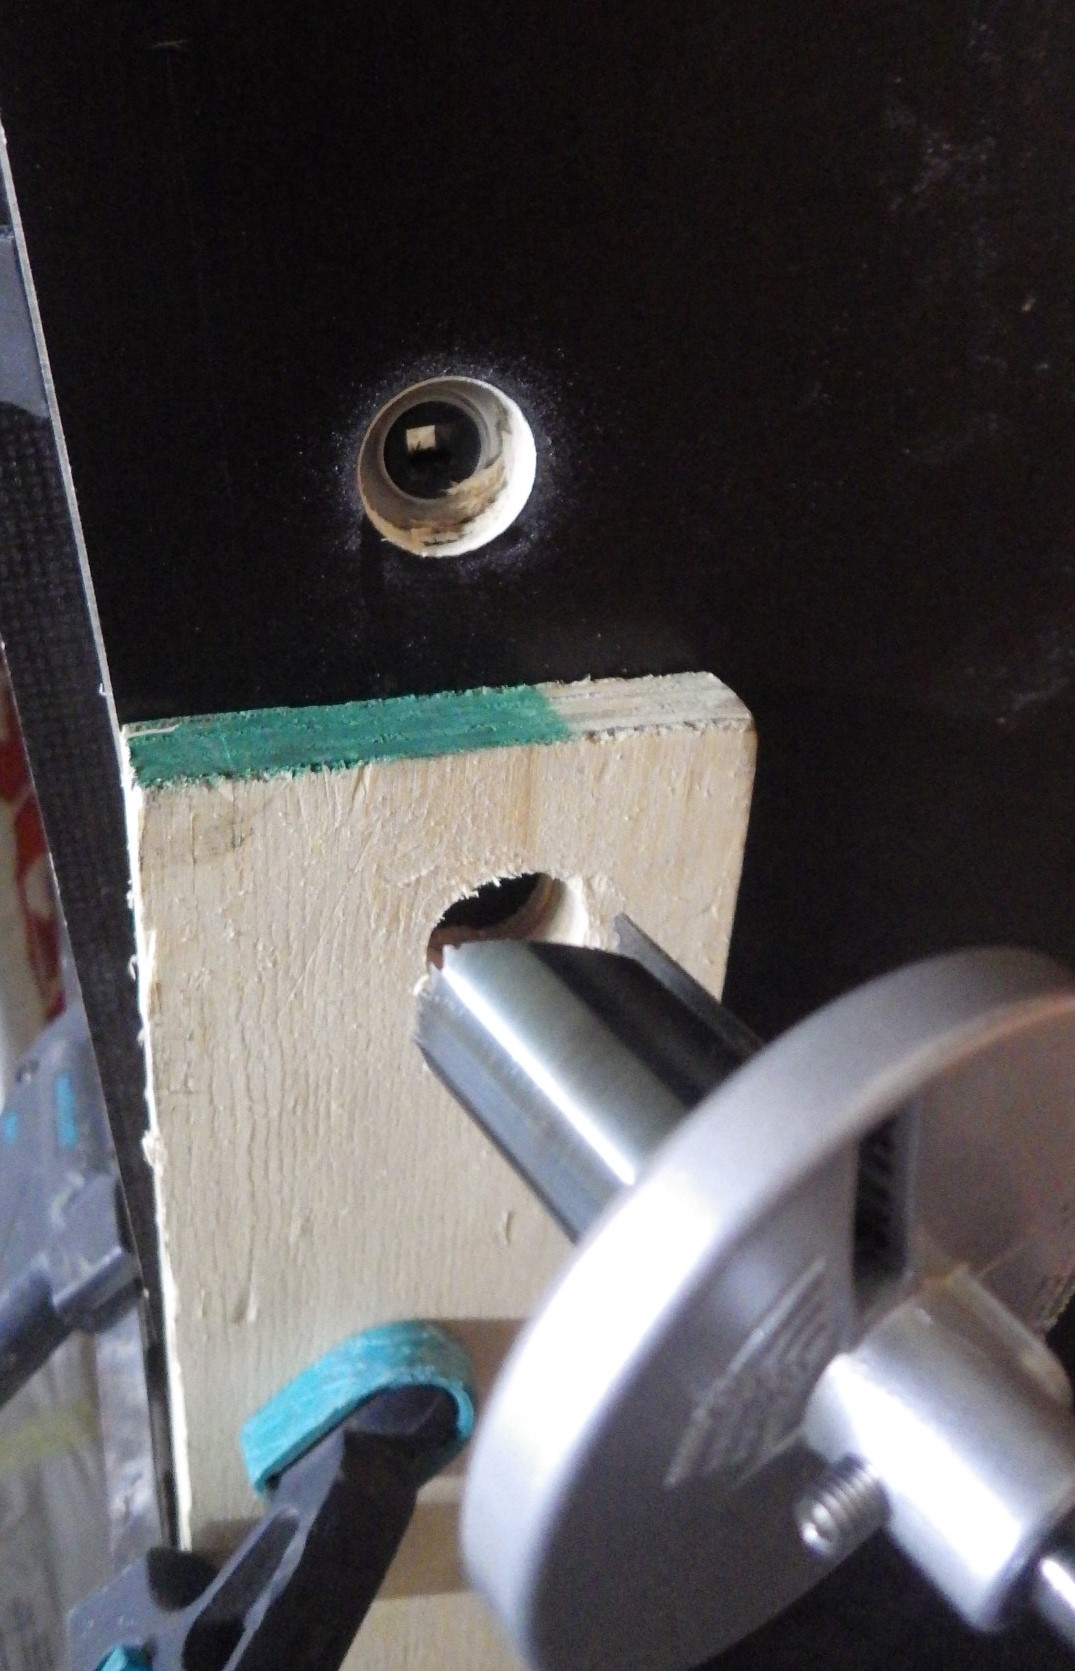
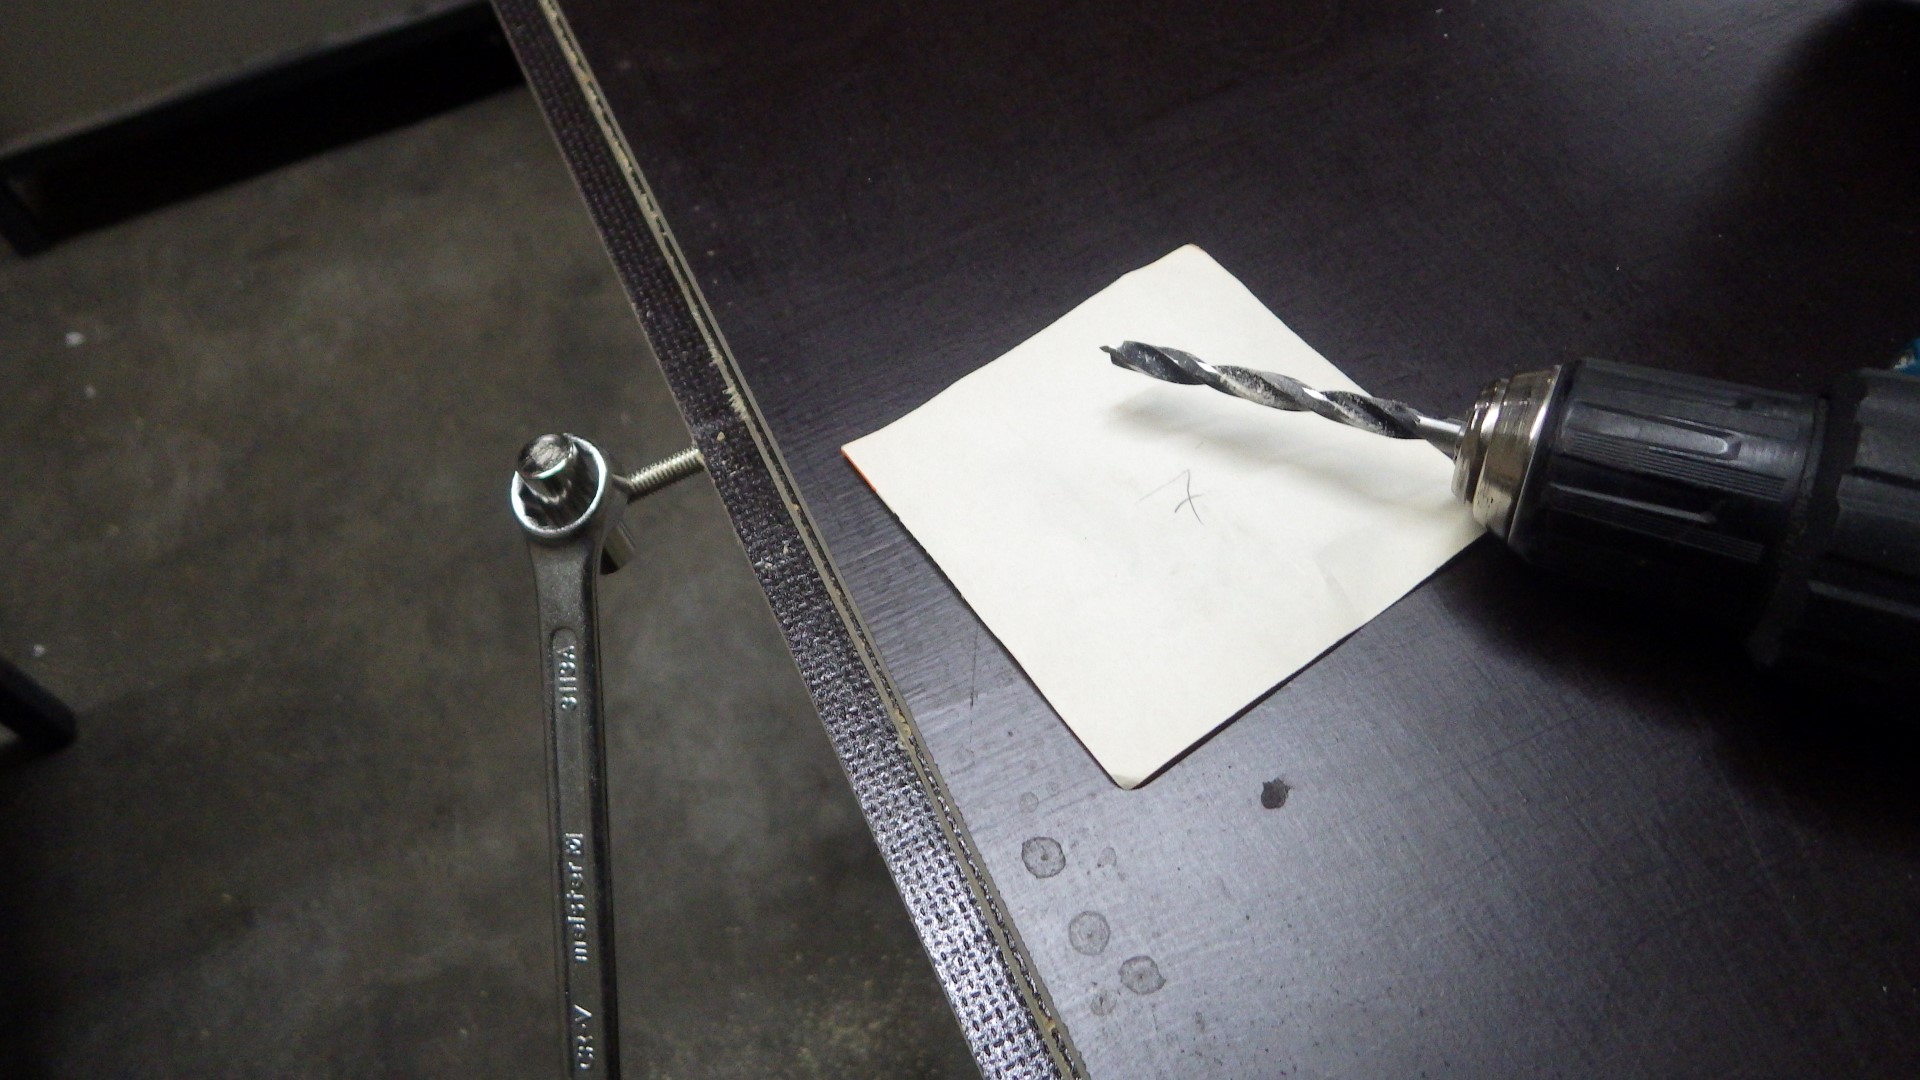
| 14:35, 30 December 2020 | Schalltür7.JPG (file) |  |
380 KB | Die Löcher für die Drückergarnitur wurden mit bereits eingebautem Schloss gebohrt - damit der Pilotbohrer der Lochsäge sich nicht in zuvor gesetzte, kleine "Suchbohrungen" verlief, wurde eine einfache Führung (aka Brett mit Loch) an die richtige Stelle gespannt Project:Schallschutztüren | 1 |
| 14:30, 30 December 2020 | Schalltür6.JPG (file) |  |
632 KB | vom Trockenbau war noch Dichtungsband übrig, mit dem das Schloss ein wenig entkoppelt und vor allem vor eindringender Mineralwolle geschützt wurde Project:Schallschutztüren | 1 |
| 14:29, 30 December 2020 | Schalltür5.JPG (file) |  |
478 KB | hier sind noch einmal die fertigen Aussparungen für das Schloss sichtbar - unbedingt gut testen, bevor Korrekturen durch den weiteren Zusammenbau schwieriger werden! Project:Schallschutztüren | 1 |
| 14:26, 30 December 2020 | Schalltür4.JPG (file) |  |
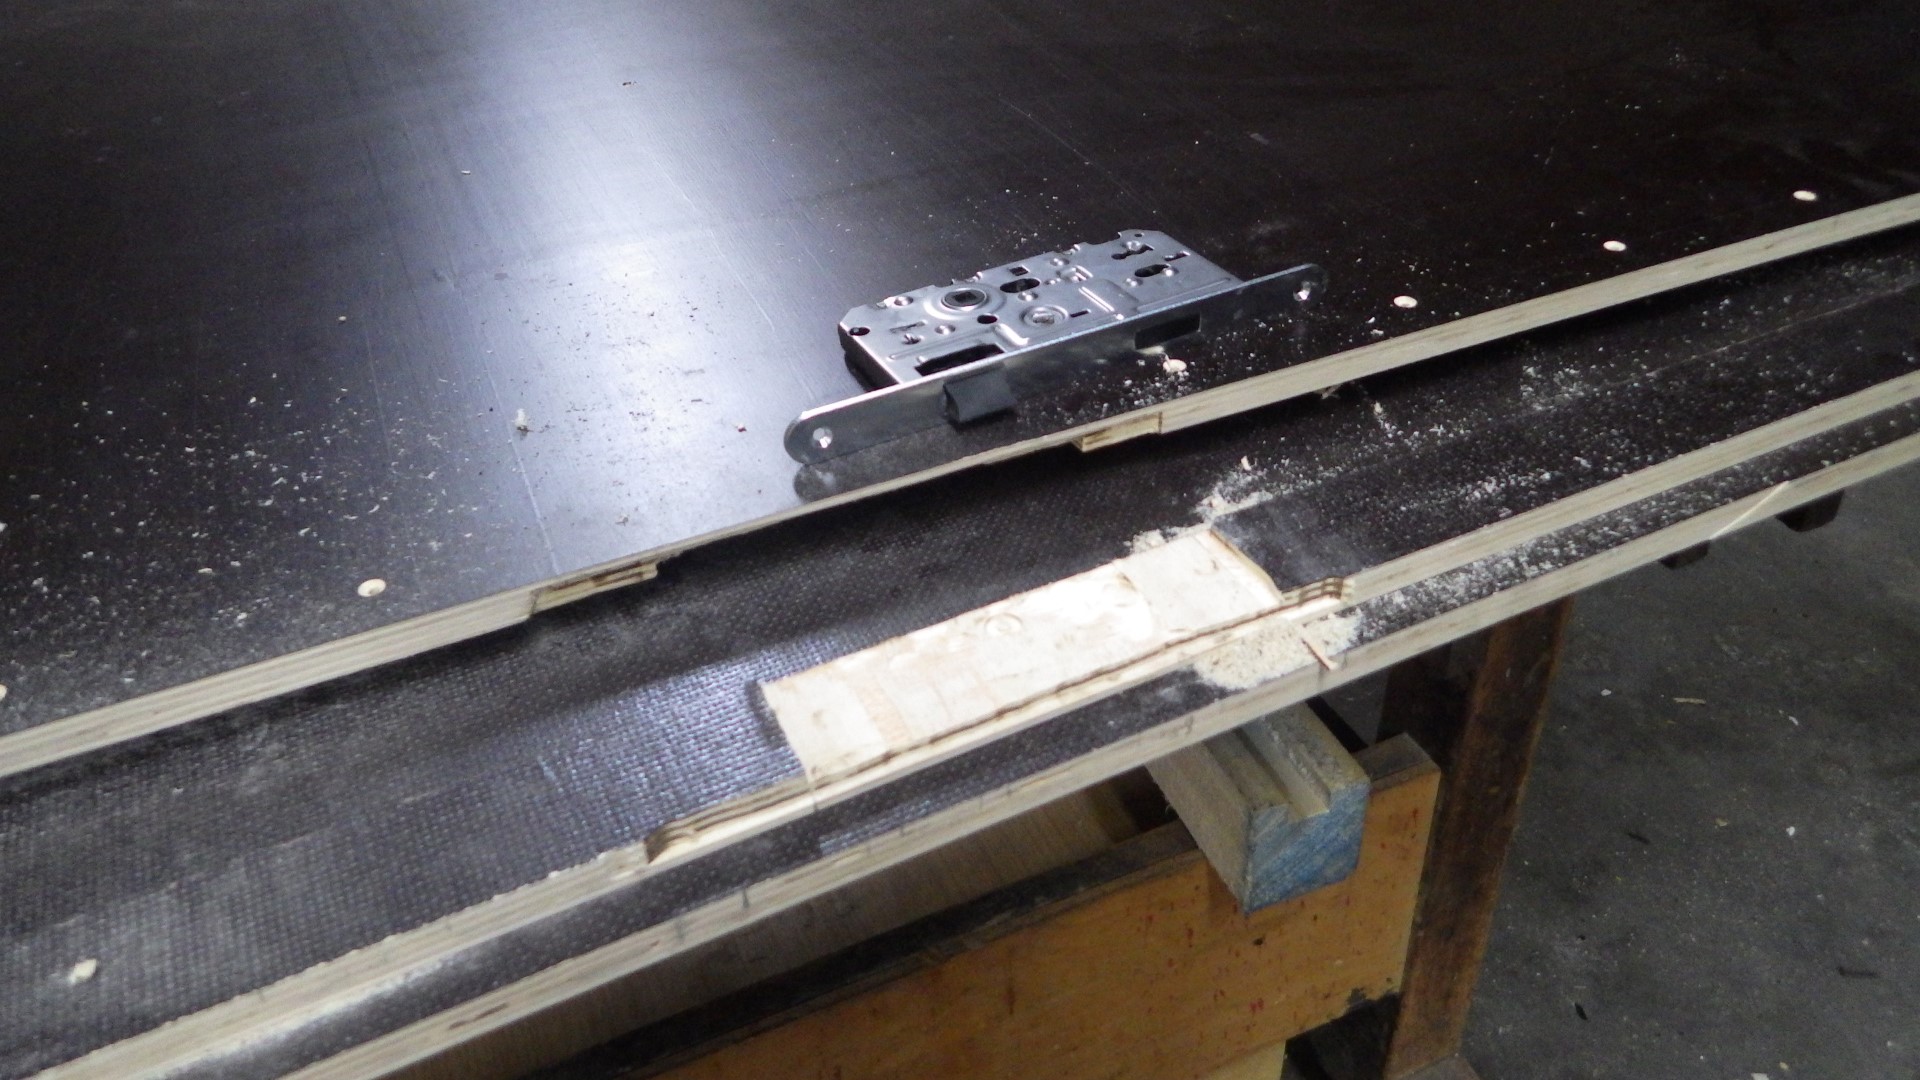
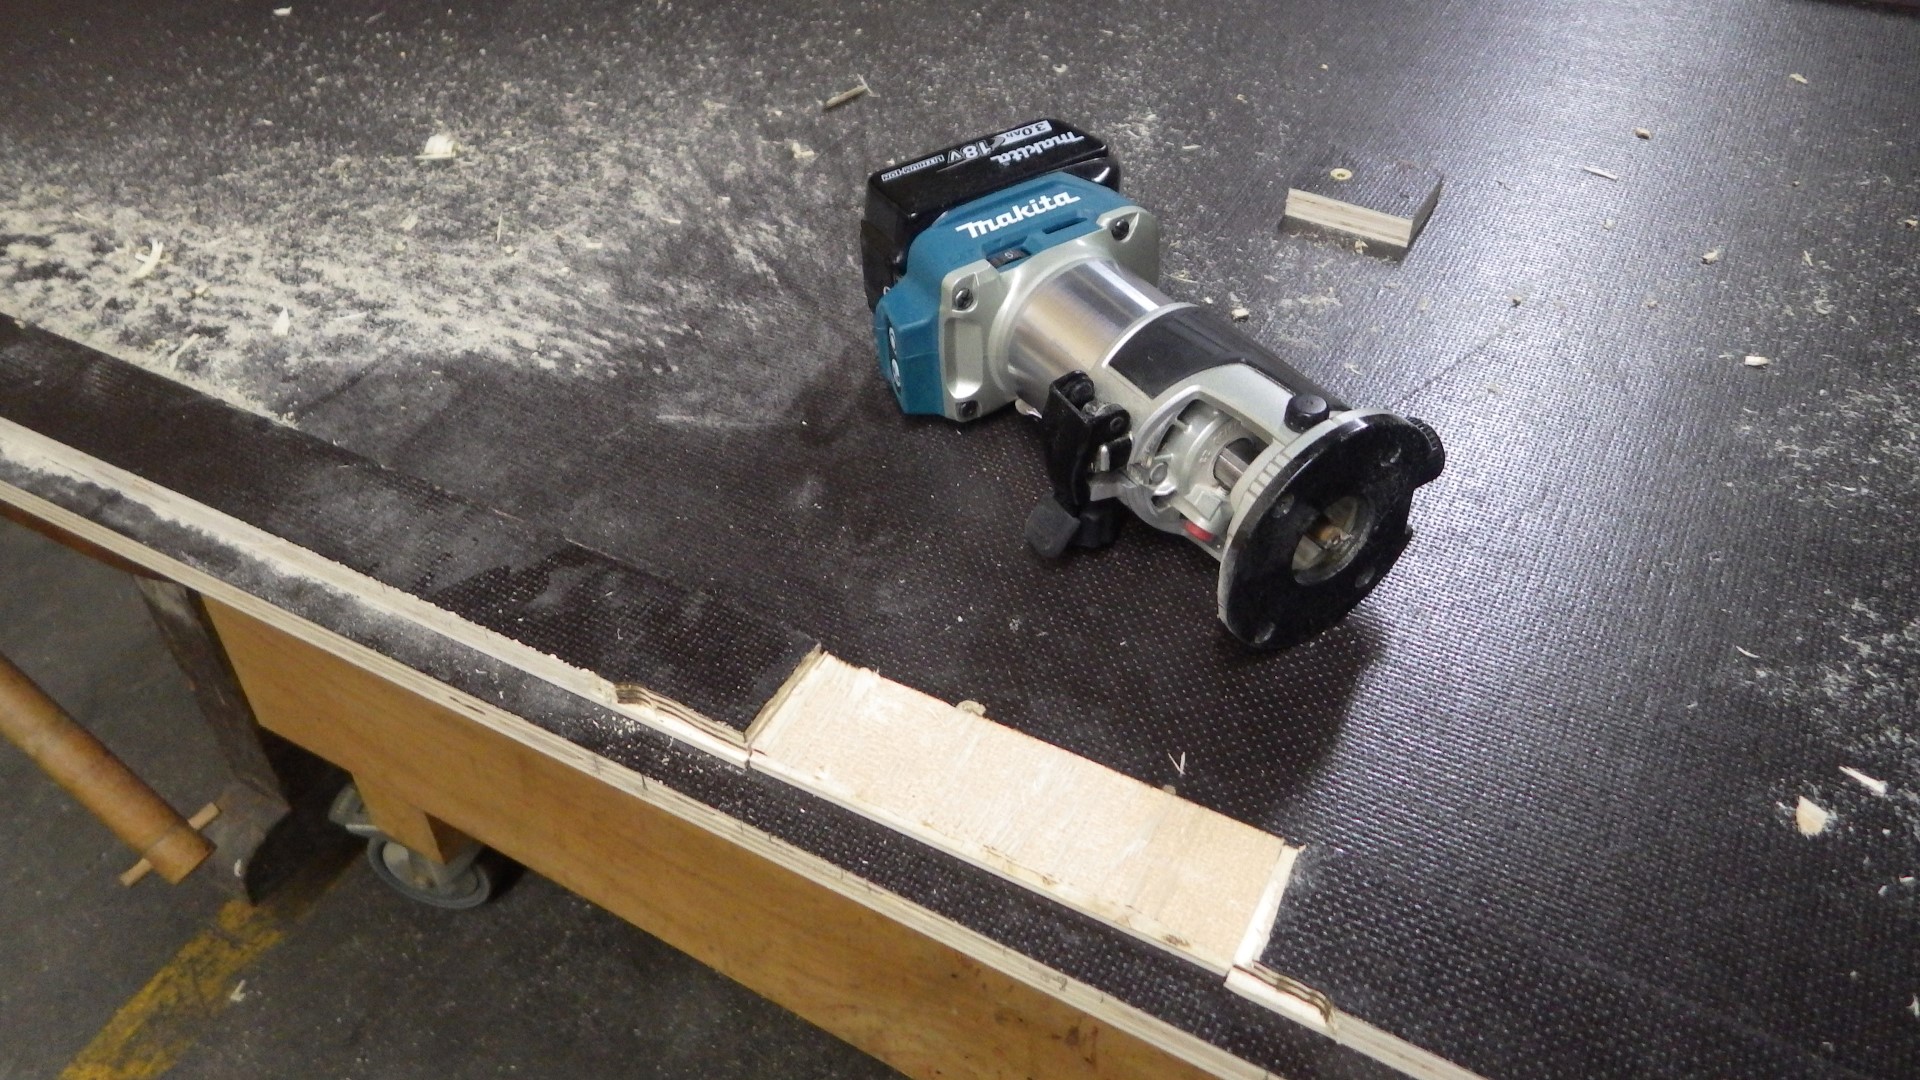
666 KB | die Aussparung für das Einsteckschloss ''kann'' man zwar im verschraubten Zustand fräsen - denkt man aber rechtzeitig daran, kann die Latte einfach auf dem Frästisch bearbeitet werden! Project:Schallschutztüren | 1 |
| 14:24, 30 December 2020 | Schalltür3.JPG (file) |  |
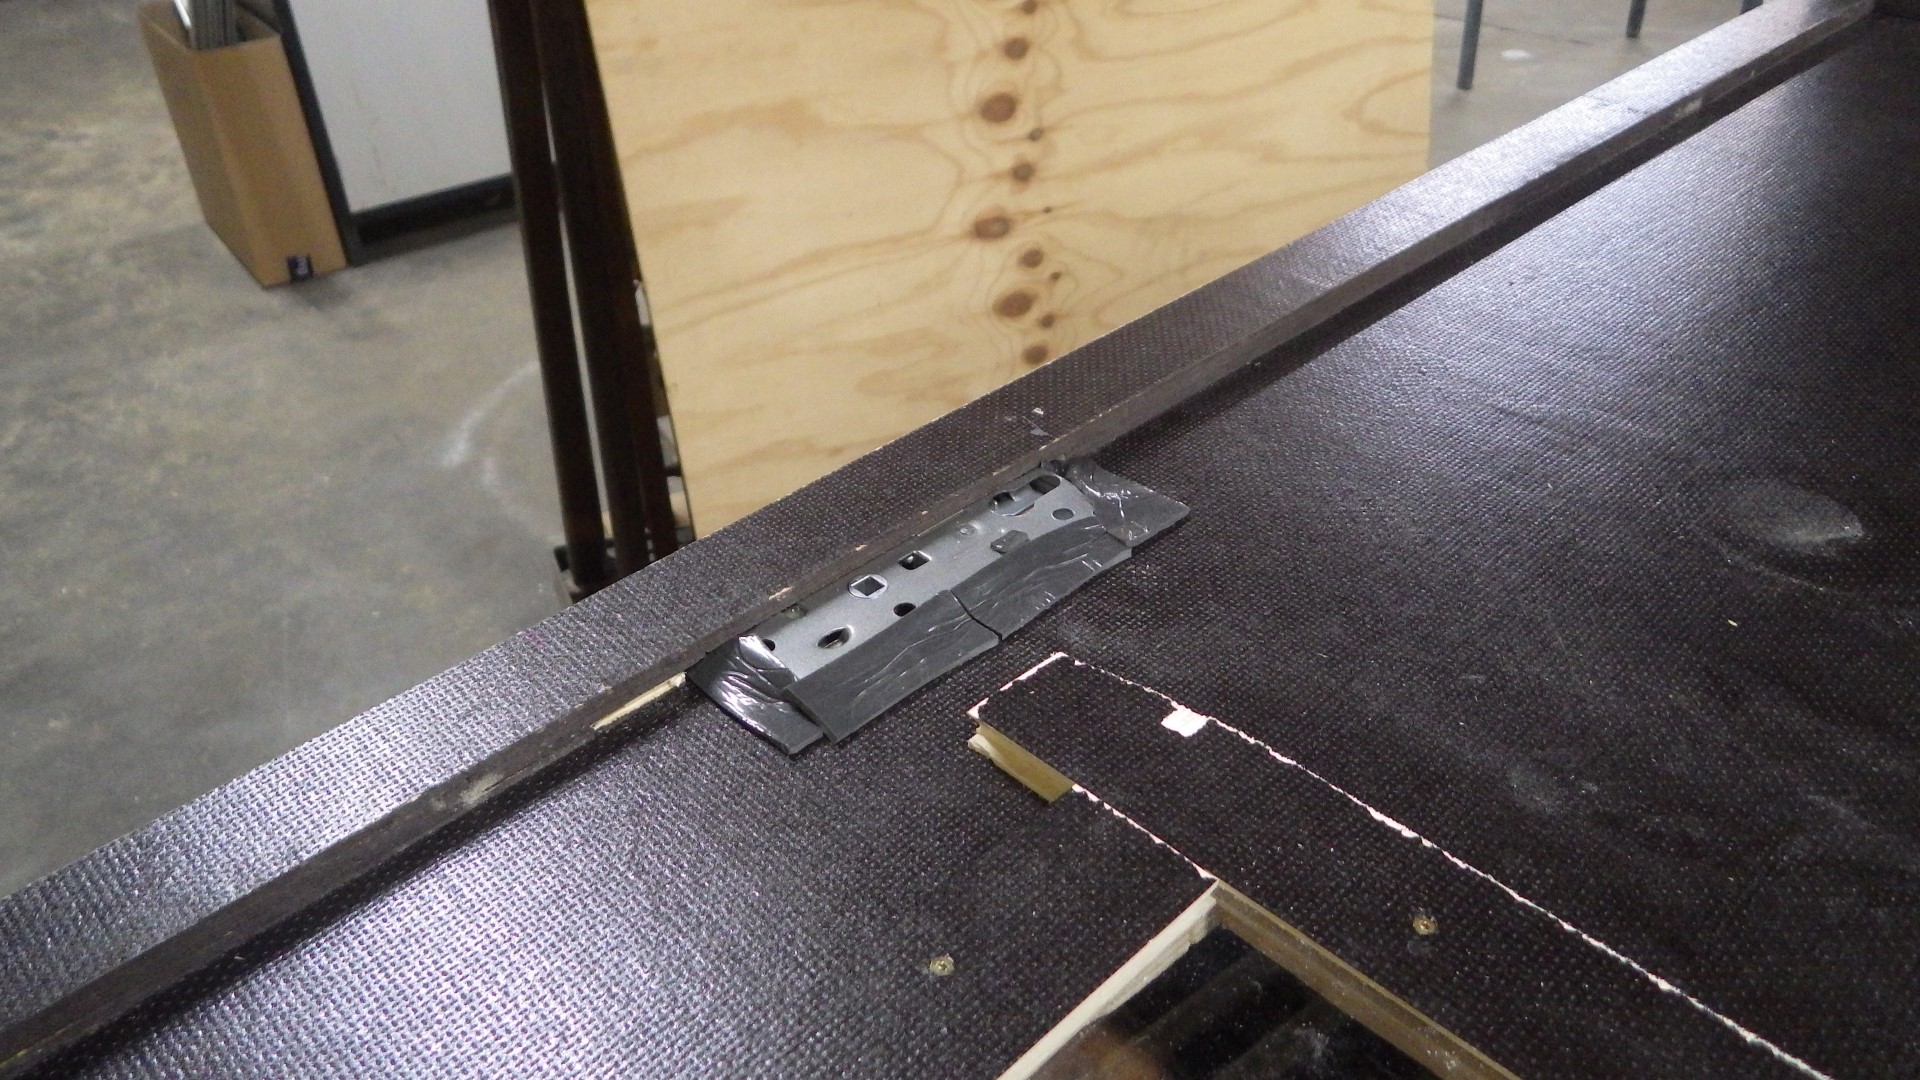
526 KB | vor dem Verschrauben sollte das Einsteckschloss eingepasst werden - für den richtigen Sitz im Rahmen musste eine Vertiefung in die kleinere Platte gefräst werden Project:Schallschutztüren | 1 |
| 14:21, 30 December 2020 | Schalltür2.JPG (file) |  |
488 KB | die beiden massiven Platten wurden mit einem leichten Rahmen als Mittelschicht verschraubt - mit einem Zirkel können solche Bohrungen ohne Rechnen gleichmäßig angeordnet werden Project:Schallschutztüren | 1 |
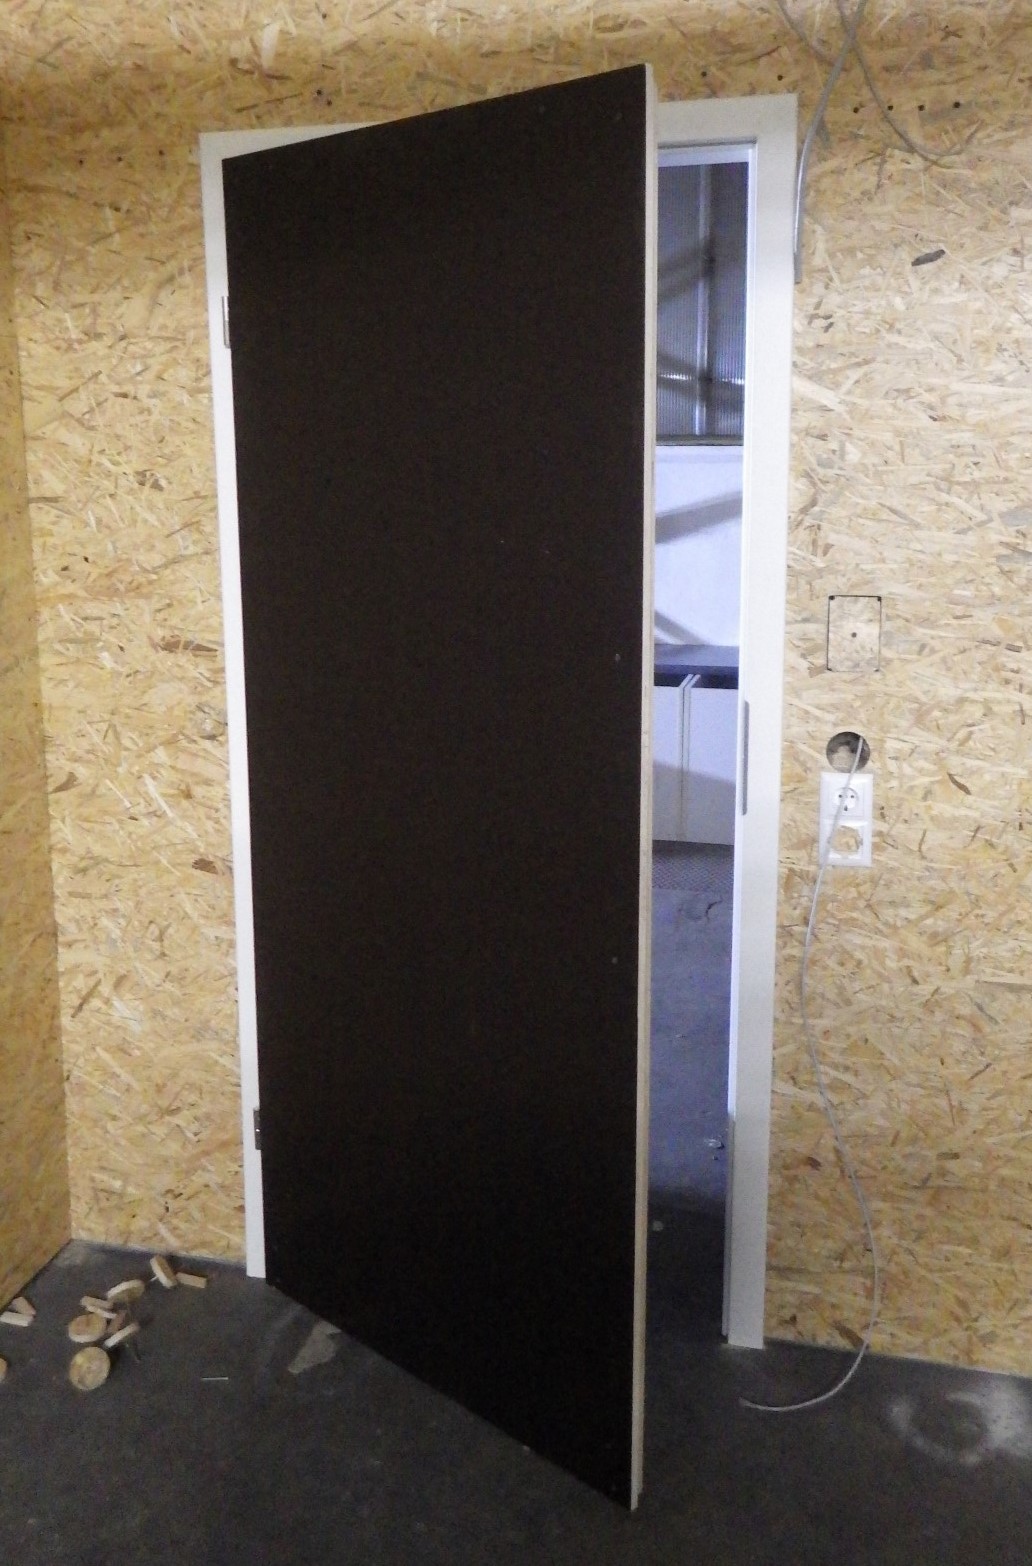
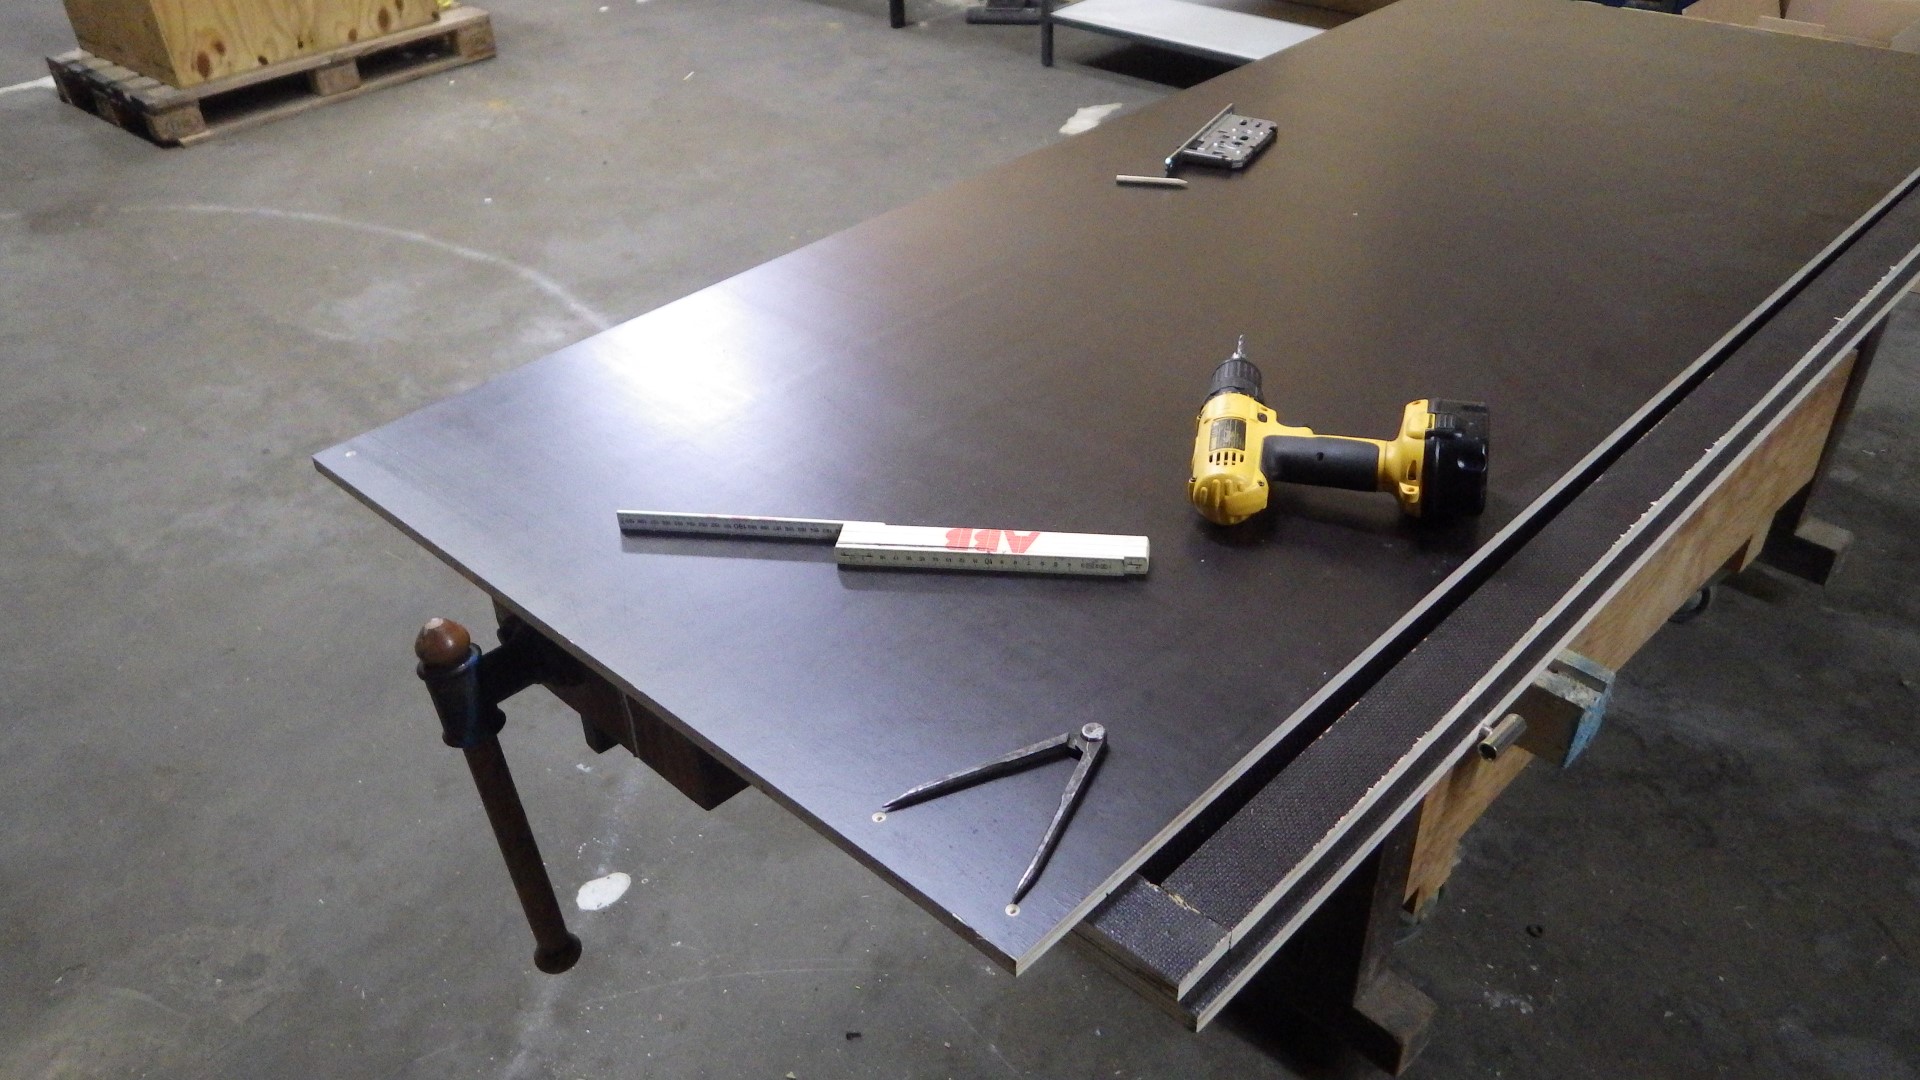
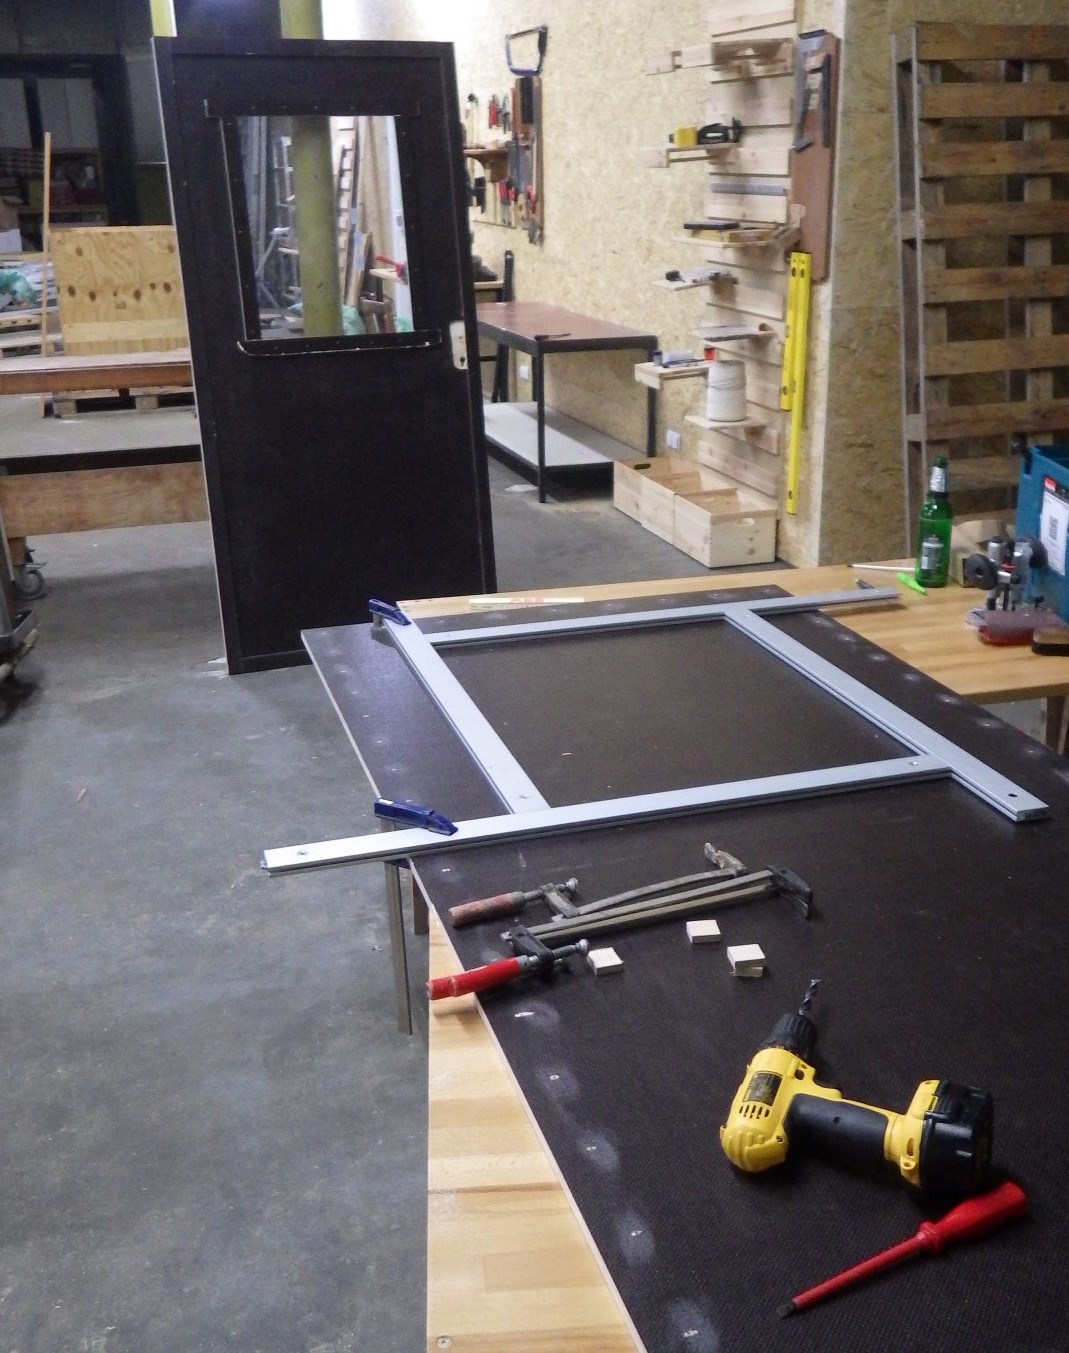
| 12:31, 30 December 2020 | Schalltür1.JPG (file) |  |
422 KB | sobald eine Tür auf den Rahmen zugeschnitten war, wurden die Bänder eingedreht um den Sitz möglichst früh testen und ggf. verbessern zu können Project:Schallschutztüren | 1 |
| 12:18, 30 December 2020 | Schalltür0.JPG (file) |  |
375 KB | "Baustelle" für unsere Schallschutztüren kurz vor Fertigstellung | 1 |
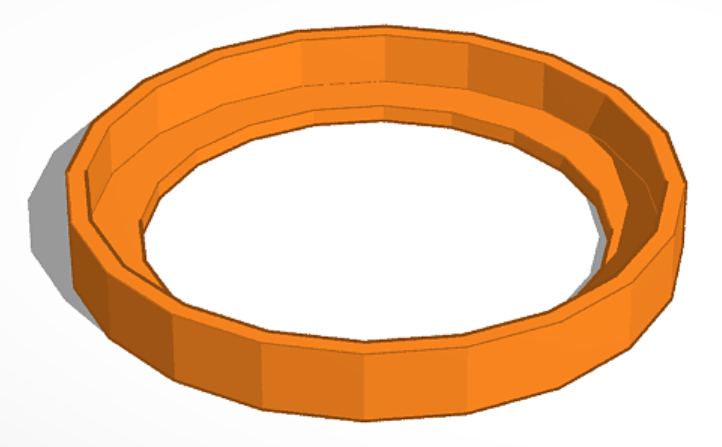
| 11:23, 30 December 2020 | Fishcage3D.png (file) |  |
114 KB | final snap ring design in Tinkercad - super fancy, I know! Project:Fish Cages | 1 |
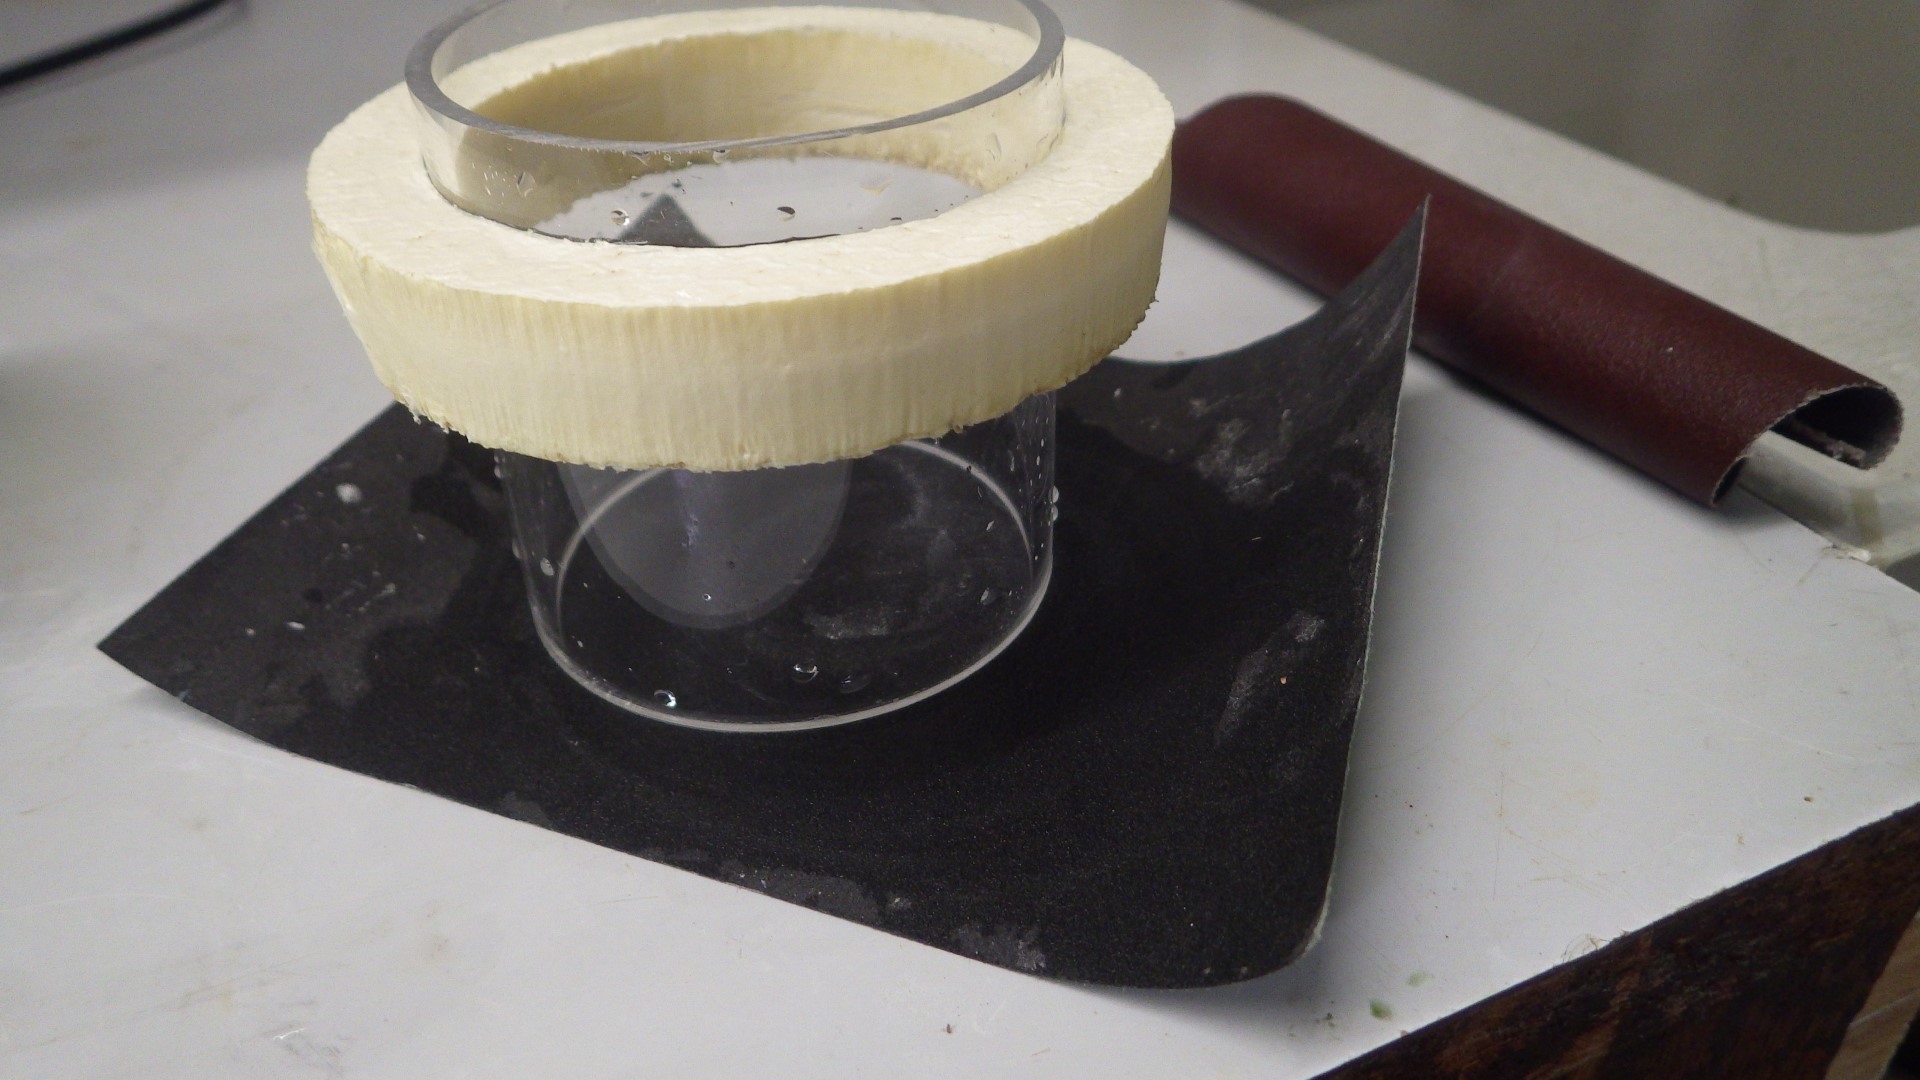
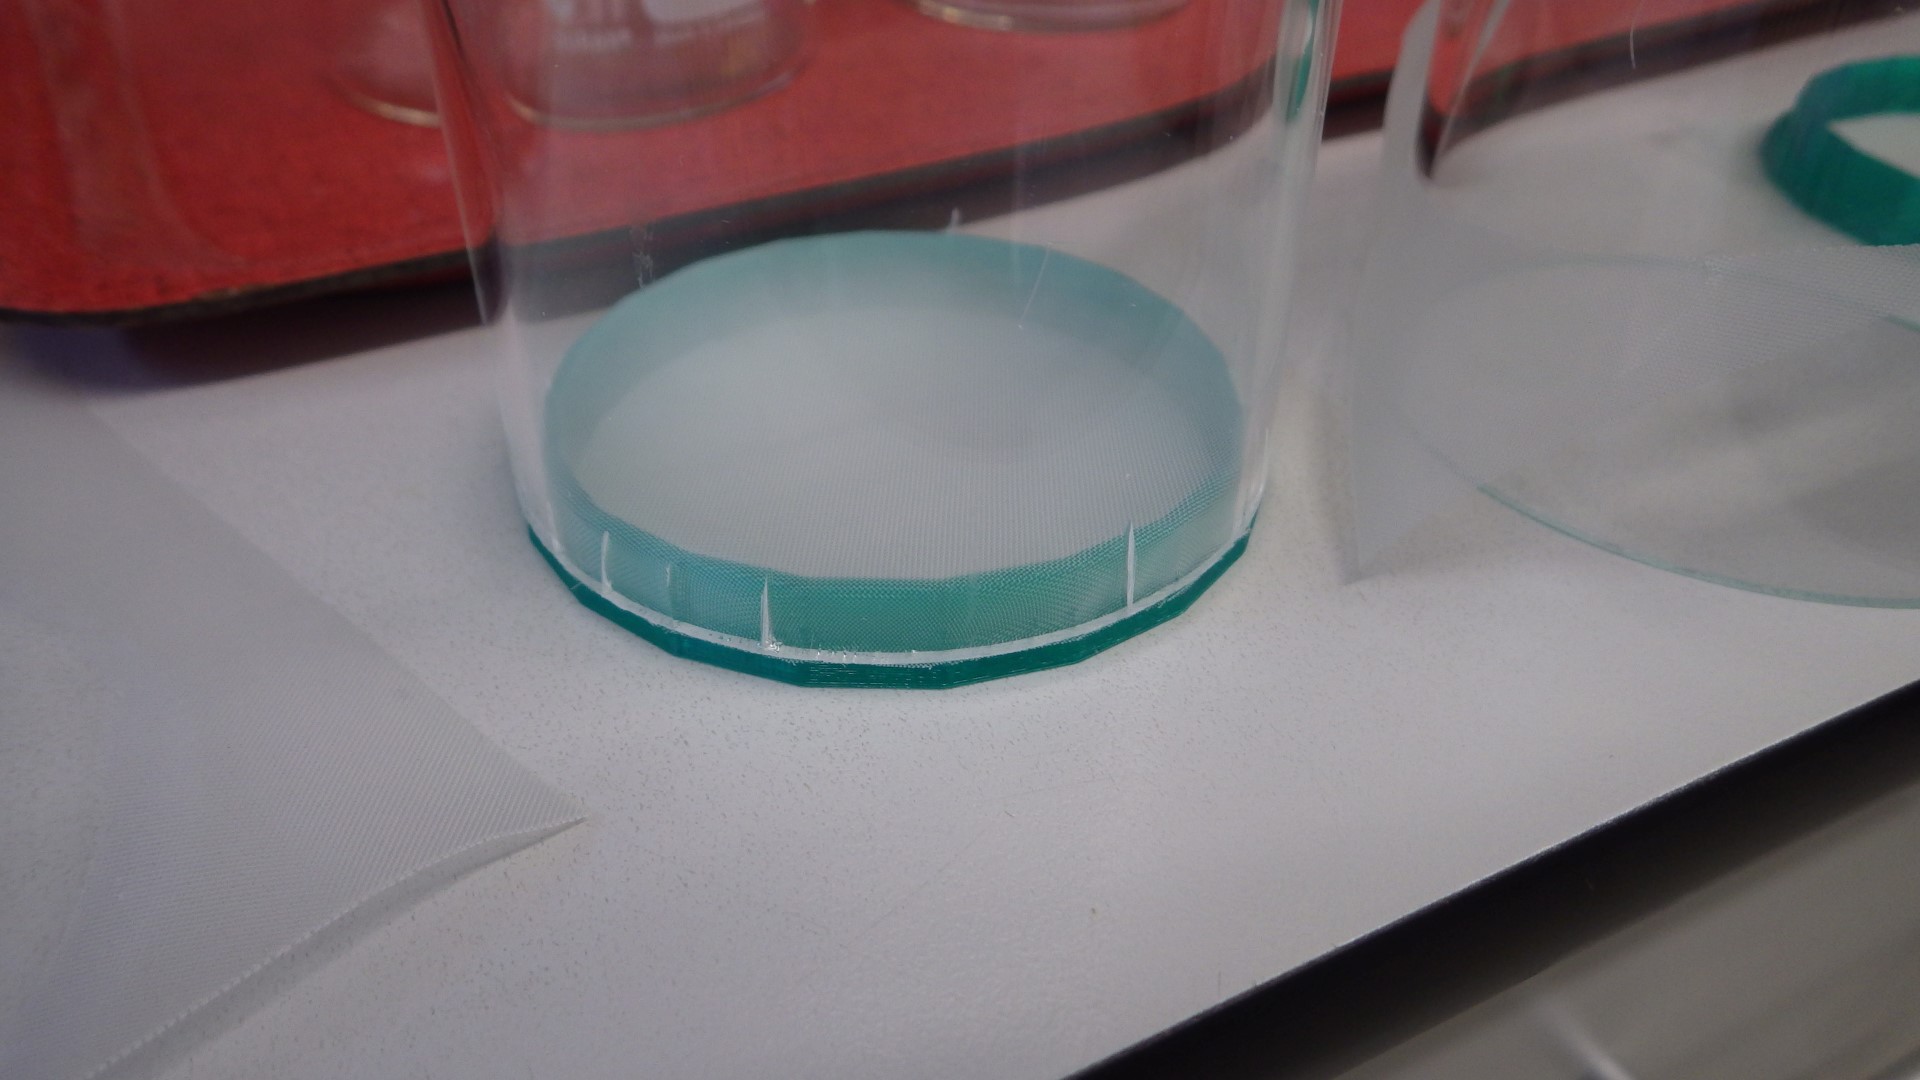
| 11:16, 30 December 2020 | Fishcage7.JPG (file) |  |
371 KB | the bottom ends of the cages were wet sanded until they were even enough to form a tight seal with the mesh & snap ring Project:Fish Cages | 1 |
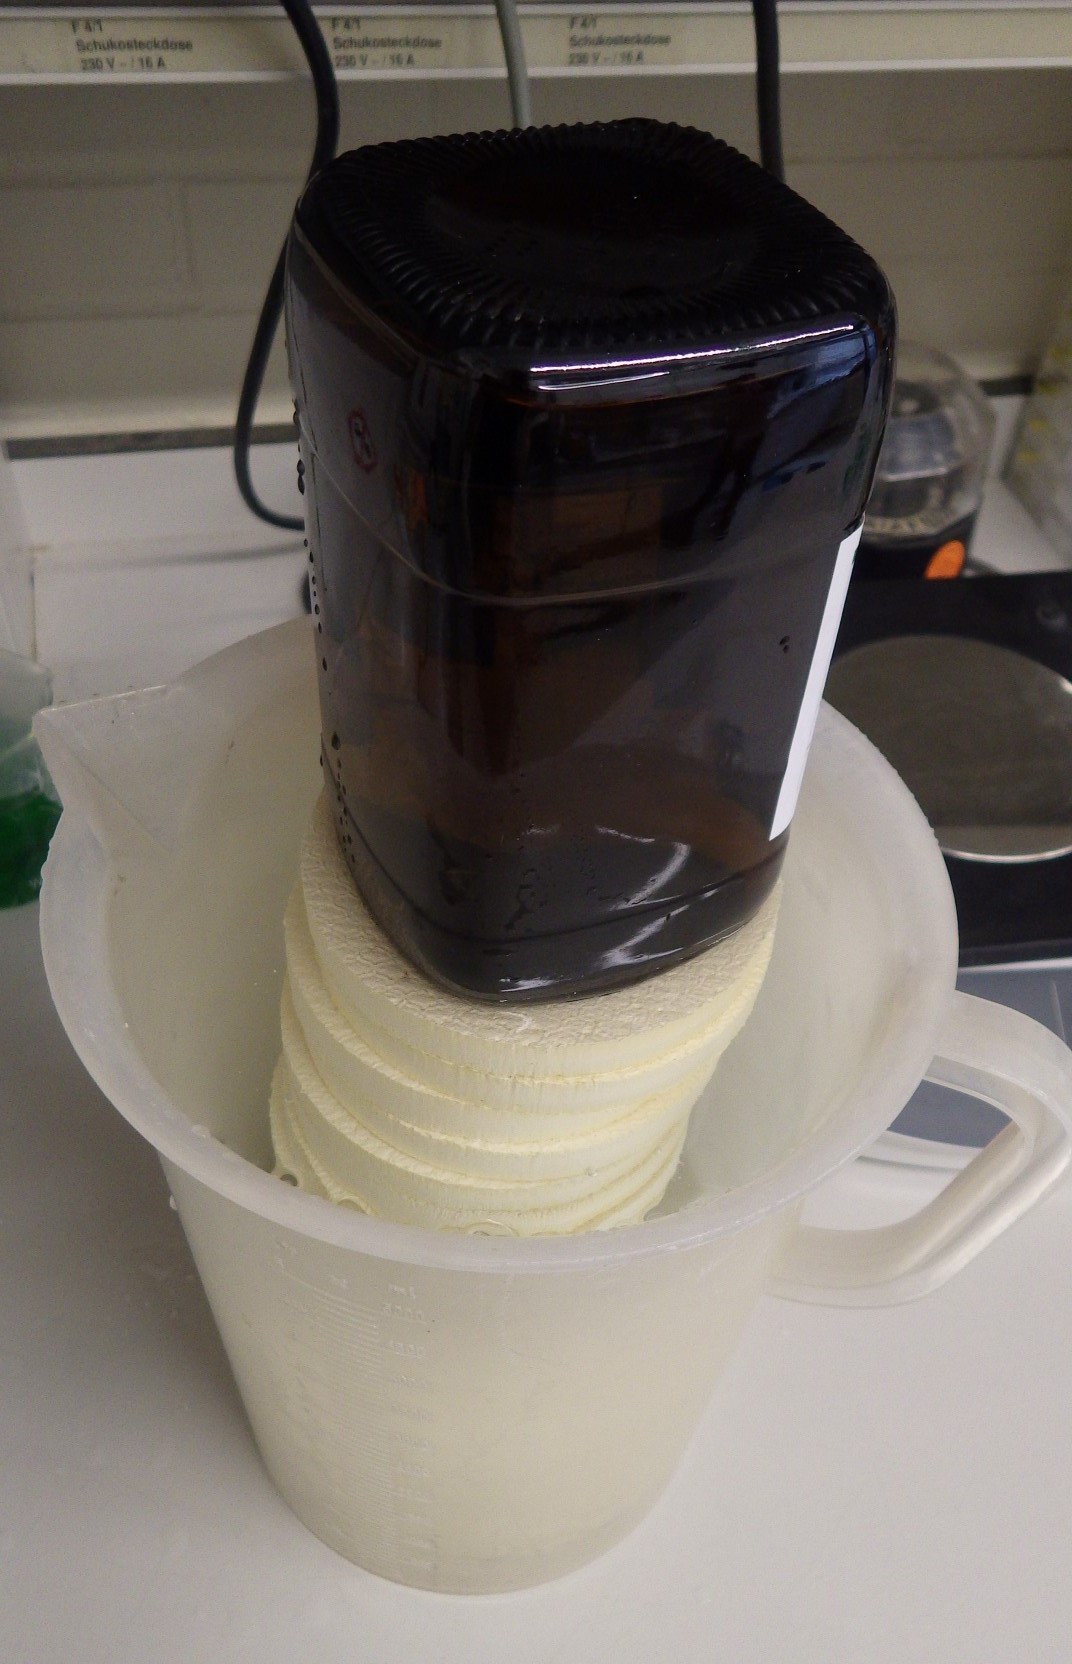
| 11:10, 30 December 2020 | Fishcage6.JPG (file) |  |
342 KB | the floaters were held underwater for a couple of days after washing with ethanol to get rid of the laser stench Project:Fish Cages | 1 |
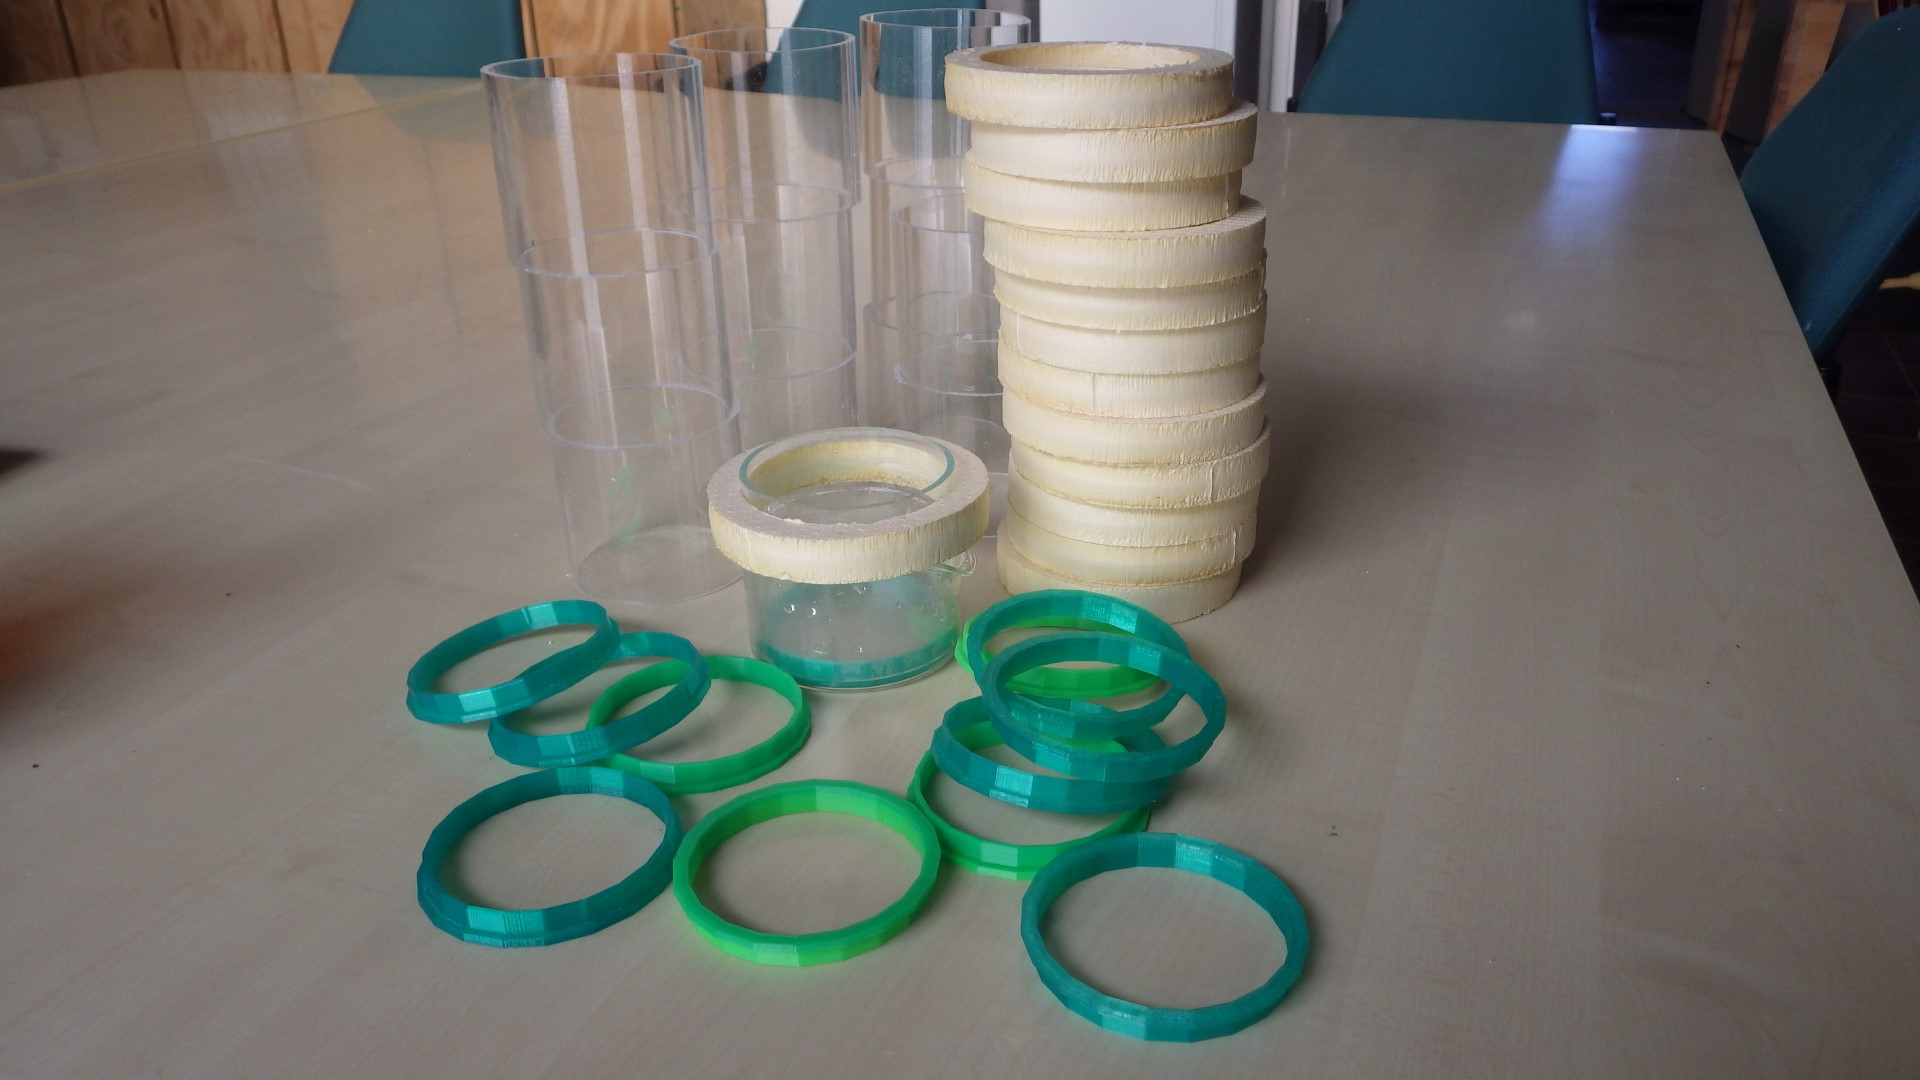
| 11:02, 30 December 2020 | Fishcage5.JPG (file) |  |
316 KB | all the parts after the "machine work" at the Space: tubes, floaters and snap rings Project:Fish Cages | 1 |
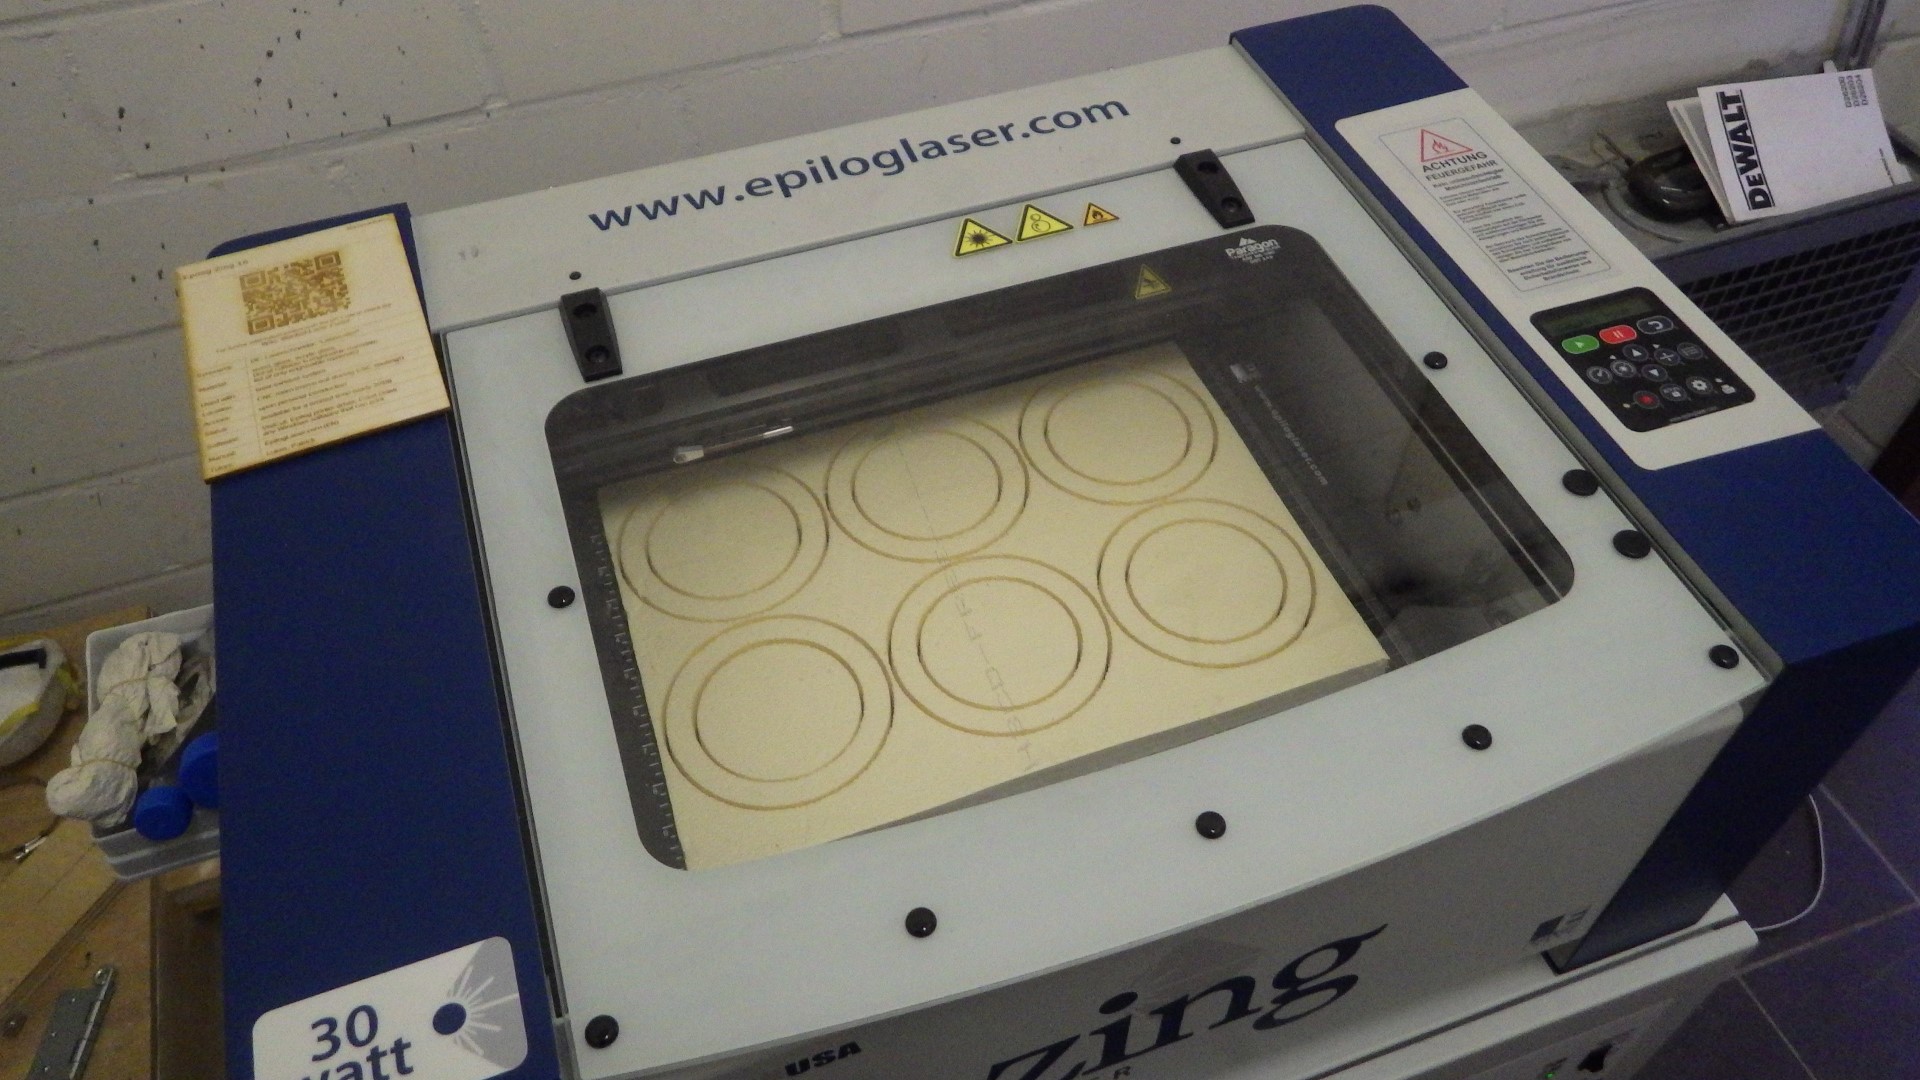
| 10:57, 30 December 2020 | Fishcage4.JPG (file) |  |
463 KB | laser cutting the floaters out of XPS Project:Fish Cages | 1 |
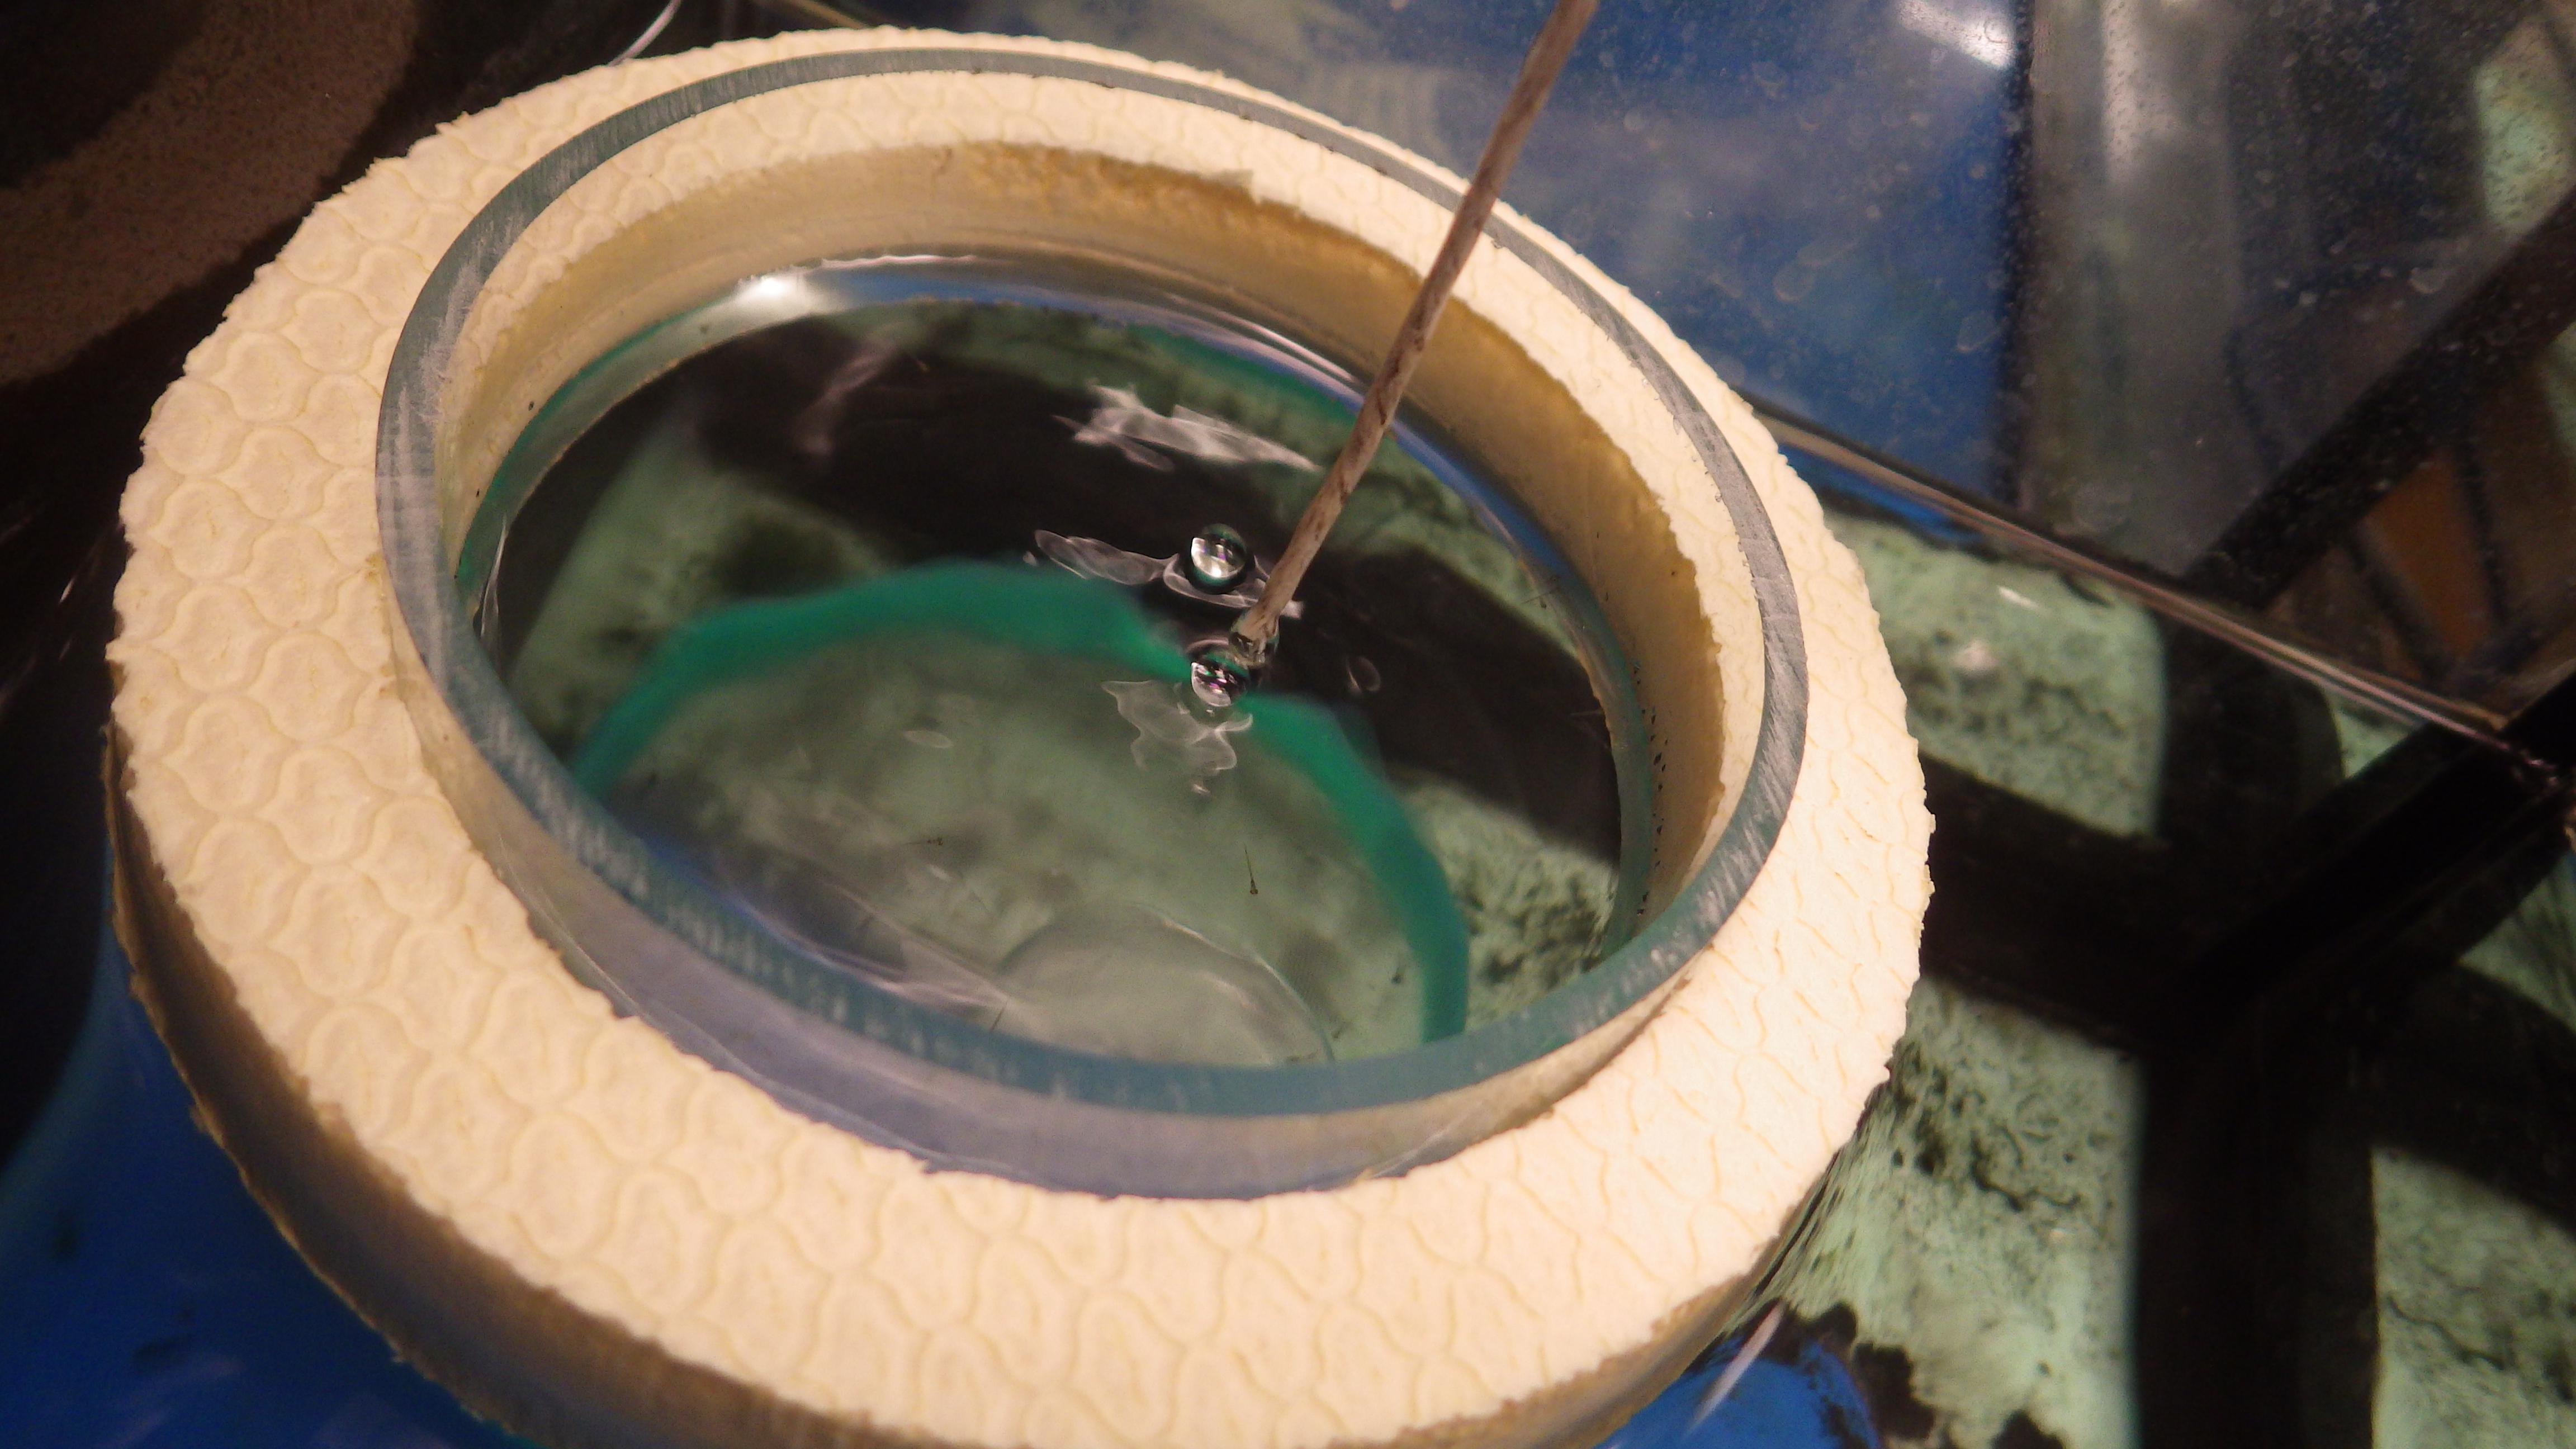
| 10:49, 30 December 2020 | Fishcage3.JPG (file) |  |
295 KB | a 3D printed snap ring that was just a bit too large - note the cracks forming in the acrylic glass tube Project:Fish Cages | 1 |
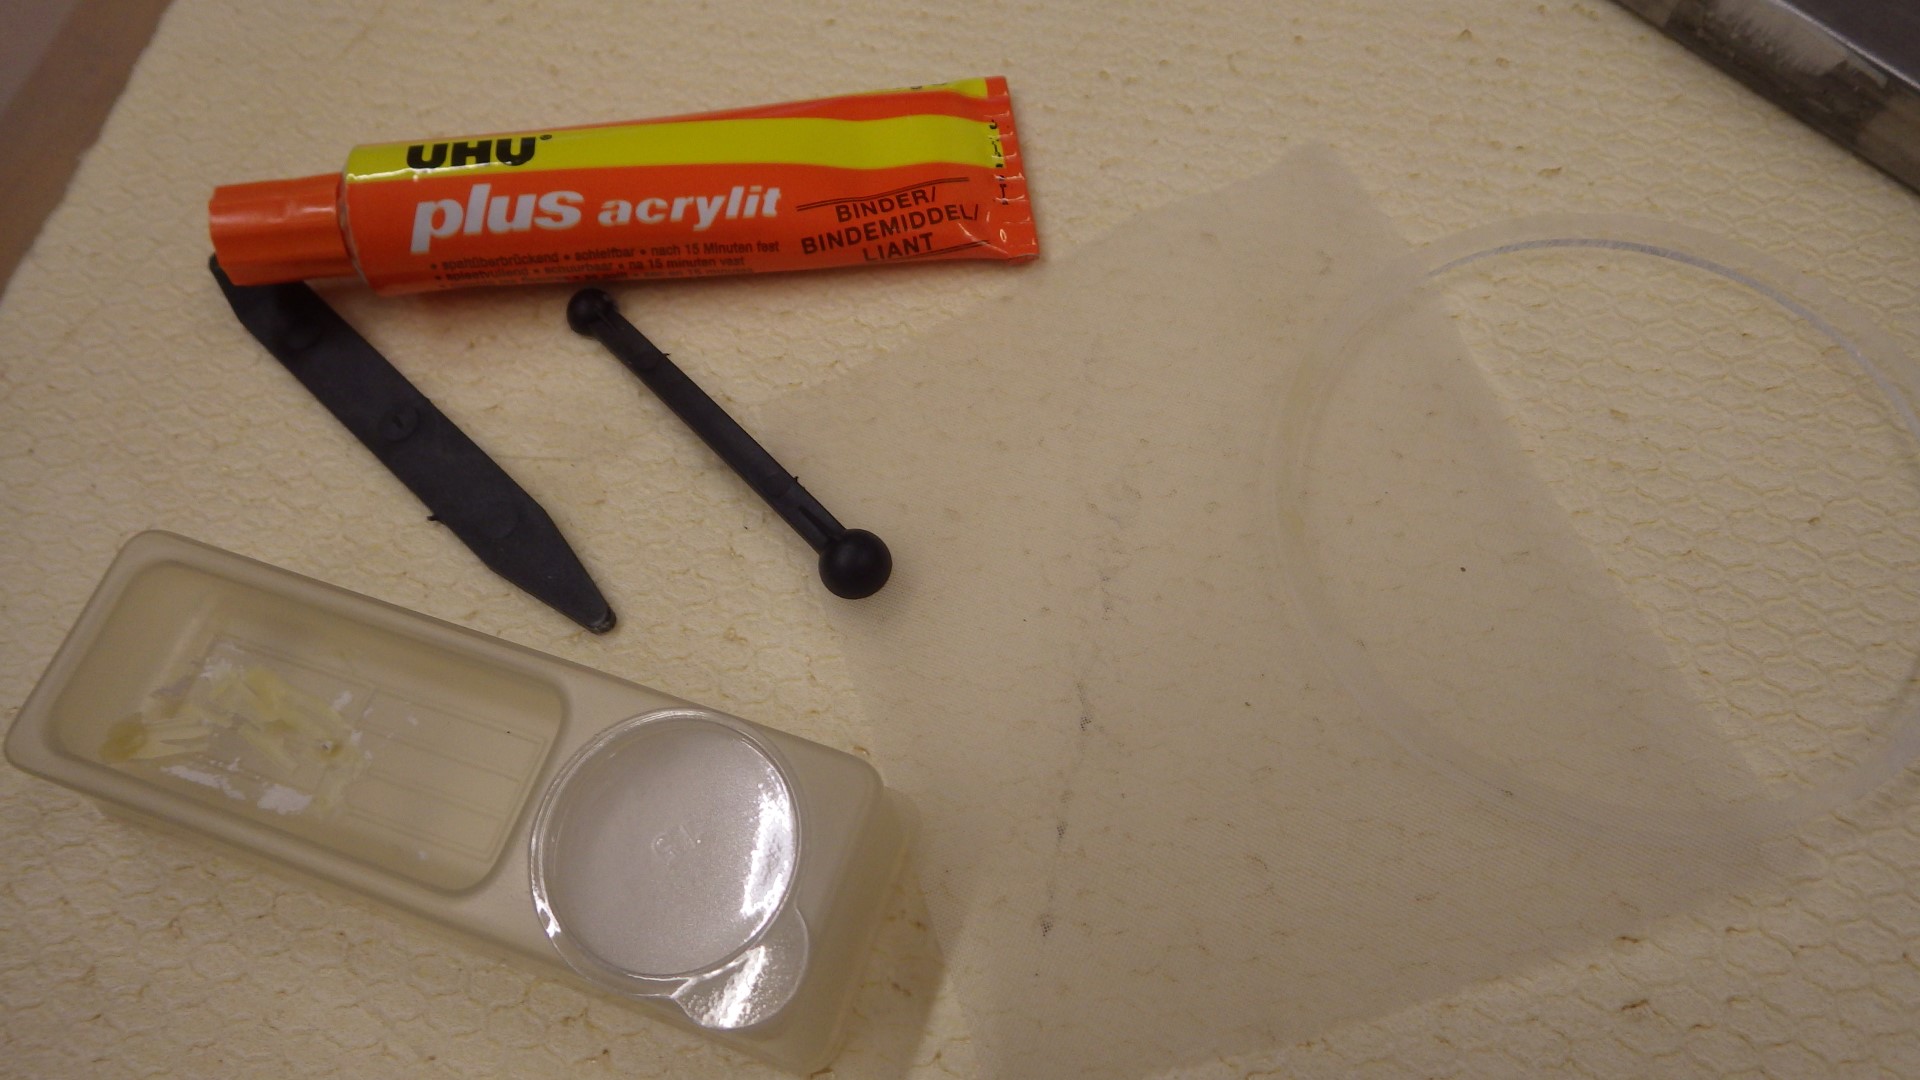
| 10:44, 30 December 2020 | Fishcage2.JPG (file) |  |
354 KB | The initial plan was to glue the mesh directly onto the cut face of the acrylic tube, but I did not know the material (probably a non-gluable plastic) and therefore failed quickly. Project:Fish Cages | 1 |
| 10:34, 30 December 2020 | Fishcage0.JPG (file) |  |
4.05 MB | a floating "fish cage" with some tiny zebrafish larvae inside Project:Fish Cages | 1 |
| 10:25, 30 December 2020 | Bandsaw sled guides.JPG (file) |  |
311 KB | some 3D printed T-slot guides were screwed into the bandsaw sled at just the right places for nice tracking on the machine table | 1 |
| 10:18, 30 December 2020 | Bandsaw sled without clamps.JPG.jpg (file) |  |
424 KB | 1 | |
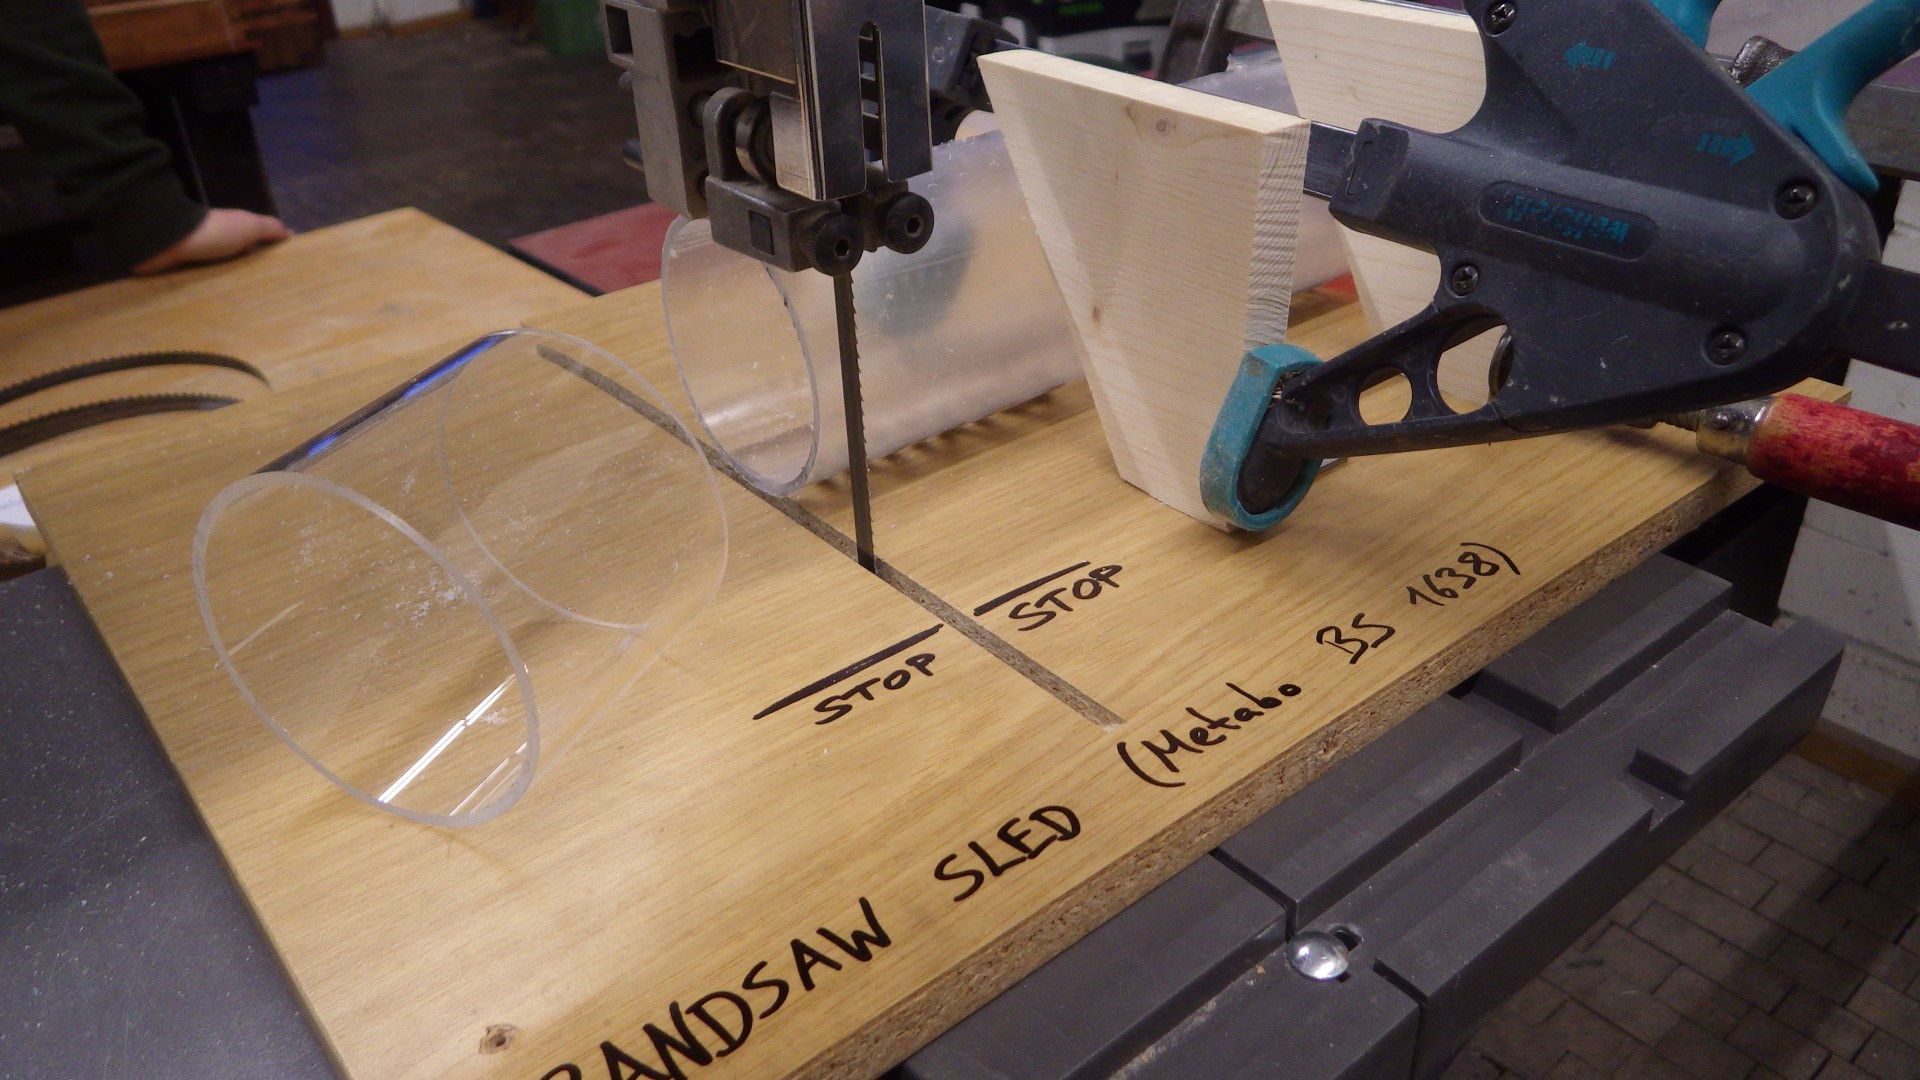
| 10:12, 30 December 2020 | Bandsaw sled.JPG (file) |  |
463 KB | clamps can be used with a bandsaw sled for maximum safety, e.g. when there is a high danger of round stock rolling around | 1 |
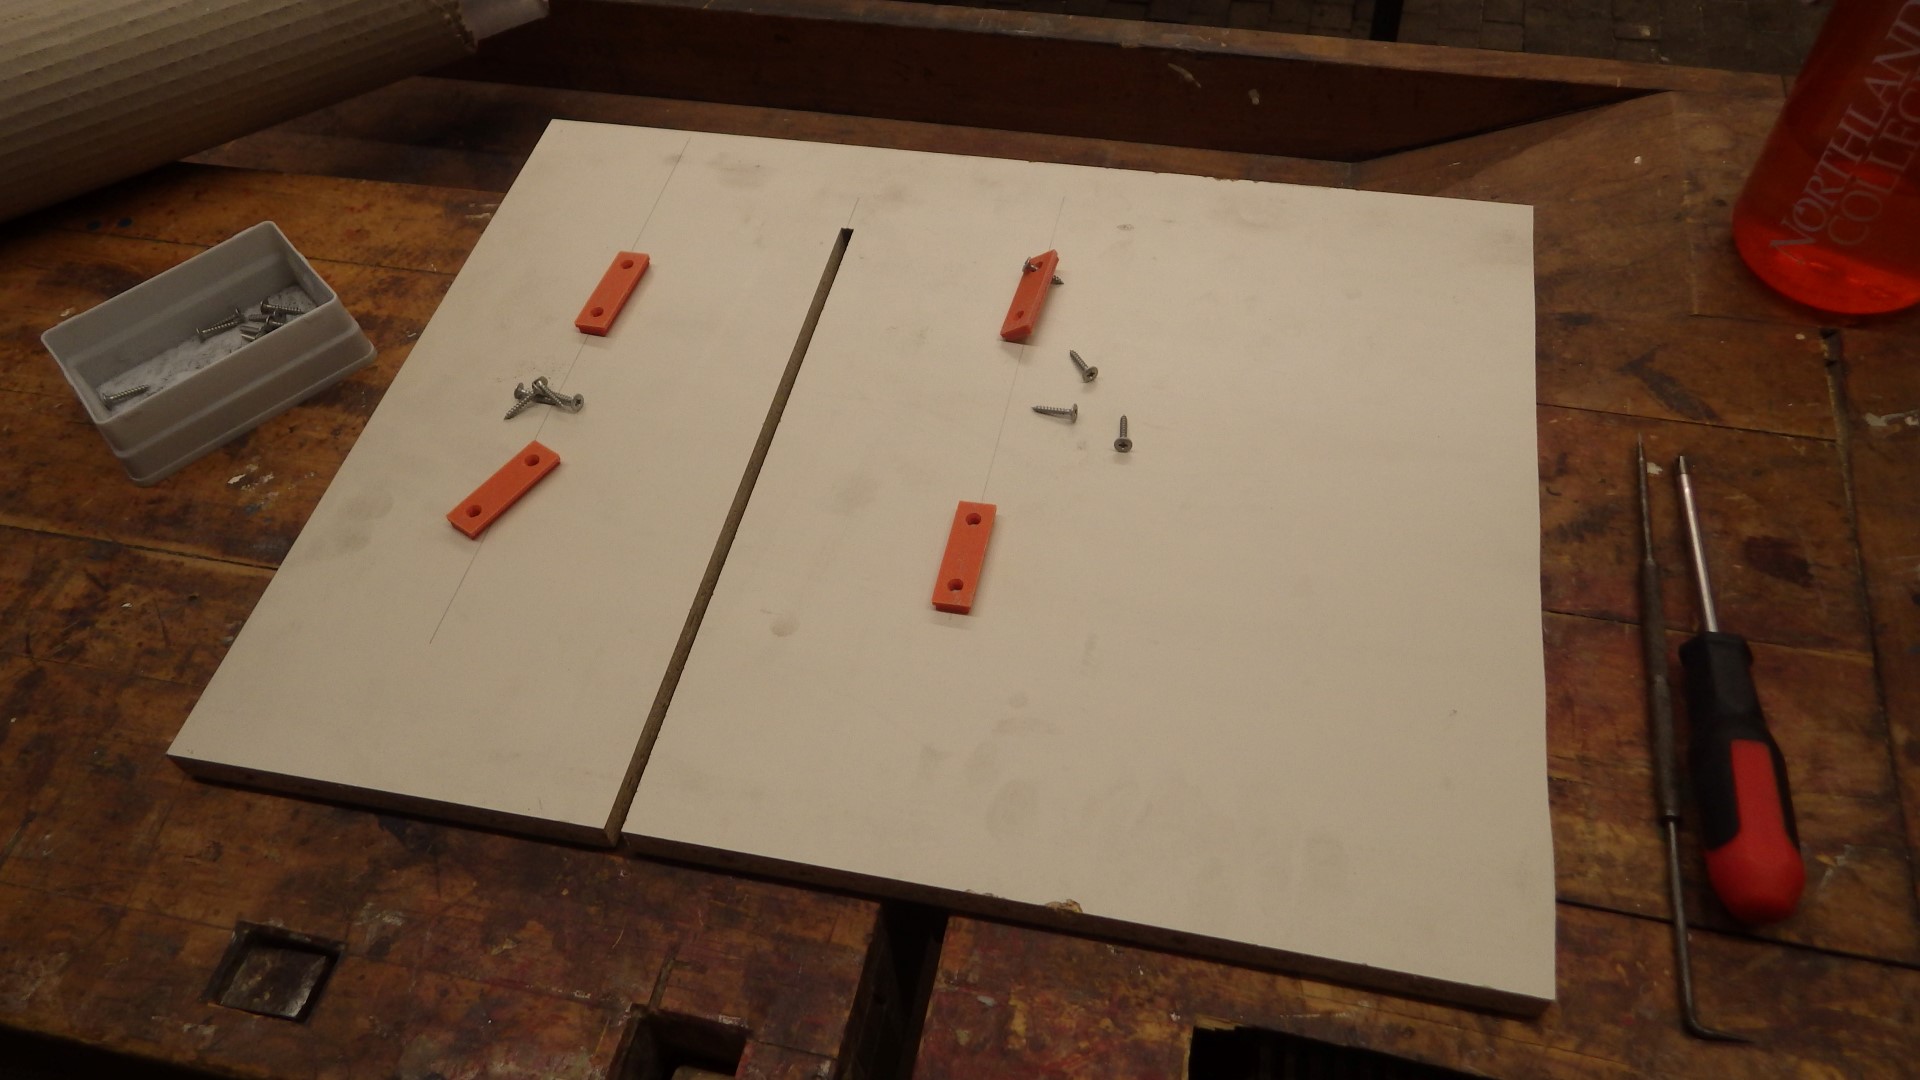
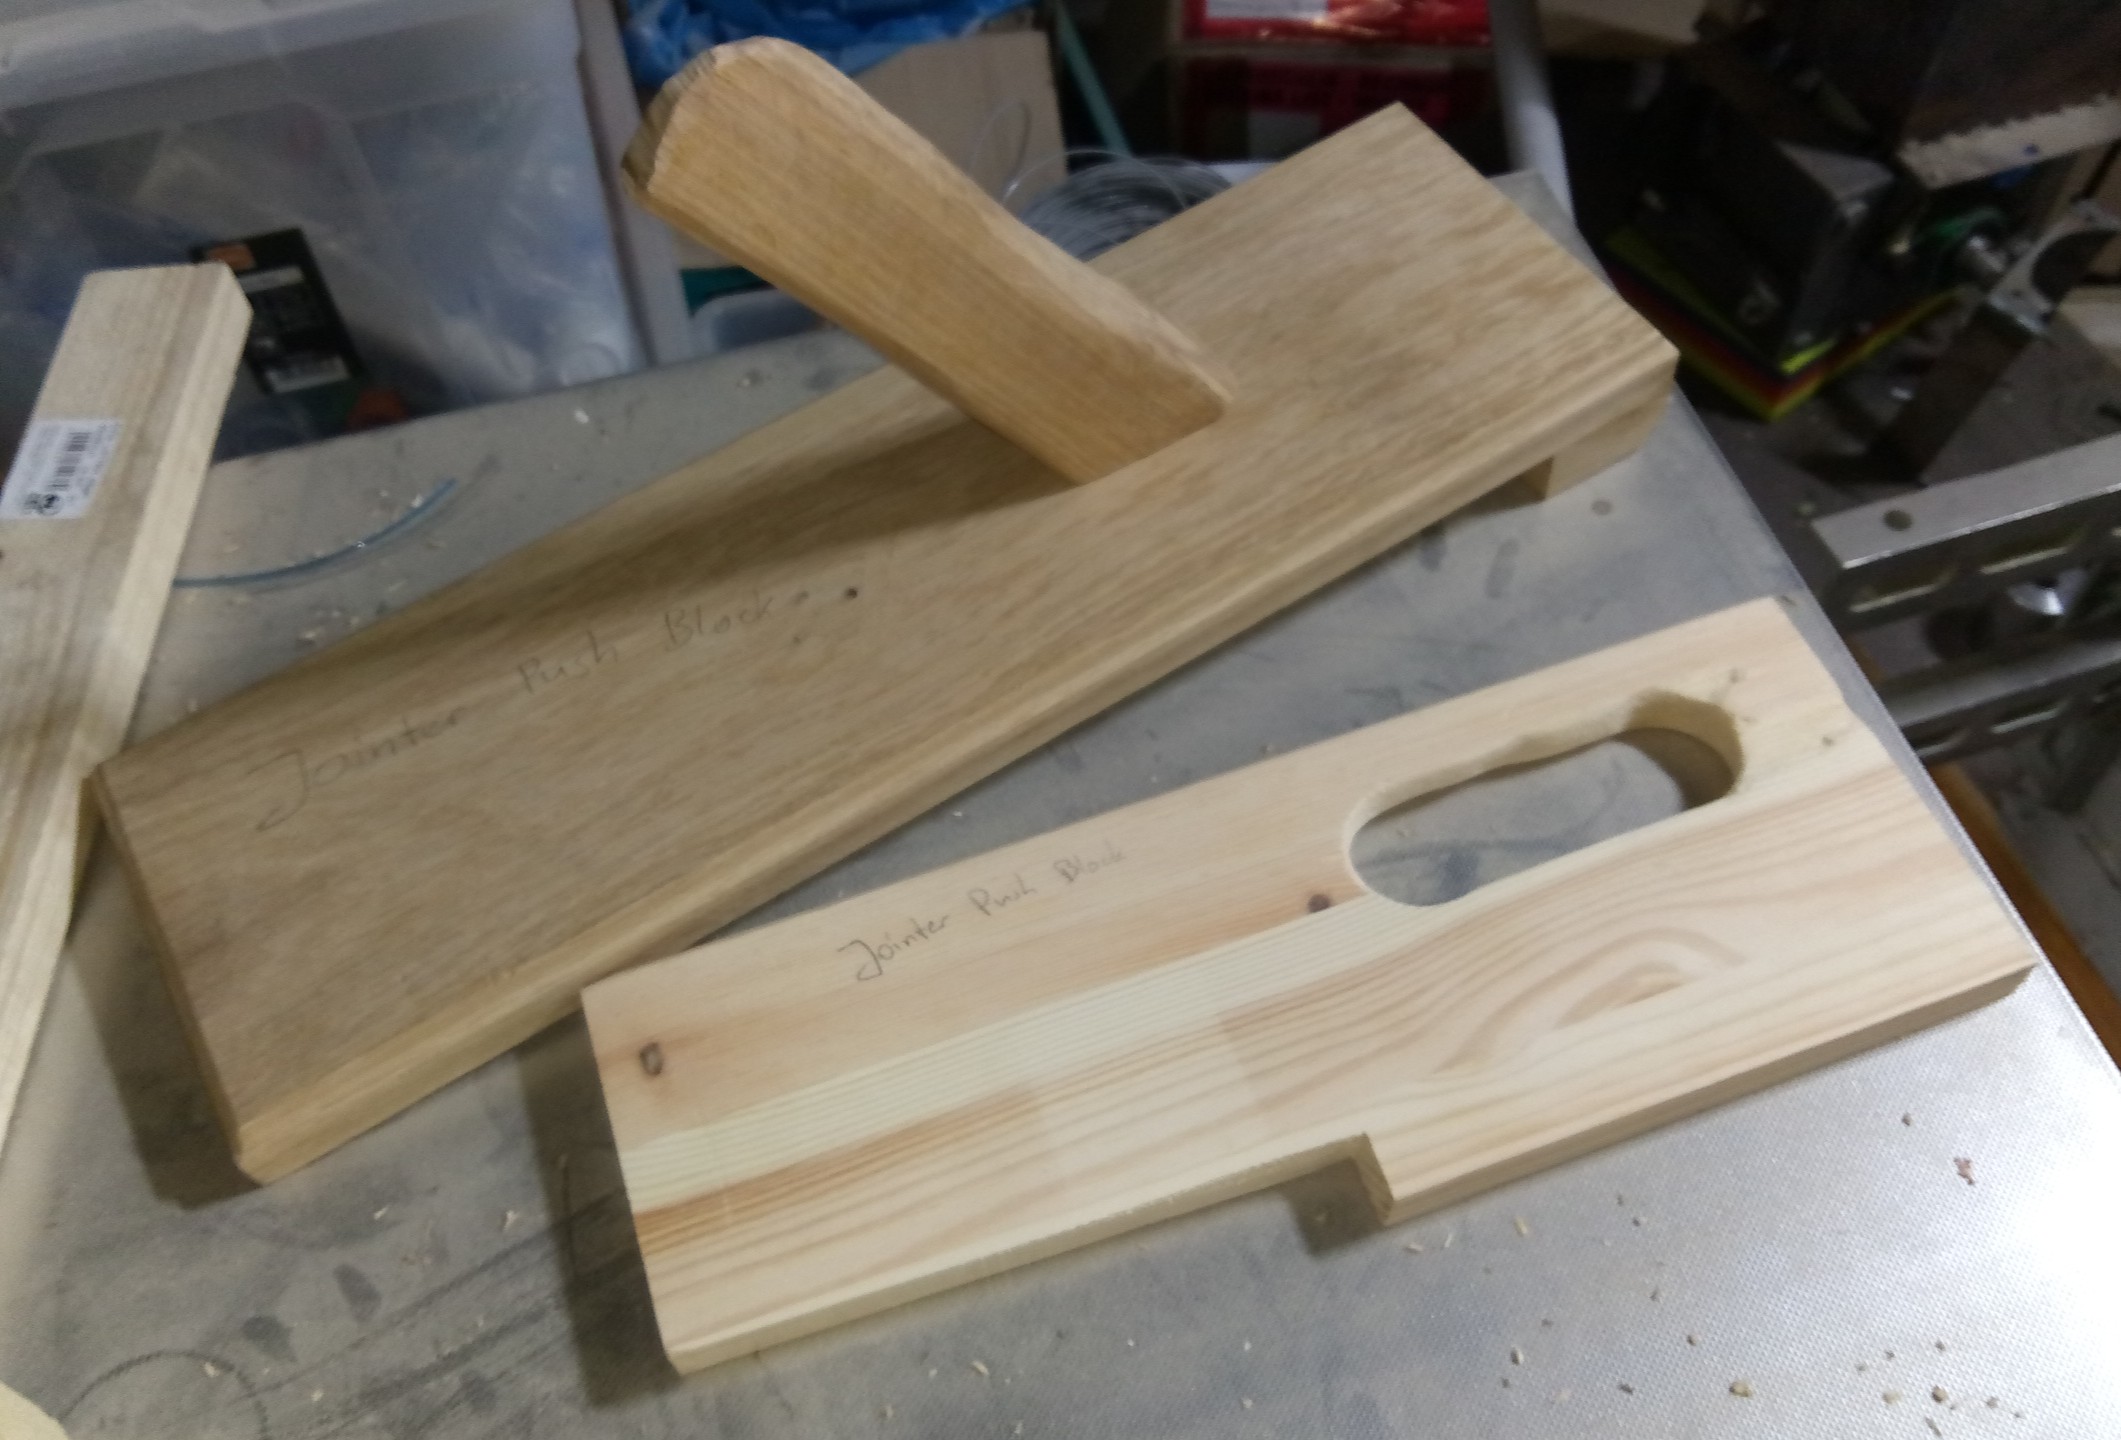
| 11:38, 20 December 2020 | Jointer push blocks.jpg (file) |  |
390 KB | both of these push block designs may be used with the jointer, depending on workpiece size | 1 |
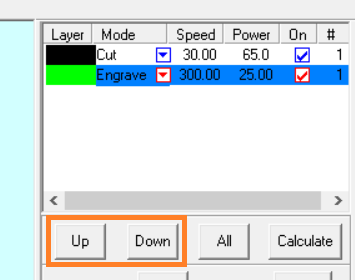
| 18:54, 8 December 2020 | Lasercut 5.3 order.png (file) |  |
10 KB | the easy way to define output order in LaserCut 5.3 - select the "layer", then use the Up and Down buttons | 1 |
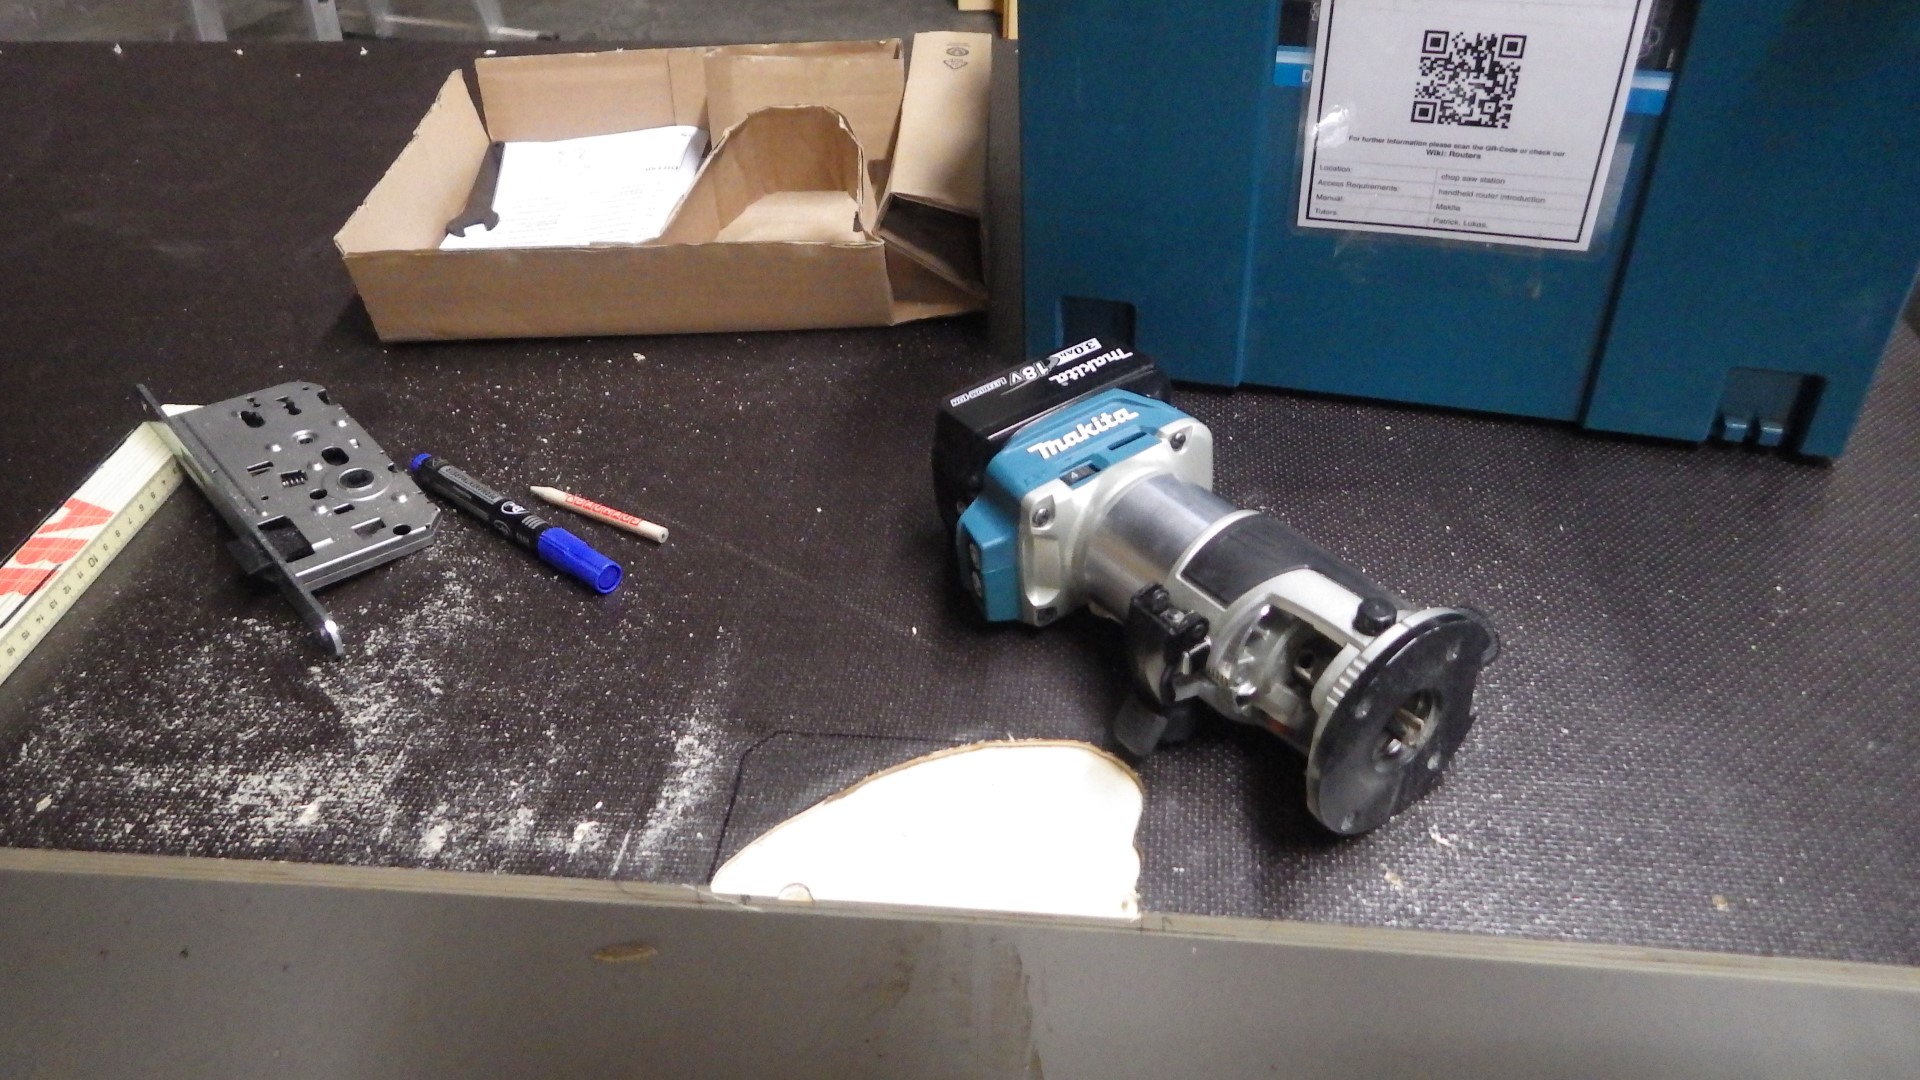
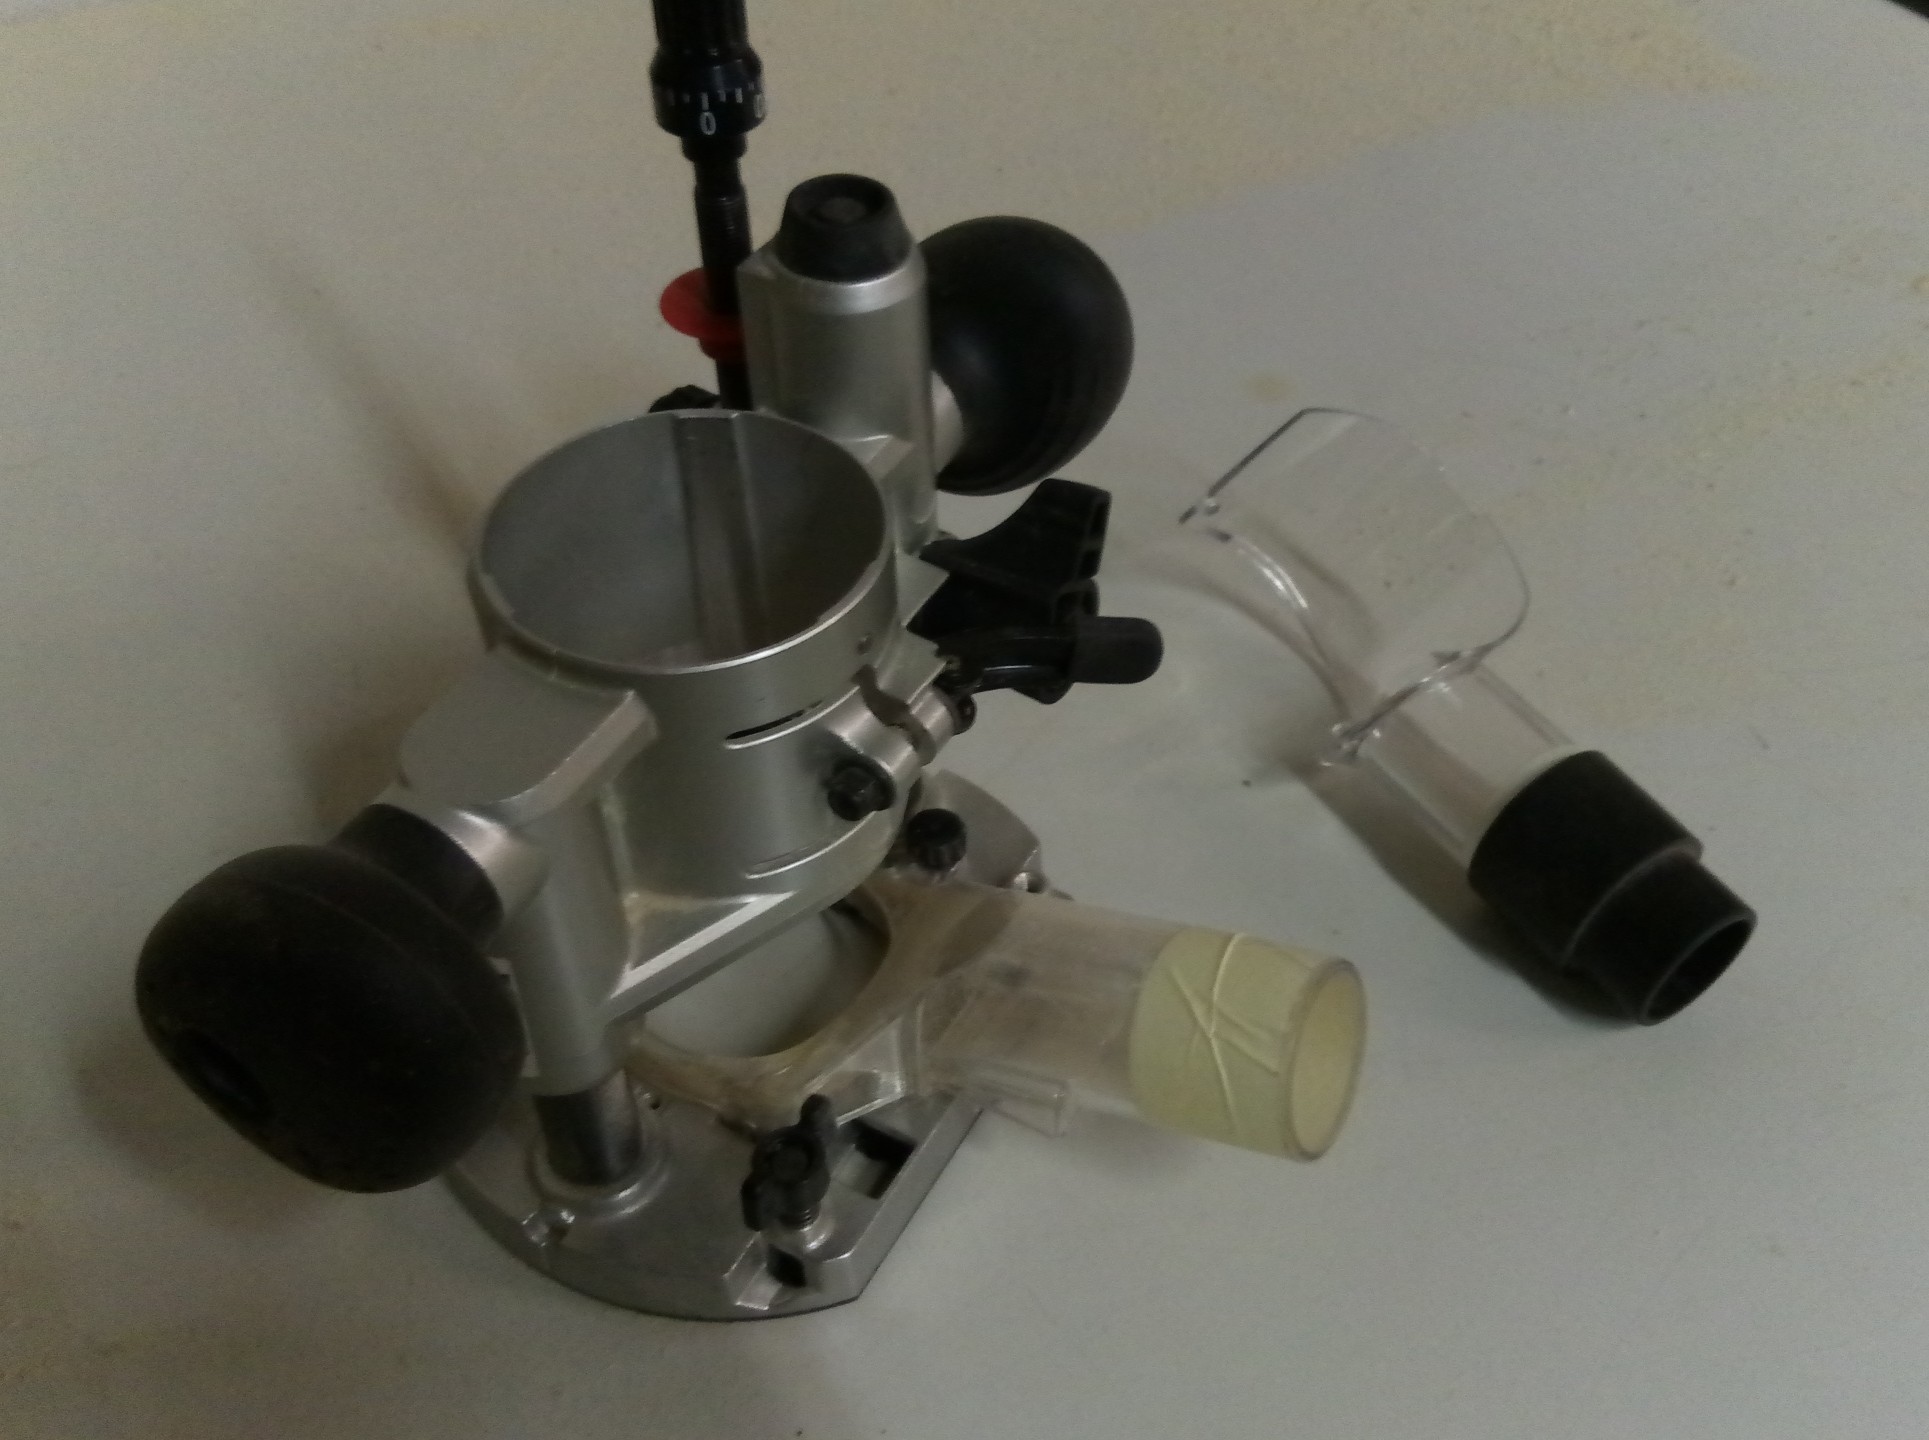
| 03:08, 5 December 2020 | Makita router with stolen dust adapter.jpg (file) |  |
334 KB | The scroll saw has a shop vac adapter we don't need, and the Makita router needed one - tada! | 1 |
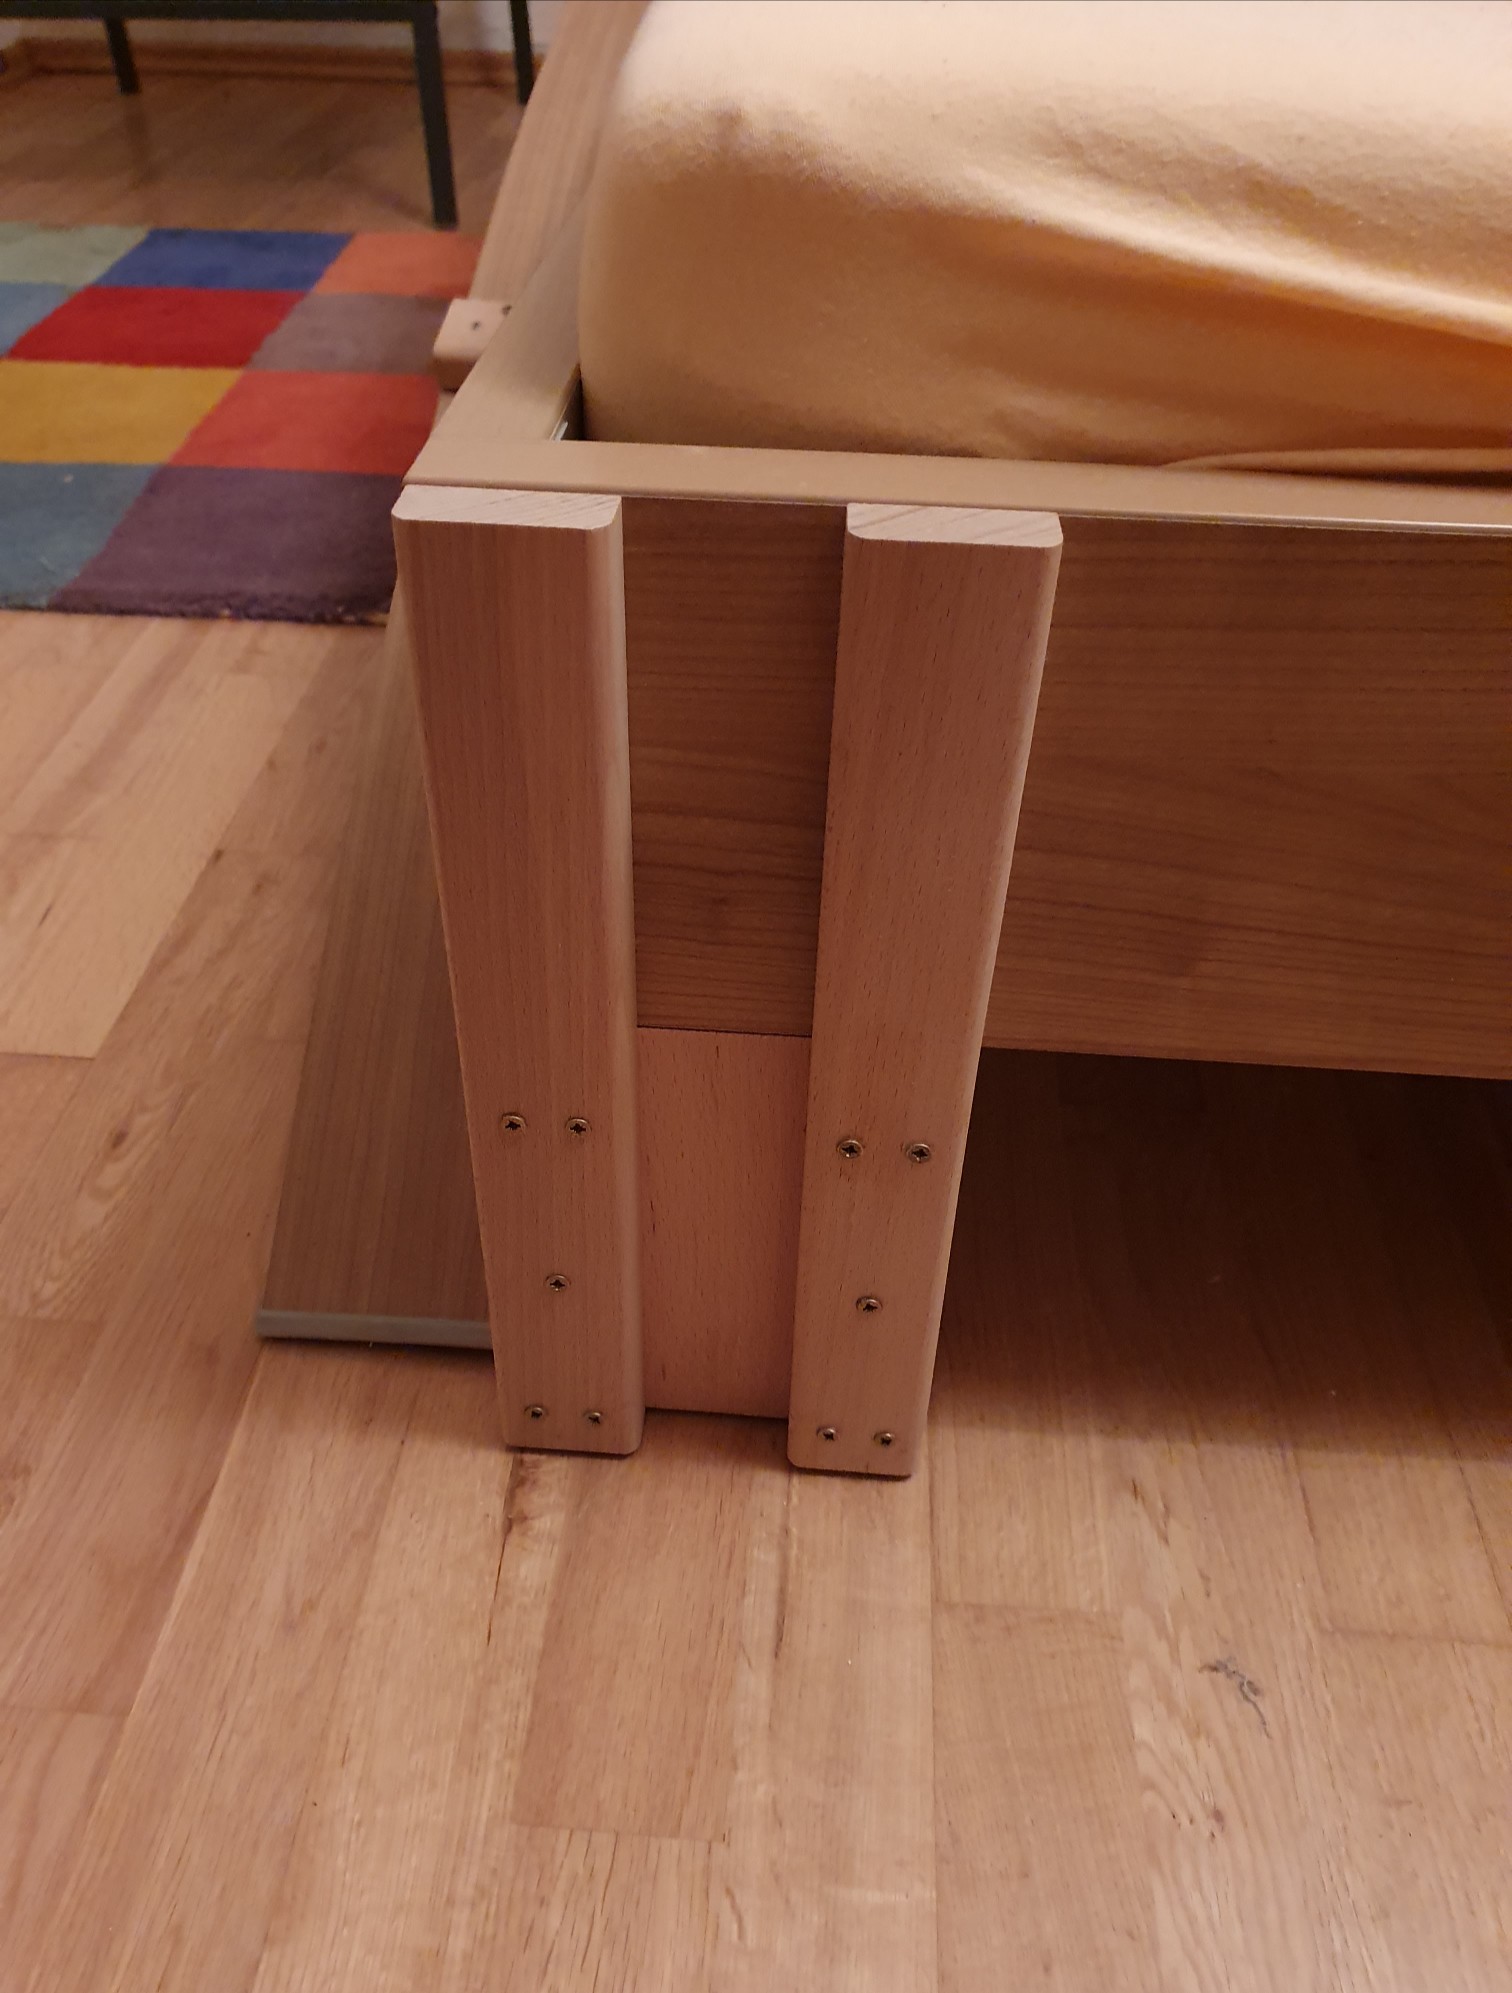
| 13:25, 2 December 2020 | Karel - bed leg.jpg (file) |  |
347 KB | When the legs on your bed break, just make super solid, new ones! Photo by Karel Category:Repair | 1 |
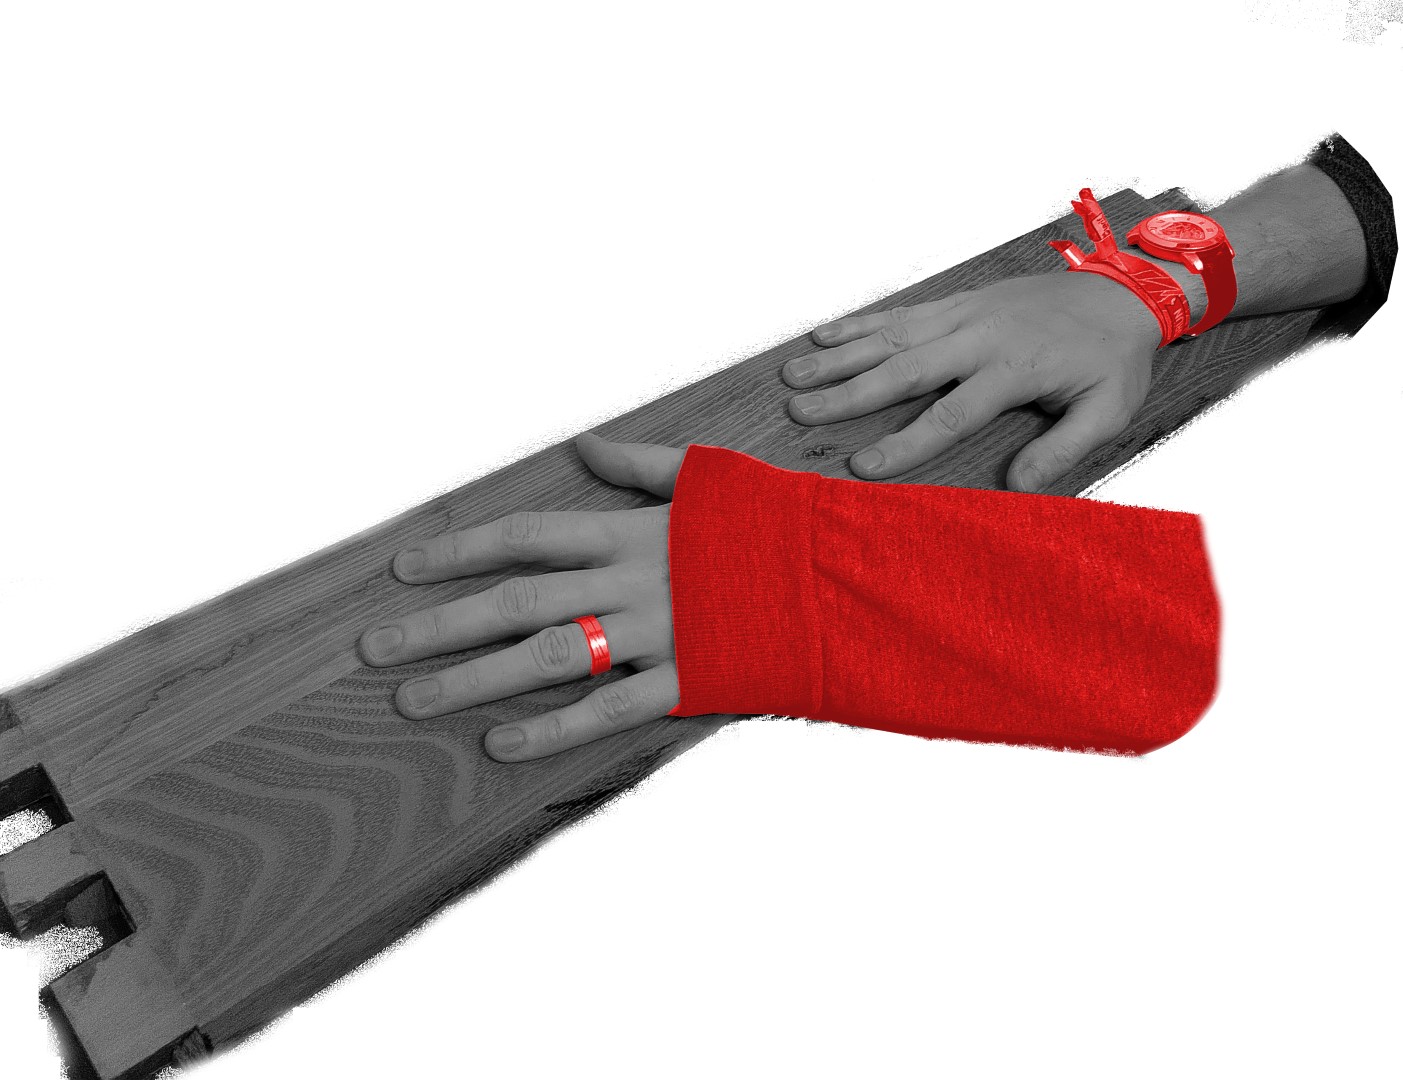
| 03:37, 29 October 2020 | Abrichte falsch bekleidet.JPG (file) |  |
223 KB | At the Jointer-Planer you MUST NOT (red) wear jewellery, including watches and rings, or loose long clothing. | 1 |
| 02:59, 23 October 2020 | Planer - angled infeed.JPG (file) |  |
435 KB | Feeding boards through a planer/bottom of a jointer-planer at a slight angle may help to avoid "snipe" ''(Hobelschläge)'' | 1 |
| 02:22, 23 October 2020 | Jointer - fingers together.JPG (file) |  |
470 KB | When moving a workpiece over the jointer, your fingers should always remain close together and far from the blades. | 1 |
| 02:10, 23 October 2020 | Abrichte - Hilfsanschlag.svg (file) |  |
3.79 MB | Benutzung des Hilfsanschlags beim Abrichten schmaler Werkstücke ''Use of the auxiliary fence when jointing narrow workpieces'' ---- created with Inkscape | 1 |
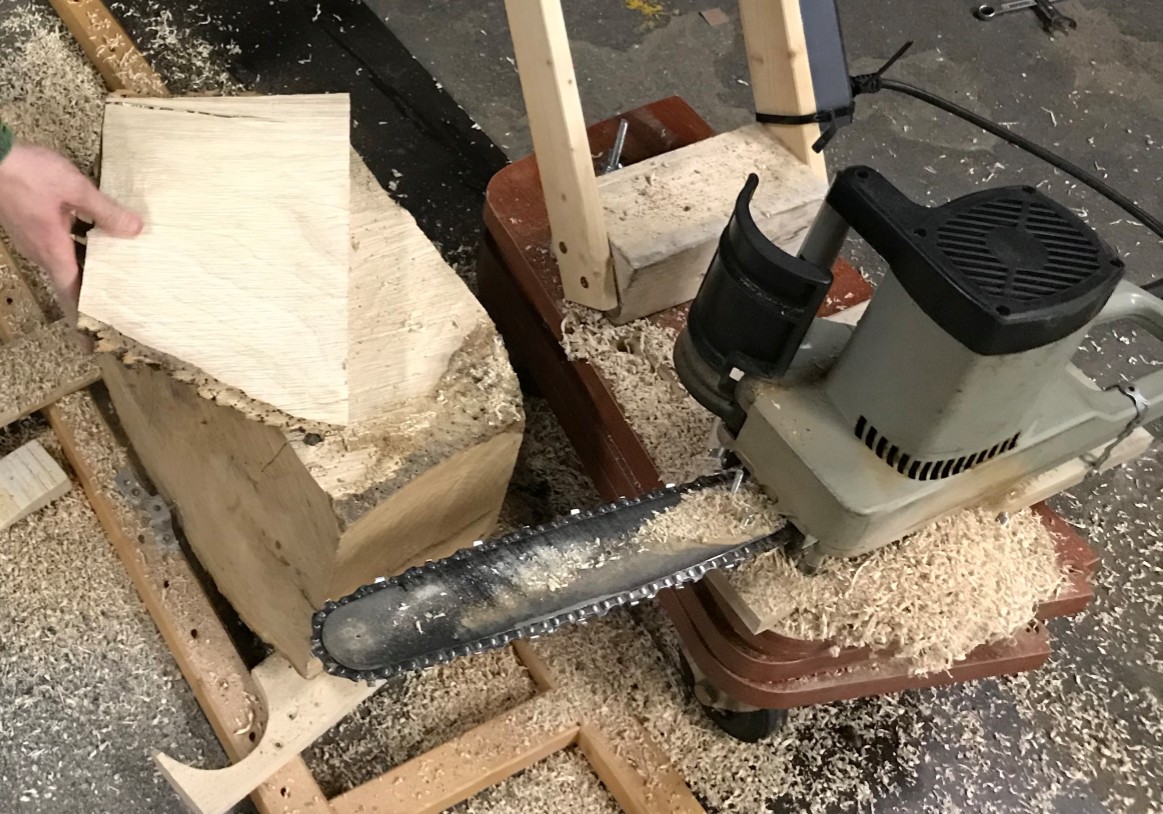
| 18:27, 20 August 2020 | Chainsaw mill - first board.jpg (file) |  |
270 KB | The first full board cut with {{£}}'s chainsaw. Project:Chainsaw Mill | 1 |
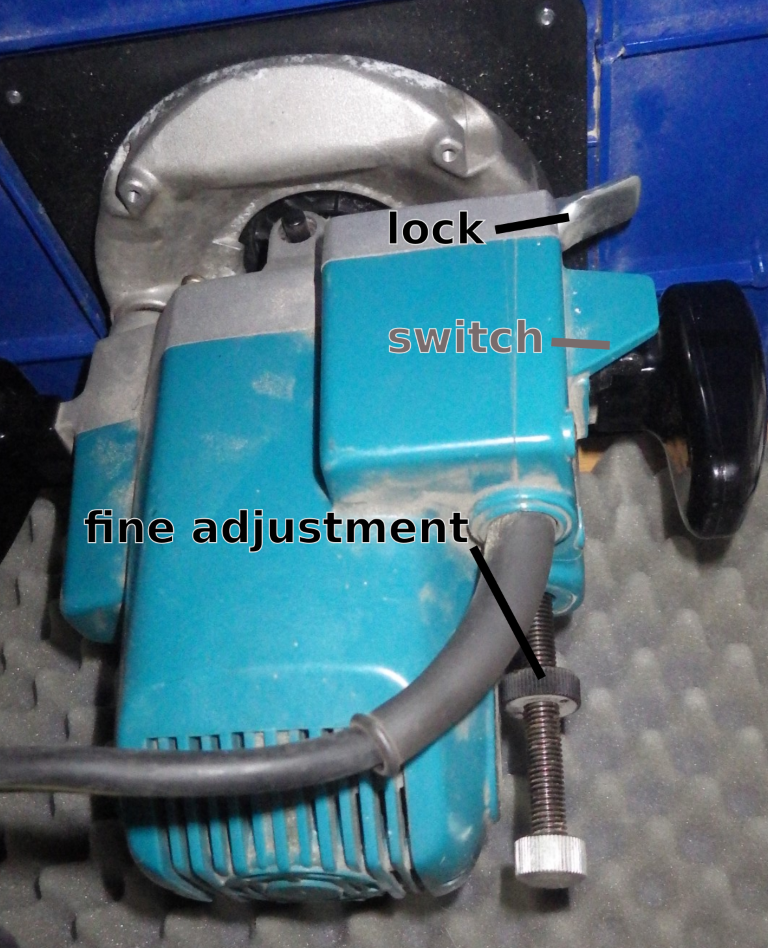
| 16:32, 1 August 2020 | Makita 3612BR in router table.png (file) |  |
1.16 MB | the machine control elements of the Makita 3612BR you'll need for operation in the router table | 1 |
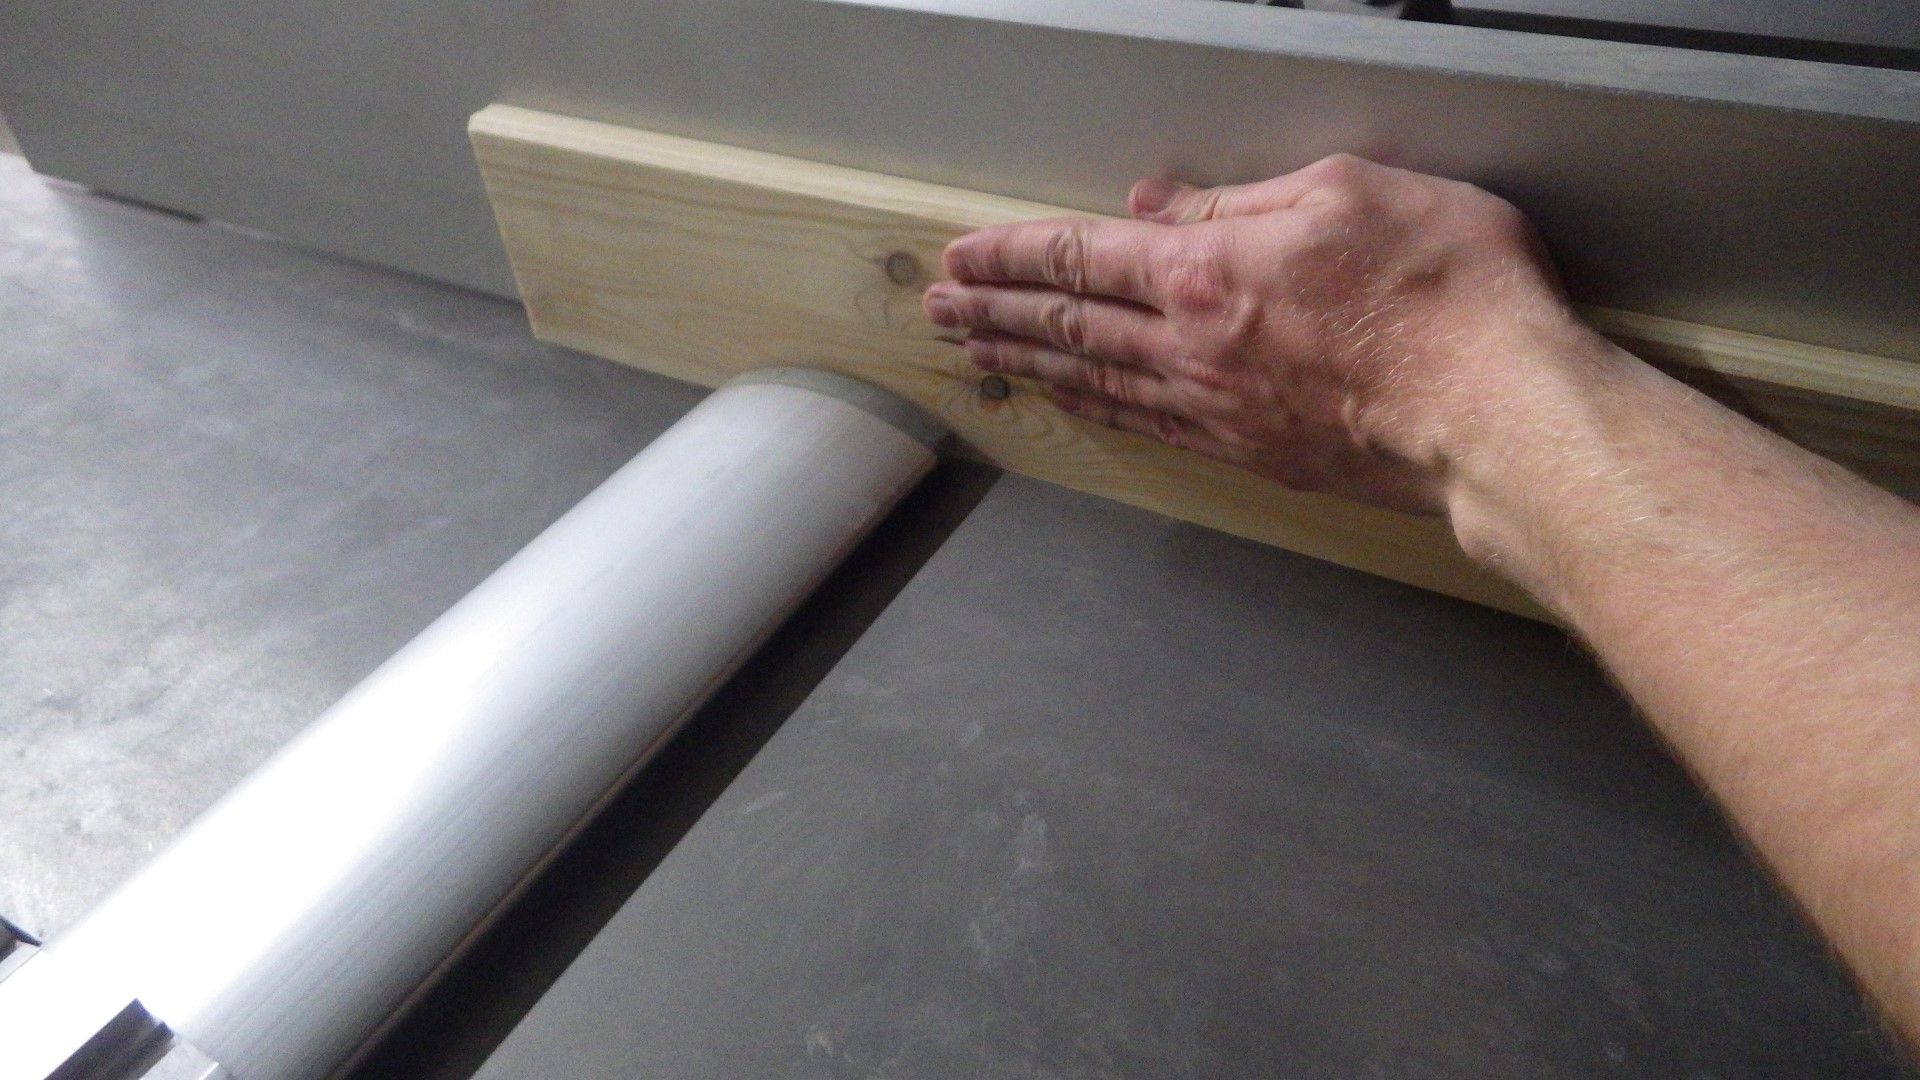
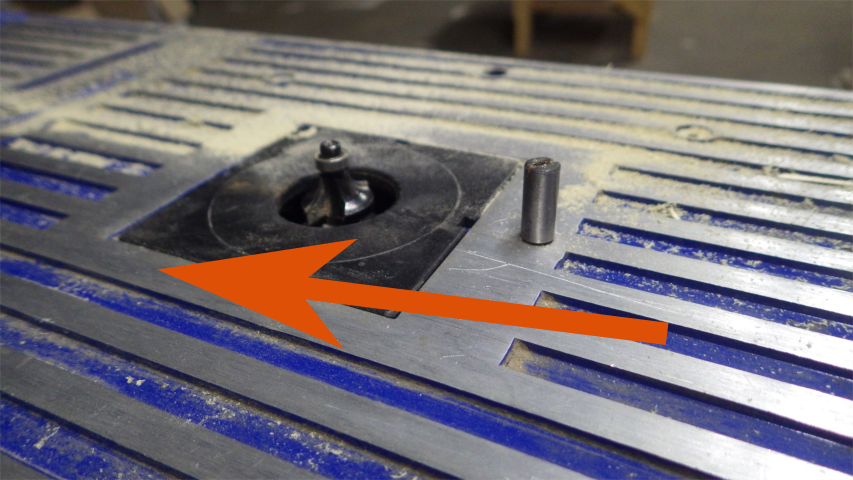
| 16:05, 1 August 2020 | Router table - starting pin.png (file) |  |
711 KB | When working fenceless with a guide-bearing bit on the router table, a starting pin needs to be used for a safe first contact with your workpiece. It helps you make sure your workpiece stays in front of the router bit! | 1 |