Project:Giant Football Scoreboard: Difference between revisions
(Created page with "{{ProjectInfoBox |project title=Giant Football Scoreboard |image=Football scoreboard team alignment.JPG |status=finished |date=Oct 2016 |initiator=Mathis |team=User:Lukas|Lu...") |
m (→3D Engraving with a Laser Cutter: typo) |
||
| Line 46: | Line 46: | ||
== 3D Engraving with a Laser Cutter == | == 3D Engraving with a Laser Cutter == | ||
The laser cutter we used supported 3D engraving, e | The laser cutter we used supported 3D engraving, i.e. engraving at different intensities depending on the darkness of a greyscale image. We told [[VisiCut]] to 3D engrave everything with 100 % power and 10 % speed, using 4 mm [[Plywood#Poplar Plywood|poplar plywood]]. Since that material is prone to warping from moisture, we clamped the long side under one of the laser cutter's rulers which made it pretty level. | ||
Afterwards we reset the laser to the position we started engraving at and started a second job which consisted of cuts (100 % power, 24 % speed) along all the bright green hairlines [[User:Pakue|Patrick]] had added around each logo in Adobe Illustrator (see above). | Afterwards we reset the laser to the position we started engraving at and started a second job which consisted of cuts (100 % power, 24 % speed) along all the bright green hairlines [[User:Pakue|Patrick]] had added around each logo in Adobe Illustrator (see above). | ||
Revision as of 08:40, 3 September 2017
| ProjectInfoBox Giant Football Scoreboard | |
|---|---|

| |
| Status: | finished |
| Release Date: | Oct 2016 |
| Initiator: | Mathis |
| Team: | Lukas, Patrick |
| Materials Used: | plywood, MDF, washers, magnets |
| Tools Used: | laser cutter, jigsaw, pruning saw, various marking & measuring tools |
| Software Used: | Inkscape, Adobe Illustrator, VisiCut, GIMP |
| Approx. Cost: | 240 € |
In a day-and-night weekend project, Lukas and his brother Mathis made a giant football-shaped scoreboard for the U.S. national football league (NFL). We'll lay out the details on this page eventually...
Idea
The league organization is pretty weird and more complicated than a simple leaderboard table which makes it hard to visualize. There are 32 teams which are split up into two "conferences" which are each made up of four "divisions". Division champions are among the most important to track as they will automatically advance to the playoffs.

The basic idea was putting all 4 teams in one division into an imaginary square as shown on the left.
For extra cool looks, the board everything was to be mounted on was to resemble a giant football (turned out to be 6.5x scale compared to a regulation ball) and could optionally be illuminated by LEDs or other lights.
Shaping the Board

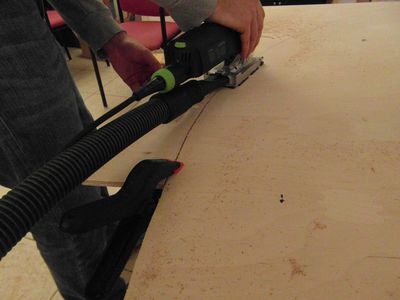
We got a 2 × 1.3 m plywood ("Multiplex") sheet from a nearby hardware store as that was about the minimum size necessary to fit all the team logos with 10 × 10 cm footprints. We measured a regular-sized football to transfer the significantly scaled up width and height to the wood and played around with a pencil and some string as a makeshift giant compass until we found a suitable center for a circle that would go through all measured points.
The pencil line was quite easy to follow with a jigsaw and the edge only needed a bit of sanding until we were satisfied.
Preparing Logos for Laser Cutting
The logos were for the most part already in a vector format as the Wikipedia pages usually contain an SVG version. The rest were vectorized with the redraw function in Adobe Illustrator or Inkscape and scaled to fit into 10 × 10 cm squares. As the logos also had to be cut out in a laser cutter, an outline was needed – preferably with a 2 mm gap to give a nice unburnt frame.
In Adobe Illustrator this is achieved with the following steps:
- select the object with all its shapes
- go to
Object>Path>Move Path- select the desired distance and mode click OK
- there will now be several new shapes around your object
- combine them into one by using the pathfinder tool
- any left-over artifacts can be removed with the direct-select tool (A) to leave a single shape engulfing your object
- change the path properties to something you can identify later in VisiCut, (e.g. an unusual color)
- done!
3D Engraving with a Laser Cutter
The laser cutter we used supported 3D engraving, i.e. engraving at different intensities depending on the darkness of a greyscale image. We told VisiCut to 3D engrave everything with 100 % power and 10 % speed, using 4 mm poplar plywood. Since that material is prone to warping from moisture, we clamped the long side under one of the laser cutter's rulers which made it pretty level.
Afterwards we reset the laser to the position we started engraving at and started a second job which consisted of cuts (100 % power, 24 % speed) along all the bright green hairlines Patrick had added around each logo in Adobe Illustrator (see above).
The result looked awesome, but be warned - the 32 logos took about three hours to engrave and a little more to cut!
Designing the Seam
[...]
Magnetization
[...]
Wall Mounting
[...]
Gallery
- more photos
a spring clamp can be a valuable "third hand"!
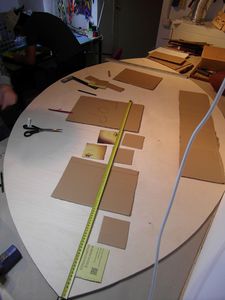
planning the logo size and alignment with corrugated fiberboard templates
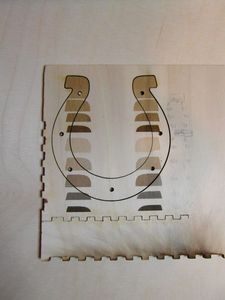
trying out different laser cutter engraving settings
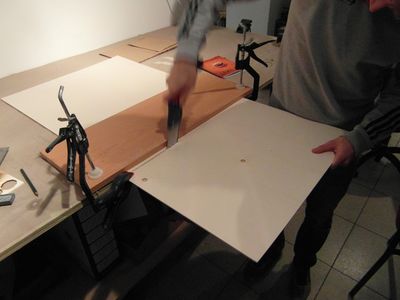
preparing a sheet of poplar plywood to fit into the laser cutter
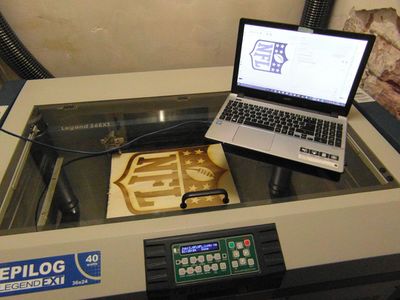
laser engraving the NFL logo
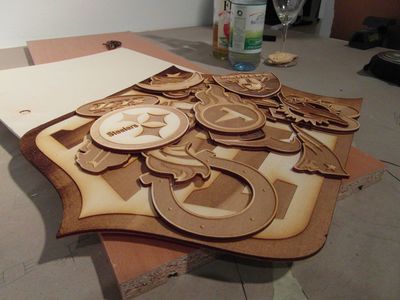
about half the laser cut parts
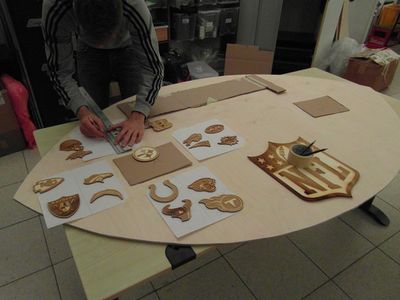
fine-tuning the team alignment


