Welding Helmets: Difference between revisions
created stub |
location |
||
| (6 intermediate revisions by 2 users not shown) | |||
| Line 1: | Line 1: | ||
{{ToolInfoBox | {{ToolInfoBox | ||
|tool name= | |tool name=Tacklife PAH01D | ||
|image= | |german=Schweißhelme | ||
|synonyms=welding masks, welding hoods, welding shields, welder helmets, welder masks, welder hoods; DE: Schweißhelme, Schweißerhelme, Schweißmasken, (Kopf)Schweißschilde, Schweißschirme | |image=Tacklife PAH01D.JPG | ||
|synonyms=welding masks, welding hoods,<br>welding shields, welder helmets,<br>welder masks, welder hoods;<br>DE: Schweißhelme, Schweißerhelme,<br>Schweißmasken, (Kopf)Schweißschilde,<br>Schweißschirme, Schweißerschutzhelme | |||
|type=[[PPE|personal protection]] | |type=[[PPE|personal protection]] | ||
|material= | |material= | ||
|used with=[[Welding Transformer|welding transformer]] | |used with=[[Welding Transformer|welding transformer]] | ||
|location= | |location=[[Location::Welding Area|welding area]] in the [[Metal Workshop|metal workshop]] | ||
|access= | |access=read this page & the manual | ||
|tutors= | |tutors=[[User:Lukas|Lukas]] | ||
|manual= | |manual=in each bag; [https://www.tacklifetools.com/product/product/index/id/123 product website with schematic] | ||
|donation= | |donation= | ||
|similar= | |similar=[[Face Shields|face shields]] | ||
}} | }} | ||
We have two auto-darkening welding helmets that will protect your eyes and face during [[welding]] sessions. | We have two auto-darkening welding helmets that will protect your eyes and face during [[welding]] sessions. | ||
== Before Use == | |||
* select the correct [[#Shade Selection|shade number]] and [[#Sensitivity|sensitivity]] for your application | |||
* select "Weld" or "Grind" mode, depending on what you want to do | |||
* check that no dirt is covering the four sensors around the filter | |||
* check for scratches or cracks and report them immediately so the glass can be replaced if necessary (more are available in the [[Storage Room|storage room]]) | |||
* adjust the headband so that the helmet is as low as possible on your head and close to your face | |||
* check for light tightness | |||
* '''if the helmet does not darken properly when you start welding or grinding, stop immediately until you've found the problem!''' | |||
== Settings == | |||
=== Shade Selection === | |||
For [[SMAW]], the manual states these appropriate shade numbers (depending on current): | |||
* 20-40 A => #9 | |||
* 40-80 A => #10 | |||
* 80-175 A => #11 | |||
* 175-300 A => #12 | |||
* 300-500 A => #13 | |||
If necessary, make adjustments based on your weld - you should be able to ''see'' the welding spot and the pool of hot metal but no unpleasant glare. | |||
=== Sensitivity === | |||
The sensitivity should be set ''as high as possible'' without darkening because of ambient light. The helmet should then darken immediately upon ignition of the welding arc. | |||
=== Delay === | |||
The delay setting regulates how long the filter stays dark after the light burst. A longer delay should be set when the welding pool continues to blind you after interrupting the arc or the filter flashes between light and dark. | |||
== Storage == | |||
Keep the helmets in their bags to reduce exposure to light, this is supposed to make them last longer. | |||
[[Category:Metalworking]] | |||
[[Category:Safety]] | |||
[[Category:Welding]] | [[Category:Welding]] | ||
Latest revision as of 07:04, 11 October 2023
| ToolInfoBox Tacklife PAH01D | |
|---|---|

| |
| Synonyms: | welding masks, welding hoods, welding shields, welder helmets, welder masks, welder hoods; DE: Schweißhelme, Schweißerhelme, Schweißmasken, (Kopf)Schweißschilde, Schweißschirme, Schweißerschutzhelme |
| Type: | personal protection |
| Used with: | welding transformer |
| Location: | welding area in the metal workshop |
| Access Requirements: | read this page & the manual |
| Tutors: | Lukas |
| Manual: | in each bag; product website with schematic |
| Similar (More or Less): | face shields |
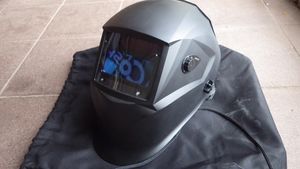
We have two auto-darkening welding helmets that will protect your eyes and face during welding sessions.
Before Use
- select the correct shade number and sensitivity for your application
- select "Weld" or "Grind" mode, depending on what you want to do
- check that no dirt is covering the four sensors around the filter
- check for scratches or cracks and report them immediately so the glass can be replaced if necessary (more are available in the storage room)
- adjust the headband so that the helmet is as low as possible on your head and close to your face
- check for light tightness
- if the helmet does not darken properly when you start welding or grinding, stop immediately until you've found the problem!
Settings
Shade Selection
For SMAW, the manual states these appropriate shade numbers (depending on current):
- 20-40 A => #9
- 40-80 A => #10
- 80-175 A => #11
- 175-300 A => #12
- 300-500 A => #13
If necessary, make adjustments based on your weld - you should be able to see the welding spot and the pool of hot metal but no unpleasant glare.
Sensitivity
The sensitivity should be set as high as possible without darkening because of ambient light. The helmet should then darken immediately upon ignition of the welding arc.
Delay
The delay setting regulates how long the filter stays dark after the light burst. A longer delay should be set when the welding pool continues to blind you after interrupting the arc or the filter flashes between light and dark.
Storage
Keep the helmets in their bags to reduce exposure to light, this is supposed to make them last longer.