Project:Tree Trunk Tealights: Difference between revisions
From CoMakingSpace Wiki
skeleton |
m Category:Lighting |
||
| (6 intermediate revisions by 2 users not shown) | |||
| Line 1: | Line 1: | ||
''documentation unfinished, | {{ProjectInfoBox | ||
|project title=Tealight Holders out of Birch Logs | |||
|image=birch tealights 10.JPG | |||
|status=about 40 made, now documenting | |||
|date=spring 2018 | |||
|initiator={{£}} | |||
|team=Gesa | |||
|materials=birch logs, [[Coconut Oil|coconut oil]], steel tealight cups, [[tealights]] | |||
|tools=[[Chop Saw|chop saw]] (and [[Crosscut Saw|crosscut saw]] where too thick),<br>[[Drill Press|drill press]] & [[Forstner Bits|Forstner bit]], [[Eccentric Sander|eccentric sander]], [[sandpaper]] | |||
|cost= | |||
}} | |||
''documentation unfinished, please just ask if you have urgent questions ;-) '' | |||
I made a bunch of tealight holders out of birch trunks as a wedding decoration and will now work on turning this project into a woodworking [[seminar]] for beginners. | I made a bunch of tealight holders out of birch trunks as a wedding decoration and will now work on turning this project into a woodworking [[seminar]] for beginners. | ||
| Line 5: | Line 16: | ||
== Materials == | == Materials == | ||
=== Birch Logs === | === Birch Logs === | ||
* Bauhaus | * from Bauhaus, very wet! | ||
** better cut & dry in advance next time?? | |||
** cut & dry in advance?? | |||
** risk of mold forming at the cut faces... | ** risk of mold forming at the cut faces... | ||
| Line 15: | Line 25: | ||
== Making == | == Making == | ||
Need to test whether this can be sped up - drilling into the wet wood was very difficult! | Need to test whether this can be sped up - drilling into the wet wood was very difficult! '''Lots''' of unforeseen mold problems.. | ||
* cut with [[Chop Saw|chop saw]] - log often too thick for the small Herkules saw...switch to [[bandsaw]] next time? | * cut with [[Chop Saw|chop saw]] - log often too thick for the small Herkules saw...switch to [[bandsaw]] next time? | ||
* sand cut faces with [[Eccentric Sander|eccentric sander]] | * sand cut faces with [[Eccentric Sander|eccentric sander]] | ||
* let dry - continue & seal ends immediately next time? | * let dry - continue & seal ends immediately next time? | ||
* drill with | * drill with 1-5/8" [[Forstner Bit|Forstner bit]] | ||
* let dry/seal again so the bottom of the hole is protected | * let dry/seal again so the bottom of the hole is protected | ||
* insert steel holder before the log shrinks too much! | * insert steel holder before the log shrinks too much! | ||
< | <gallery mode=packed-hover heights=150 caption="gallery"> | ||
[[Category:Quick Projects]] | File:birch tealights 01.JPG|the store-bought logs were very wet and quickly became moldy... | ||
File:birch tealights 02.JPG|cutting approx. 8-10 cm long pieces with the [[Chop Saw|chop saw]] | |||
File:birch tealights 03.JPG|the logs were often too thick for our (then) available power [[saws]] and needed to be finished off by hand with a [[Crosscut Saw|crosscut saw]] | |||
File:birch tealights 04.JPG|a lot of mold formed again within a week after cutting... | |||
File:birch tealights 05.JPG|we then [[Sanding|sanded]] off the mold and force-dried the cut faces with a [[Heat Gun|heat gun]] | |||
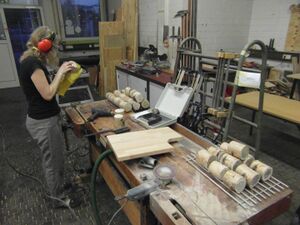
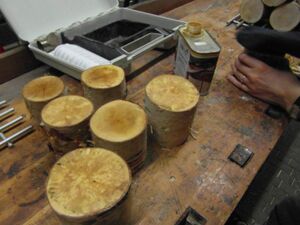
File:birch tealights 06.JPG|after superficial heating, we applied [[Hard Wax Oil|hard wax oil]] in an attempt to protect the wood | |||
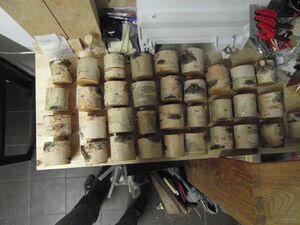
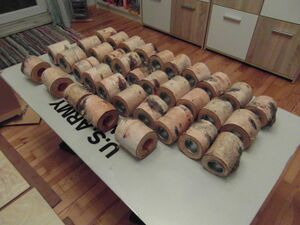
File:birch tealights 07.JPG|another week of drying on my workbench with better spacing | |||
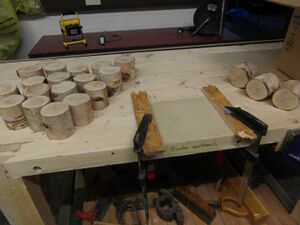
File:birch tealights 08.JPG|there was still some new mold after all this, but it was easily sanded off by hand | |||
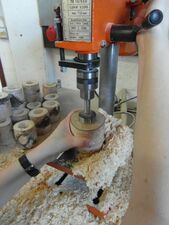
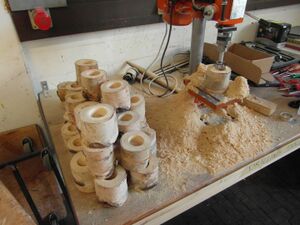
File:birch tealights 09.JPG|finally, the logs were ready for drilling with a large [[Forstner Bit|Forstner bit]] | |||
File:birch tealights 10.JPG|more drilling...good to have a [[Drill Press|drill press]] available! | |||
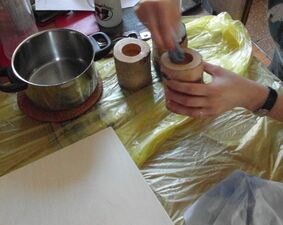
File:birch tealights 11.JPG|after shaping, the ends were finished with [[Coconut Oil|coconut oil]] | |||
File:birch tealights 12.JPG|make sure to insert the steel cups soon afterwards, the wood (and the hole!) will shrink as it keeps drying | |||
</gallery> | |||
[[Category:Lighting]] | |||
[[Category:Quick Projects]] | |||
[[Category:Woodworking]] | [[Category:Woodworking]] | ||
[[Category:Wedding]] | |||
Latest revision as of 18:43, 3 September 2023
| ProjectInfoBox Tealight Holders out of Birch Logs | |
|---|---|
| |
| Status: | about 40 made, now documenting |
| Release Date: | spring 2018 |
| Initiator: | Lukas |
| Team: | Gesa |
| Materials Used: | birch logs, coconut oil, steel tealight cups, tealights |
| Tools Used: | chop saw (and crosscut saw where too thick), drill press & Forstner bit, eccentric sander, sandpaper |
documentation unfinished, please just ask if you have urgent questions ;-)
I made a bunch of tealight holders out of birch trunks as a wedding decoration and will now work on turning this project into a woodworking seminar for beginners.
Materials
Birch Logs
- from Bauhaus, very wet!
- better cut & dry in advance next time??
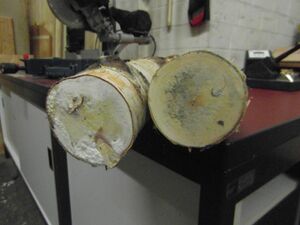
- risk of mold forming at the cut faces...
Tealights
- steel holders from <smile link>
- "eco" tealights without aluminum cases <smile link>
Making
Need to test whether this can be sped up - drilling into the wet wood was very difficult! Lots of unforeseen mold problems..
- cut with chop saw - log often too thick for the small Herkules saw...switch to bandsaw next time?
- sand cut faces with eccentric sander
- let dry - continue & seal ends immediately next time?
- drill with 1-5/8" Forstner bit
- let dry/seal again so the bottom of the hole is protected
- insert steel holder before the log shrinks too much!
- gallery
-
the store-bought logs were very wet and quickly became moldy...
-
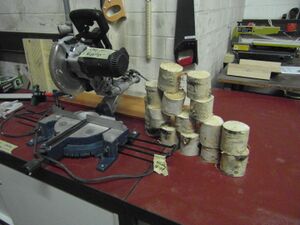
cutting approx. 8-10 cm long pieces with the chop saw
-
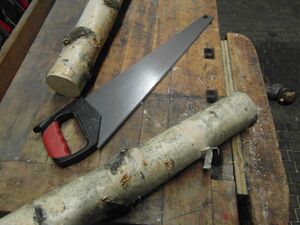
the logs were often too thick for our (then) available power saws and needed to be finished off by hand with a crosscut saw
-
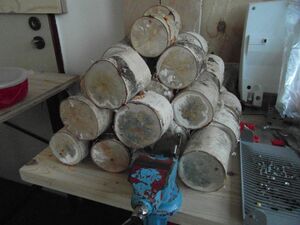
a lot of mold formed again within a week after cutting...
-
after superficial heating, we applied hard wax oil in an attempt to protect the wood
-
another week of drying on my workbench with better spacing
-
there was still some new mold after all this, but it was easily sanded off by hand
-
finally, the logs were ready for drilling with a large Forstner bit
-
more drilling...good to have a drill press available!
-
after shaping, the ends were finished with coconut oil
-
make sure to insert the steel cups soon afterwards, the wood (and the hole!) will shrink as it keeps drying
