Marking Gauge: Difference between revisions
From CoMakingSpace Wiki
NitramLegov (talk | contribs) m (German) |
No edit summary |
||
| Line 1: | Line 1: | ||
{{ToolInfoBox | {{ToolInfoBox | ||
|tool name=Marking Gauge | |tool name=Marking Gauge | ||
|german=Streichmaß|image= | |german=Streichmaß|image=Ulmia Doppelstreichmaß.jpg | ||
|synonyms=DE: Streichmaß | |synonyms=DE: Streichmaß | ||
|type=[[marking]] tool | |type=[[marking]] tool | ||
|material=[[wood]] and [[Engineered Woods|engineered woods]] | |material=[[wood]] and [[Engineered Woods|engineered woods]] | ||
|used with= | |used with= | ||
|location= | |location=marking & measuring | ||
|access= | |access= | ||
|tutors= | |tutors= | ||
|manual= | |manual= | ||
Revision as of 04:02, 18 March 2023
| ToolInfoBox Marking Gauge | |
|---|---|

| |
| Synonyms: | DE: Streichmaß |
| Type: | marking tool |
| Material: | wood and engineered woods |
| Location: | marking & measuring |
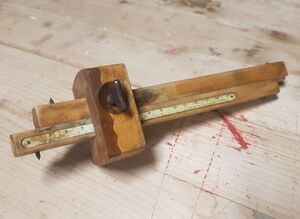
A marking gauge is used to scribe a line that is parallel to the workpiece's edge. That is often useful to transfer the center line of a hidden piece for suitable screw positions or the depth of cuts for various joinery techniques, for example.
A quick and dirty marking gauge can be made from a sharp-edged screw and a piece of scrap wood (see photo on the left). The distance from the guiding edge can then be adjusted by turning the screw. [1]
