Silicone Molding
Making silicone molds can be a great way to produce negatives for "mass production" of things like chocolate, soap or plaster in nearly any shape you imagine. Molding silicone usually comes as a two-component kit and withstands high temperatures once mixed and chemically cured, unlike molds made from thermoplastics or similar molten materials.
This tutorial involves a very liquid (pouring or injection molding) silicone, but there are other formulas available which are more viscous and can be used to paint a coat of silicone onto your template which may save lots of resources - molding silicone, especially food-grade, is very expensive!
Pouring Molds

What you'll need for this technique (besides the silicone):
- positive template(s)
- cardboard or thick paper
- hot glue gun
- ruler
- glue stick or butter
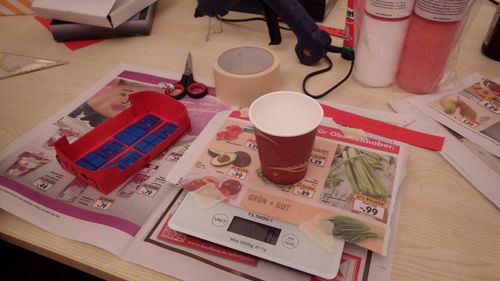
- mixing container, e.g. paper cup
- something to stir with, e.g. chopstick
- scale
- calculator
- 1-2 hours of your time
Preparation
You will need at least one positive template (i.e. having the same shape as your desired product) to begin with, but it may be more efficient to make a couple at once when the individual objects are rather small. A good way to produce intricate molds is to 3D print them, but you can use nearly every material. Consider adding a higher base under your model if you want to be able to fill the finished mold more easily, but keep in mind that this will also increase the amount of silicone needed.
Once you have your positives, the next steps are rather simple:

- prepare a box out of cardboard that is as close to the minimum size needed to house all your positives as possible
- any leakage is to be avoided - use hot glue to seal any gaps and reinforce glued or taped corners
- you may also want to try making more complicated shapes if your template is not rectangular, an easy one is a ring bent from a strip of cardboard
- use a glue stick to glue your positive(s) to the bottom of your cardboard box
- (most?) glue sticks are water soluble, so this way you can recover your positive when you are done
- another option could be butter which can also be used to fill cavities that should not be filled with silicone
- do some math!
- calculate the volume of silicone you'll need (e.g. W × D × H for a rectangular box)
- the height of your mold should be about 5 mm above the height of your positive for a nice and solid bottom
- to optimize material use, subtract the volume of your positive(s) if you know it
- 1 cm³ is equal to 1 ml in case you forgot
- derive the mass of silicone corresponding to your calculated volume
- consider the specific weight (should be on the bottle), e.g. 1.1 g/cm³
- add about 5 g which will usually remain in the mixing cup and divide the number by 2 to get the required amount of each component
- calculate the volume of silicone you'll need (e.g. W × D × H for a rectangular box)
Pouring
Now you are ready to go! Take your mixing cup, double check that it is large enough, weigh it and add the silicone components according to what you calculated during the preparations. Mix the components thoroughly but without generating too many bubbles - there is no big rush (see bottle for mixing time), but using a transparent mixing cup helps to determine when everything is well-mixed.
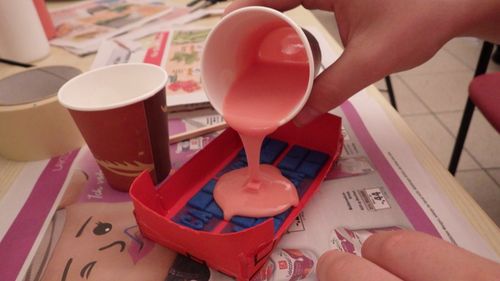
Once you have produced a homogenous 50:50 mixture, pour it into your template box in a nice, thin stream. There is no need to wander around with this stream, indeed that will probably generate more bubbles. Just stay in one spot and watch as the liquid silicone spreads over your positive.
Despite your best efforts, it is perfectly normal to see some bubbles surfacing shortly after pouring - if you do not, go to an optician (or Hogwarts). Blowing on the surface of your mold lets these bubbles pop and the silicone will soon cover the cavity.
Post Processing
After at least the curing time stated on the bottle has passed, you can take your silicone mold out of the box. Be gentle and start from several corners if there are some tough spots: if something is damaged now you can not liquify it again!
Thin sheets of silicone may have formed where it oozed under your positive and can be ripped off, using tweezers if necessary. Larger errors would be due to mistakes in the preparation of the mould but may still be fixable with a knife (silicone is best cut under slight tension). You may be able to reuse your positives now, e.g. as key chains.
To get rid of any volatile residues still trapped in the hardened silicone, bake the mold at a medium temperature (70-100 °C) for a while.
Hopefully this guide helps you obtain the mold you were aiming for - we are always happy about photos or even a short report of your result!