Project:Flip Dot Display
| ProjectInfoBox FlipDotDisplay | |
|---|---|
| |
| Status: | Done |
| Release Date: | September 2018 |
| Initiator: | Patrick |
| Team: | Ciaran & Lukas (funding), Martin (Coding) |
| Materials Used: | 3 Flipdot panels, lot of electronics and time. |
| Software Used: | KiCAD, Arduino IDE |
| Approx. Cost: | I don't want to know |
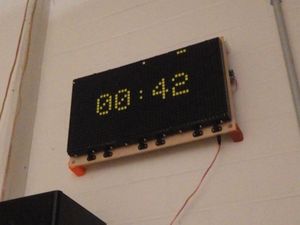
An impulse acquisition we made at the Makerfaire Hannover – three 16x24 flip dot displays. The project was to get them up and running for displaying stuff in and around the CoMakingSpace (hey!). Talk to Patrick for the most recent status of the project or have a glance in the GitHub repository.
Basic Function
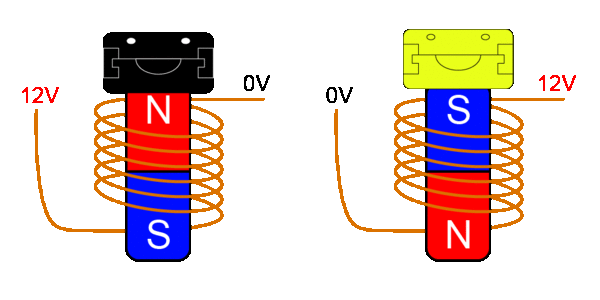
Each 'dot' of the FDD consists of a plastic hinge half the size of the dot. Depending on the orientation of the hinge the dot appears yellow or black. In the center of the hinge is a small magnet embedded that allows to hinge to be flipped around by applying a magnetic field to it. The magnetic field is changed with an electromagnet below each dot. The core of the electromagnet has a high magnetic hysteresis (e.g. ferrite) which retains the magnetic field even after the the current through the coil has stopped. Depending on the direction of the current flow the field orientation is flipped and therefore the dot.
The dots are oriented in a matrix which allows the change of dot by applying a voltage between a row and a column.
Electronics
- Sends data to each ATMEGA328P on each panel via serial interface
- 3x ATMEGA328P
- timing and control of the drivers
- 3x 5x 74HC595 Shift register
- IO expansion for the H-bridge drivers
- 3x 20x L293D quad half-bridge driver
Software
ESP8266 firmware
The FDD is programmed via OTA updates in the Arduino EDA. Before updating be sure the OTA handling function is called properly. Otherwise you'll need a ladder for further debugging...
 FlipDotDisplay @ 192.168.1.5
 IHateGitIgnore
The code can be found in the Github repo.
MQTT
The ESP can receive messages via MQTT. There are two topics currently open:
| MQTT Topics | ||
|---|---|---|
| Data | Text | Binary image (not fully supported yet) |
| Topic | /CommonRoom/FDD/Text | /CommonRoom/FDD/Binary |
| Server | comakingcontroller | |
| Port | 1883 | |
Currently a character limit of around 100 is present due to the MQTT library used on the ESP.
History
Stage 1.1 – Display in the Common Room
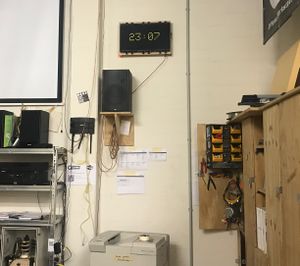
The 3 24x16 panels were combined into one 48x24 display and mounted on a wooden board to allow for better mounting.
Stage 1.0 – Driver on PCB
*imagine some more trial & error on breadboard since the last update*
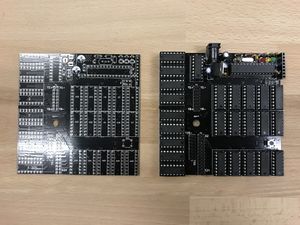
The goal of the board was to squeeze all the driver ICs and a ATMEGA328P onto a 100x100mm board (because im cheap…). I decided on THT devices because it fits the old school style of the FDD panel. The circuit and layout design was made in KiCAD and the PCBs were ordered from DirtyPCBs.
Stage 0.4 – Alternate Design
The triac circuit worked with some triacs (Z013MA) however it proved to be rather difficult to implement with higher current triacs (probably due to higher latch current). Therefore I started with a common H-bridge design (L293D). Also I found a cheaper source for them on eBay (~50 cent/piece).
Stage 0.3 – First Circuit Design
Usually FDDs are controlled via a half-H-bridge for each row/column, which then get powered once a dot has to be flipped. However this method is rather expensive in terms of parts needed to run a larger display. You could build a half-H-bridge for every line by yourself, but this would be insanely time consuming and hard to debug, or you could use a quad-motor-driver-chip, which costs 2 to 3 €. This is still not cheap but a reasonable option for a controller board.
Nevertheless I wanted to go for an even cheaper method of controlling the FDD with just a single H-bridge for current flow and a triac for each row/column. A triac works roughly like a transistor for alternating currents (AC). If you apply a current trough the gate of the triac, the impedance between the two anodes decreases drastically and allows flow of current through the triac. This is pretty much exactly what is needed to select a column and a row to flip a dot on the display.
To reduce the need of I/O ports of a microcontroller, a couple of shift registers (74HC595) will serve as a digital I/O extender. This way only 3 pins are needed to control a (nearly) arbitrarily large flip dot display.
Stage 0.2 – Basics and Proof of Concept
The first steps were to run just a few pixels manually and then via a microcontroller. With 12V voltage pulse over a column and a row you can make a pixel switch – pretty much like playing battleships. Depending the direction of the current the pixel either switches to yellow or black.
Things learned from testing:
- the display is usually powered by a dual power supply (e.g. +12V/-12V)
- this can be mediated by switching the voltage with an H-bridge
- H-bridges are a pain in the a** to wire on a breadboard
- a 500-600 microsecond pulse is sufficient to switch a pixel
- the row and column selection will be done via a couple of shift registers (74HC595)
-
flipping dot (click to see)
-
test of the H-bridge
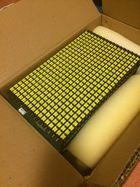
Stage 0.1 – The Purchase
Generating display code
The display runs on a simple byte array (1 = yellow). To "draw" an image there are websites like dot2pic. Select Monochromatic, 8 pixels per byte (horizontal) 24x16 draw.

