Project:PC Desk Top
| ProjectInfoBox Desk Top for a Widescreen Monitor | |
|---|---|

| |
| Status: | Done |
| Release Date: | 2021-10-10 |
| Initiator: | Ronan |
| Materials Used: | Plywood, lumber, varnish, screws, glue, previous desk's legs and drawers |
| Tools Used: | hand saws, hand plane, cordless drill, clamps |
| Approx. Cost: | 80 € |
Aim
A cheap desk that fits comfortably and solidly my setup.
Before
The previous desk was the cheapest Ikea one with modifications around the screen:
- holes drilled near the left corner for cables
- power stripe zip-tied to the bottom left of the desk
- a very janky shelf. The shelf's support is made by two legs going behind the screen, screwed to the top using L brackets. The shelf is only supported from the rear.
Issues:
- The shelf had a big cutout made so that the webcam could fit (this was a test, to check if the cut-out was a big problem or not).
- The shelf's support legs are screwed to the desk top which is of MDF+cardboard: any serious weight on the shelf will bring it down on the screen, which is not cheap nor easy to replace.
- The cable hole is on the left corner of the desk, the cables have to go to the center of the screen -> the area under the left of the screen is nearly blocked by the cables
- The desk top is only covered by a very thin layer of not very waterproof material. Any small ding allows the water to penetrate, the cardboard swells, and now the desk surface is very damaged.
- The desk top's corner between the front face and the top is being worn out.
- The desk's top thickness is annoying.
- The screen is held by a screen support that is rated for the screen's weight (Arctic Z1) and claped to the desk's top. The manufacturer lied. This piece of shit is far too flimsy. The support column bends, the support arm bends more, the screen's orientation settings slip. The clamp prevents pushing the desk right up to the wall, letting a space where pens go to disappear. The only good thing is the USB3 hub integrated at the base of the support.
Requirements
The big screen weights 12kg and the included foot cannot be used, the huge legs eat all the room on the des. A strong built-in screen support is needed.
There are more than 30 cables running between the PC, power strips and all the accessories: a sane(ish) cable management is critical.
The speakers should be at the desk level, as wide-spaced as possible, without obstructions
The desk surface needs some resistance to spilled liquids (except strong alcohols or thinners like white spirit or acetone)
The desk surface should be under 15mm thick
Costs should be kept minimal
Materials
- 40x60mm raw construction lumber
- 1600mm at the back of the desk top
- 2x685mm at each side, so 4x70cm
- 34x54mm planed construction lumber
- 4x54cm to support the shelf: two in the middle back, one at each front corner (no support at the back corners)
- the shitest ever 12mm thick construction plywood
- 1600x700mm, main surface
- 1600x300mm, shelf
- 200x60mm hole plate
- two plates used to link the screen mount to the back supports of the shelf
- Arctic W1A screen wall mount
- added some friction paste to prevent slipping under load without having to over-torque the screws
After
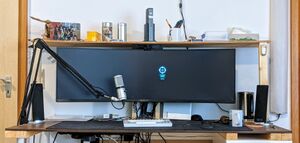
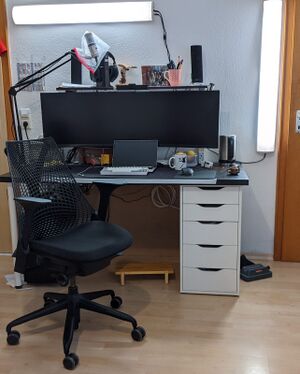
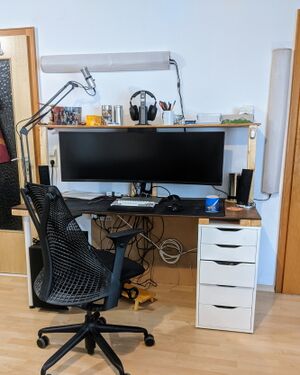
As expected, there is 8mm of sag at the middle of the desk surface and 4mm at the middle of the shelf.
To Do
Cable management under the desk

