Project:Metal Rose: Difference between revisions
From CoMakingSpace Wiki
m linked wooden rose |
m →Notes & Photos: typo |
||
| Line 23: | Line 23: | ||
<gallery mode=packed-hover heights=250 caption="major steps (mouse-over for more information)"> | <gallery mode=packed-hover heights=250 caption="major steps (mouse-over for more information)"> | ||
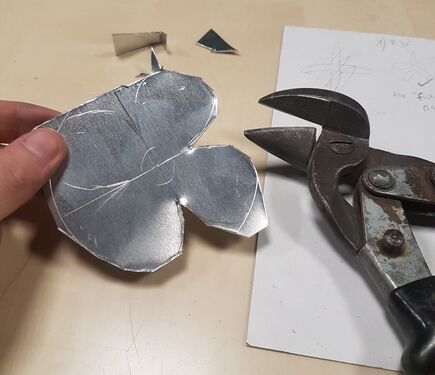
File:metal rose 01.jpg|[[Scribing Compass|scribe]] the design and cut it out with [[snips]] | File:metal rose 01.jpg|[[Scribing Compass|scribe]] the design and cut it out with [[snips]] | ||
File:metal rose 02.jpg|cut a male thread around the tube using a [[die]], then protect the | File:metal rose 02.jpg|cut a male thread around the tube using a [[die]], then protect the thread with some nuts and hammer the rest into an interesting shape | ||
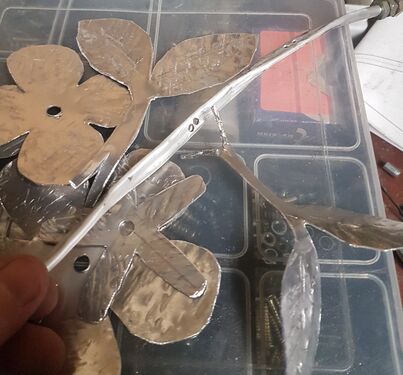
File:metal rose 03.jpg|all pieces cut/shaped | File:metal rose 03.jpg|all pieces cut/shaped | ||
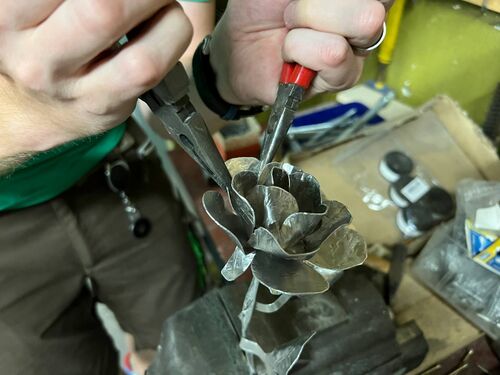
File:metal rose 04.jpg|hammering petals & leaves gives a nice organic texture; do NOT attempt to divide the leaf stalks into brittle halves like I did! | File:metal rose 04.jpg|hammering petals & leaves gives a nice organic texture; do NOT attempt to divide the leaf stalks into brittle halves like I did! | ||
Latest revision as of 23:28, 17 March 2025
| ProjectInfoBox Metal Rose | |
|---|---|

| |
| Status: | finished |
| Release Date: | July 2022 |
| Initiator: | Lukas |
| Materials Used: | scrap aluminum sheets, aluminum tube; dome nut |
| Tools Used: | M6 die, step drill bit, scribing compass, ruler, snips, hammer, file, needle-nose pliers |
| Approx. Cost: | a few cents (mostly scrap metal) |
This metal rose can be made entirey with hand tools and is a great beginner's metalworking project! No forging, welding or brazing required - not even glue!
Full disclosure: I did not come up with this design, just saved this awesome instructable in my "ideas" folder until I could use it for an anniversary: Make a Metal Rose without Welding and Forging
Please refer to that link for detailed instructions - but I thought I'd also share my experience here :-)
Alternative inspiration: wooden rose/Holzrose (DE)
Notes & Photos
Attaching the leaves was tricky - maybe I should have used rivets instead, this way I broke off several thin sections before arriving at a functioning "wrap-around"...
- major steps (mouse-over for more information)
-
-
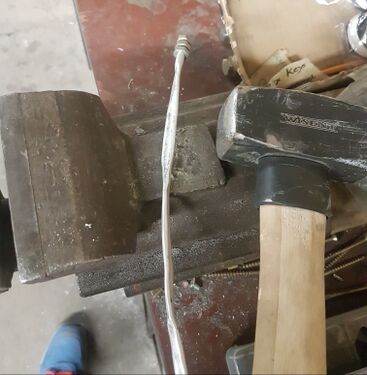 cut a male thread around the tube using a die, then protect the thread with some nuts and hammer the rest into an interesting shape
 -
 all pieces cut/shaped
 -
 hammering petals & leaves gives a nice organic texture; do NOT attempt to divide the leaf stalks into brittle halves like I did!
 -
 the petals are bent by hand until you're happy with the result - don't worry, it's easier than it looks!


