Project:Crokinole: Difference between revisions
m →Center Hole: word |
|||
| Line 85: | Line 85: | ||
==== Center Hole ==== | ==== Center Hole ==== | ||
The center hole was also cut with the handheld router in combination with a 3D-printed jig. The jig had | The center hole was also cut with the handheld router in combination with a 3D-printed jig. The jig had the holes marked for the pegs, which doubled as screw holes in the meantime. | ||
Jig-hole-diameter = router-base (88mm) + final-hole-diameter (35mm) - router-bit-diameter (8mm) => 115mm<gallery> | Jig-hole-diameter = router-base (88mm) + final-hole-diameter (35mm) - router-bit-diameter (8mm) => 115mm<gallery> | ||
Revision as of 23:48, 26 November 2022
Crokinole is a 2-4 player dexterity board game with the goal to get as many disks as close to the center as possible. For the detailed game rules check out the Crokinole Wikipedia page.
| ProjectInfoBox Crokinole Board | |
|---|---|

| |
| Status: | done |
| Release Date: | 24.12.2021 |
| Initiator: | Patrick |
| Materials Used: | Wood (beech), Coloured MDF (Valchromat) |
Design
The playing area of a Crokinole Board is 660mm in diameter. Dimensions for the other measurements were a bit harder to find and I took them from the blog of Stephen Houser.
| Playing circle | 660 mm |
| Outer line | 610 mm |
| Middle line | 406 mm |
| Inner line (with pegs) | 204 mm |
| Line width | 3 mm |
| Center hole | 35 mm |
| Center hole depth | 6 mm |
| Ditch width (area around playing circle) | >51 mm |
| Disks | 32x10 mm |
I decided to make the board in the shape of an octagon, which allowed me to save some material as only the center area needed to be made from a solid piece. The ditch and border were made from 8 identical pieces of scrap Valchromat while the center is made from an old Ikea beech tabletop.


CNC-Routing Pieces
Given that the outer pieces are identical and needed more or less precise angles and arcs I routed them on our Workbee CNC Router. The blanks were cut to width on the table saw and trimmed to size with the chop saw. On each rough cut piece I glued a printed template to help with drilling the locating/mounting holes, while making sure the screw heads are counterbored deep enough that the CNC router won't hit them.
-
 Cutting a fixture to reliably route multiple of the same piece on the CNC.
 -
Video

-
-
-
-
Timelapse of a complete piece.


-
 Countersinking for the screws used during assembly.
 -
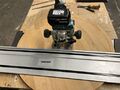
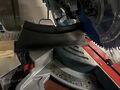 Trimming the borders. The CNC-cut part was only used for adjusting the end stop!
 -
 Predrilling screw locations on the border.


Center Piece
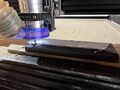
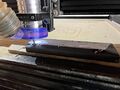
Routing Circle
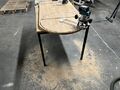
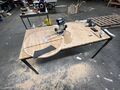
The center playing area was cut with a circle-cutting jig for our router. The 8mm bit needed 4-5 passes to cut the complete circle. Please ignore the slot in board. This is were the legs of the Ikea table used to be mounted. This will be the bottom of the Crokinole Board.
-
 Setting up.
 -
 Lining up the router bit with the radius mark.
 -
 First pass
 -
 Many passes later.
 -
 Through cut.


Routing Step
On the bottom there was also a step cut out to increase the gluing area and allow for some screws to fix the outer segments onto the playing area. MDF/Valchromat is not as strong as solid wood therefore I wanted to make sure it doesn't break when lifted from the edges.
-
 Routing step.
 -
 Checking fit. Here you can also see the positions where the screws will go.


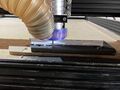
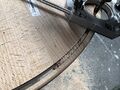
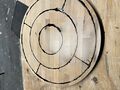
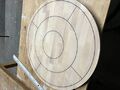
Lines
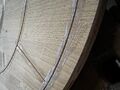
Arguably the lines are the most important feature for playing, therefore I wanted to make sure they were as solid as possible. Firstly they were routed out with a 3mm bit and then filled with black epoxy. I was worried that some of the epoxy would seep through the grain of the wood and stain areas that should not be stained. Coating the slots and the area around it with some wood glue worked ok for sealing, though in some areas there was bleed though that could not be removed by sanding. Next time I'd use 3-4 coats of wood glue (or lacquer) before applying the epoxy. Nevertheless the pitch black lines look quite nice in the end.
-
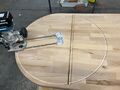
 Cutting the circles.
 -
-
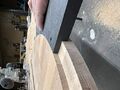
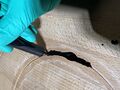
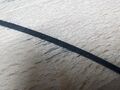
 Cutting the straight lines.
 -
 Sealing the grain with some wood glue. Next time 1-2 layers more and wider would have been better.
 -
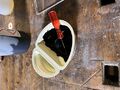 Mixing epoxy.
 -
 Syringe for 'injecting' the epoxy into the groves.
 -
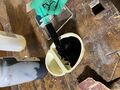
 Applying while trying to avoid bubbles.
 -
 Still uncured. Took around 5 days as the workshop was quite cold at that time.
 -
 Cured.
 -
 After sanding.
 -
 Example of some bleed through.


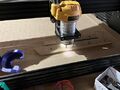
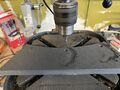
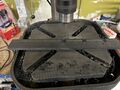
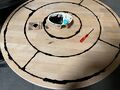
Center Hole
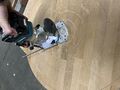
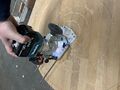
The center hole was also cut with the handheld router in combination with a 3D-printed jig. The jig had the holes marked for the pegs, which doubled as screw holes in the meantime.
Jig-hole-diameter = router-base (88mm) + final-hole-diameter (35mm) - router-bit-diameter (8mm) => 115mm
-
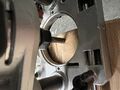
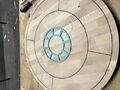 Before.
 -
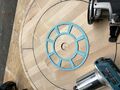 After
After

