Search results
From CoMakingSpace Wiki
File:Waxwrap2.JPG [[Project:Beeswax Wrap]] spread the [[beeswax]] flakes onto a piece of cotton [[fabric]](1,920 × 1,080 (440 KB)) - 14:31, 17 April 2019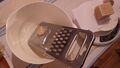
File:Waxwrap1.JPG [[Project:Beeswax Wrap]] first of all, the [[beeswax]] needed to be shredded into workable pieces(1,920 × 1,080 (405 KB)) - 14:28, 17 April 2019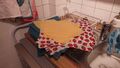
File:Waxwrap5.JPG [[Project:Beeswax Wrap]] the finished beeswax wrap can be cleaned with soapy water (not too hot!)(1,920 × 1,080 (509 KB)) - 15:01, 17 April 2019
File:Wax wrap Vader.JPG first test of self-made [[Project:Beeswax Wrap|beeswax wrap]] as an alternative to aluminum or cling foil ''(Frischhaltefolie)''(1,920 × 1,080 (436 KB)) - 20:02, 26 December 2018
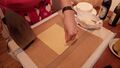
File:Waxwrap3.JPG [[Project:Beeswax Wrap]] place the [[beeswax]]-covered [[fabric]] between to sheets of baking paper and use a [[flatiron(1,920 × 1,080 (349 KB)) - 14:54, 17 April 2019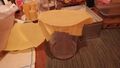
File:Waxwrap4.JPG [[Project:Beeswax Wrap]] The warmth of your hands should now be sufficient to shape your beeswax wrap around pretty much anything! If it doesn't keep its shape, add more wa(1,920 × 1,080 (564 KB)) - 14:57, 17 April 2019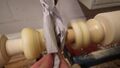
File:Captive rings 12.JPG even out the beeswax and work it in deeper with a paper towel(1,920 × 1,080 (363 KB)) - 10:47, 14 July 2019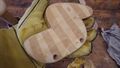
File:Laser-Tigerente 4.JPG laser engraved variation, step 4: the wood darkens slightly due to the [[beeswax]](1,920 × 1,080 (368 KB)) - 23:35, 28 May 2019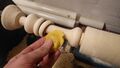
File:Captive rings 11.JPG applying [[beeswax]] is easy with the lathe spinning - most of it melts just by friction!(1,920 × 1,080 (343 KB)) - 10:41, 14 July 2019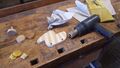
File:Laser-Tigerente 3.JPG laser engraved variation, step 3: apply [[beeswax]] with a [[Heat Gun|heat gun]] and some rags or paper towels(1,920 × 1,080 (427 KB)) - 23:33, 28 May 2019


