Project:Jigsaw Puzzles
From CoMakingSpace Wiki
| ProjectInfoBox Jigsaw Puzzles | |
|---|---|

| |
| Status: | work in progress, still learning |
| Release Date: | 2025-02-19 |
| Initiator: | B--rian |
| Materials Used: | 4mm poplar plywood |
| Tools Used: | Laser Cutter |
| Software Used: | Gimp, Inkscape, Lasercutter-Software |
| Approx. Cost: | Up to now:
|
Puzzles Examples
Isn't that what comes to mind first, when getting started with laser cutting wood?
- https://wiki.comakingspace.de/File:B--rian_HeidelbergCastle_Jigsaw.svg contains both the image and the jigsaw pattern as layers. However, the pieces are rather small and the image is too dark.
- https://wiki.comakingspace.de/File:NewBornStencil.svg is a stencil to make A6 cards if your friends have a newborn baby. Not exactly a jigsaw, I know.
Recipe
The following recipe is not complete yet!
Image Preparation
- Choose a high-resolution color image for your puzzled wo. Adjust the brightness, contrast, and saturation using photo editing software.
- Convert your image to black-and white, using the method "dither"
- Designing the puzzle pieces using a tool like Draradech (Manuel Kasten)'s amazing Jigsaw SVG Generator.
- Using a vector graphics tool like Inkscape, check the outline for your puzzle.
- You want to bring a little box or bag to put the puzzle pieces in, to carry them home safely.
Preparation for Machining
- We have to ensure that all the puzzle piece lines are recognized by the laser cutter as cutting paths.
- Choose a laser-friendly material such as plywood or acrylic, see [Materials].
- Set the laser cutter parameters (speed and power) according to the material being used, usually provided by the laser cutter's manual.
Get physical
- Start up the water cooler.
- Switch on the laser cutter.
- Send the design from the laser cutter software to the machine by hitting the "Download" button.
- Secure the material onto the laser cutter bed.
- With open laser cutter lid, hit
Startwhich will simulate the actual cutting. The red positioning laser allows you to check, whether you will stay on your piece of material. - If everything looks ok, close the lid, and go for it! Monitor the laser cutter during operation to ensure nothing catched fire.
Tidy up and pay the bills
- Pack your puzzle into the box which you brought along.
- Shut-down all equipment, in the following order: Laser-cutter, water-cooler, and PC.
- Don't forget to donate — your contribution to the not-negligible power consumption 😉.
Learnings and remarks
Thomas Eddison supposedly once said I never once failed at making a light bulb. I just found out 999 ways not to make one. The same is true for laser cutting jigsaw puzzles -- most likely, things will not immediately work, so here a few things I learned so far and other may profit from this experience:

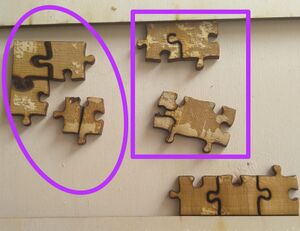
- Don't make the puzzle pieces to small, otherwise the knobs of the puzzle pieces may easily break.
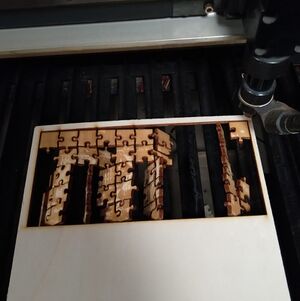
- Stop the laser immediately, if the plywood dissappears unexpectedly through the surface grid into the waste bin drawer.
- Make sure that the engraved picture is not too dark.
- If you don't put anything underneath the workpiece, puzzle pieces may just slip through the knife bed into the collection tray. The lamella distance was bigger than the 2cm puzzle pieces of my first try.
Nota bene: This is WIP (work in progress), so please be a bit patient with me. --B--rian (talk) 2025, February 20th