Project:Upcycled Handrail: Difference between revisions
(Category:Upcycling; fixed code-like ending sentence format) |
|||
| (3 intermediate revisions by 2 users not shown) | |||
| Line 36: | Line 36: | ||
<br clear=all> | <br clear=all> | ||
== Gallery == | == Gallery == | ||
<gallery mode=packed-hover heights=240> | <gallery mode="packed-hover" heights="240"> | ||
File: | File:Ciaran Handrail Starting Point.jpg|After the attic renovation we had to build a new stairs. I rescued some of the original antique beams from the roof to carve into the handrail. | ||
File: | File:Ciaran Handrail Prototype 1.jpg|Rapid prototyping of the bottom curve with wood dowel stock and foam pipe insulation | ||
File: | File:Ciaran Handrail Prototype 2.jpg|Rapid prototyping of the bottom curve. This enabled many adjustments while visualising the complex curve. | ||
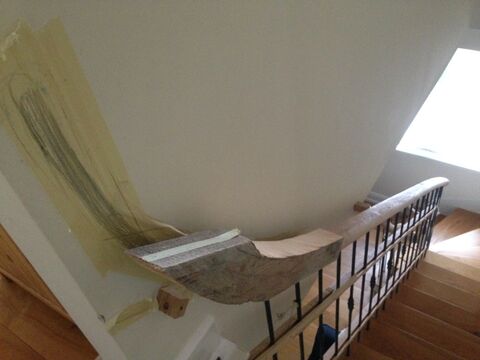
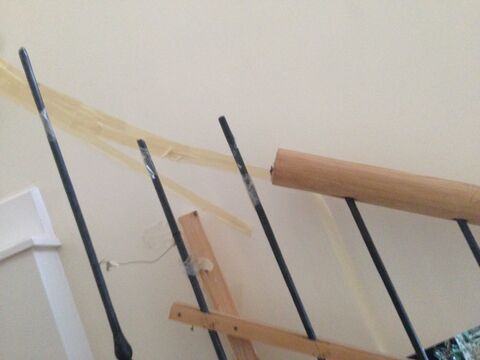
File: | File:Ciaran Handrail Curve Transfer 1.jpg|Rapid prototyping the top curve with glue gunned wood strips, wrapped in cardboard and taped. | ||
File: | File:Ciaran Handrail Curve Transfer 2.jpg|Transferring the curve to the wall | ||
File: | File:Ciaran Handrail Curve Transfer 3.jpg|Transferring the curve onto the salvaged old beam piece | ||
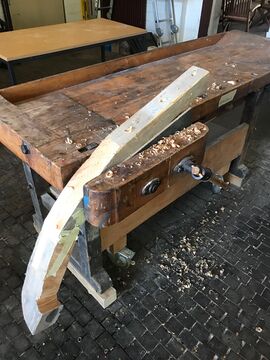
File: | File:Ciaran Handrail Cutting Time 1.jpg|Time to cut. This took a while to get started as I need to make sure not to cut too much as I had no spare beams if something went wrong. | ||
File: | File:Ciaran Handrail Cutting Time 2.jpg|Carefully made the rough cuts as close to the imagined curve but double checking in place between each cut. | ||
File: | File:Ciaran Handrail Trial Fitting 1.jpg|Trial fitting the piece in place. | ||
File: | File:Ciaran Handrail Trial Fitting 2.jpg|Trial fitting the two top curve pieces in place after rough cutting. | ||
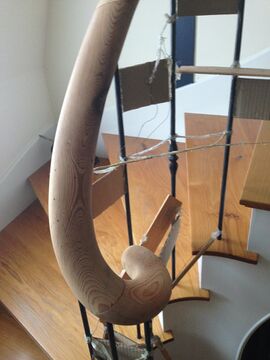
File: | File:Ciaran Handrail Trial Fitting 3.jpg|The curve is quite complex and tight at the top where it twists and attaches to the wall | ||
File: | File:Ciaran Handrail Carving Markup.jpg|Off to the CoMakingSpace to the carpenters bench. Some more marking up before getting on with carving. | ||
File: | File:Ciaran Handrail Carving Start.jpg|First start to round off the corners to allow the curvature to come through. | ||
File: | File:Ciaran Handrail Carving Blocky.jpg|Slowly the rectangular gives way to the curve. | ||
File: | File:Ciaran Handrail Carving Snake.jpg|The cobra raises it's head. Now the curve is dominant and can be refined further. | ||
File: | File:Ciaran Handrail Carving Curves.jpg|A nice shot of the bottom and top curves lying on the bench. Already hard to imagine the rectangular beams they came from. | ||
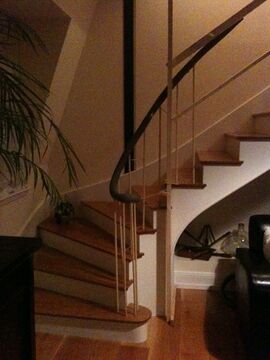
File: | File:Ciaran Handrail Stabilise Uprights 1.jpg|After fixing the wrought iron uprights in place, they were stabilised with wood strips. | ||
File: | File:Ciaran Handrail Stabilise Uprights 2.jpg|Drilling the holes and fixing the wrought iron uprights in the stairs was another whole load of complexity that slowed down the project but I'll spare the details. | ||
File: | File:Ciaran Handrail Trim Uprights 1.jpg|Measuring and marking the uprights for cutting to size. | ||
File: | File:Ciaran Handrail Trim Uprights 2.jpg|Very nervously cut the uprights. They were fixed permanently into the stairs so couldn't afford to cut them too short. | ||
File: | File:Ciaran Handrail Trial Fit 1.jpg|Trial fitting the straight-ish mid section with the bottom curve. | ||
File: | File:Ciaran Handrail Trial Fit 2.jpg|Phew! it fits. But quite a lot of refining to do still. | ||
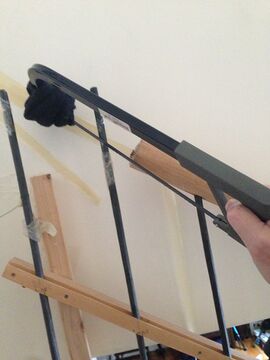
File: | File:Ciaran Handrail Bracket 1.jpg|Needed a custom bracket to fix the handrail to the wall. Upcycled two old paint roller handles left over from some earlier DIY projects. | ||
File: | File:Ciaran Handrail Bracket 2.jpg|These custom brackets worked out perfectly. | ||
File: | File:Ciaran Handrail Prep Sand Stain.jpg|Created a cardboard sculptured crap catcher. Preparation before sanding, staining, waxing and polishing. | ||
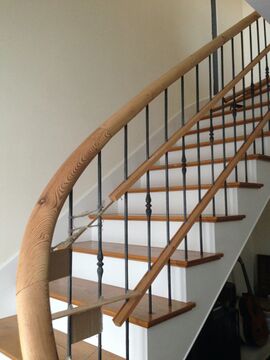
File: | File:Ciaran Handrail Finished 2.jpg|Glad this project is finally finished. Very happy with the results! | ||
</gallery> | </gallery> | ||
== Next Steps == | == Next Steps == | ||
* Hopefully no more steps! | * Hopefully no more steps! | ||
:: …and no more handrail projects for me. | |||
[[Category:Upcycling]] | |||
[[Category:Woodworking]] | [[Category:Woodworking]] | ||
Latest revision as of 21:12, 7 November 2021
| ProjectInfoBox An Upcycled Handrail | |
|---|---|

| |
| Status: | complete & documentation |
| Release Date: | completed 2021 |
| Initiator: | Ciaran |
| Materials Used: | Reclaimed roofing beams (over 100 years old) from attic conversion (Appears to be Antique Douglas Fir) |
| Tools Used: | Chisels (Woodworking), Reciprocating Saw, Rasps, Hobelbank, Sandpaper |
After a major attic conversion project, Ciaran had the romantic notion of sculpting the handrail for the new stairs from the antique roofing beams salvaged during the attic conversion.
Things started well but were put on hold many times over the years before finally being completed in 2021.
Major Steps
Some related images are in the gallery below:
- Cut away any rotten and cracked sections from the beams.
- Select best sections of remaining beams for the various curves and straight pieces of the handrail.
- Prototype the lower curve of the handrail using dowel stock and some foam pipe insulation.
- Prototype the upper curve of the handrail with some strips of wood wrapped in cardboard and tape.
- Prototyping went quickly, allowing many iterations and adjustments to find the best curve for the handrail.
- The wrought iron uprights that hold up the handrail were ordered and installed
- Another prototype was built from strips of wood and a glue gun. This was glued to the uprights to confirm the curve before the uprights would be cut to match the planned curve.
- This prototype handrail stayed in place for several years serving as temporary handrail, in retrospect there was a fear of actually cutting the uprights to size and starting the actual wood carving.
- I finally got the courage to start cutting the beams roughly to shape with a Reciprocating Saw. This was a difficult milestone as I didn’t have much wood so couldn’t afford to cut off too much.
- After the first cuts with the saw I switched to using Chisels (Woodworking) and Rasps.
- This was very tedious, but it was essential that I removed material slowly as the curves were being created by eye. I had to stop several times and put the pieces into place to check the curve and then remove them again to continue refining.
- Slowly the curves developed and I decided that the pieces were pretty close to perfect and could be roughly sanded and then fixed in position.
- When in position I did the final sanding and finishing to make sure the curve flowed smoothly through all the pieces.
- I added a couple of fixing brackets to the wall to stabilise the rail.
- This was a mini project itself. As the stairs and handrail were DIY, standard brackets wouldn’t fit. So I had to improvise using two old paint roller handles left over from previous DIY projects see photo’s below.
- Back to the handrail. I stained it with coffee and a vinegar and steel-wool solution to darken it. I then coated it with a natural beeswax finish.
Gallery
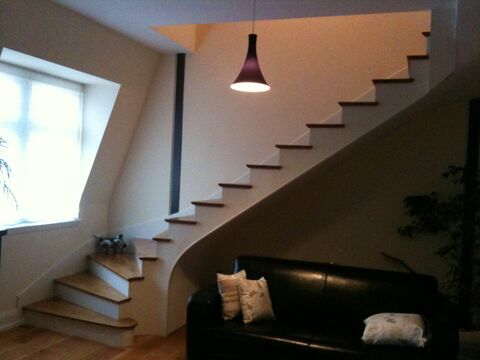
After the attic renovation we had to build a new stairs. I rescued some of the original antique beams from the roof to carve into the handrail.
Rapid prototyping of the bottom curve with wood dowel stock and foam pipe insulation
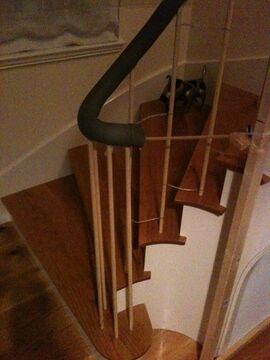
Rapid prototyping of the bottom curve. This enabled many adjustments while visualising the complex curve.
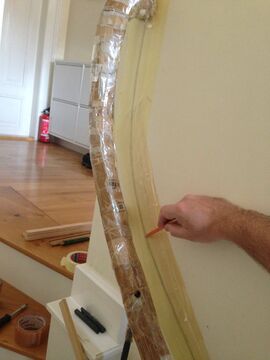
Rapid prototyping the top curve with glue gunned wood strips, wrapped in cardboard and taped.
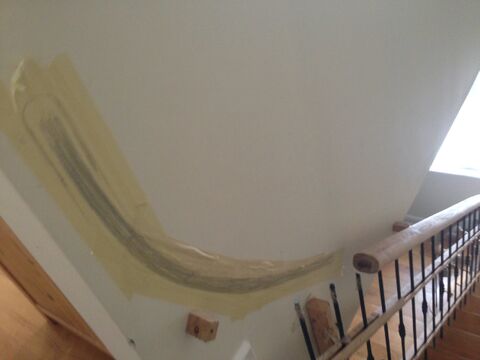
Transferring the curve to the wall
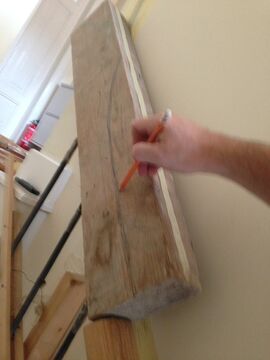
Transferring the curve onto the salvaged old beam piece
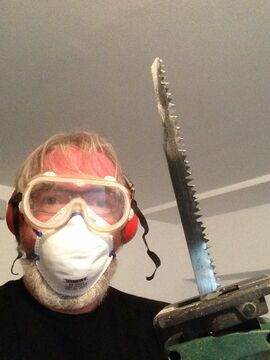
Time to cut. This took a while to get started as I need to make sure not to cut too much as I had no spare beams if something went wrong.
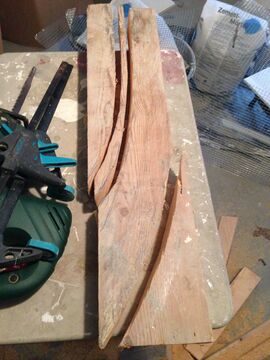
Carefully made the rough cuts as close to the imagined curve but double checking in place between each cut.
Trial fitting the piece in place.
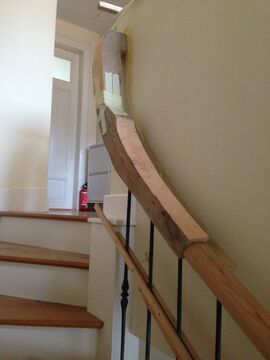
Trial fitting the two top curve pieces in place after rough cutting.
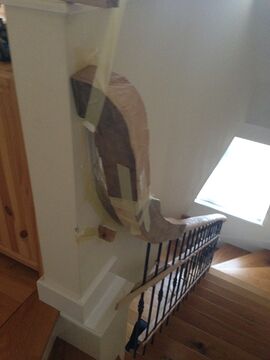
The curve is quite complex and tight at the top where it twists and attaches to the wall
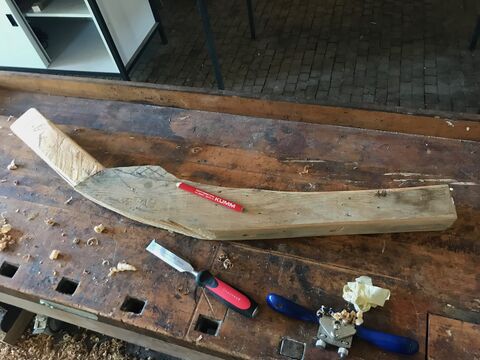
Off to the CoMakingSpace to the carpenters bench. Some more marking up before getting on with carving.
First start to round off the corners to allow the curvature to come through.

Slowly the rectangular gives way to the curve.

The cobra raises it's head. Now the curve is dominant and can be refined further.
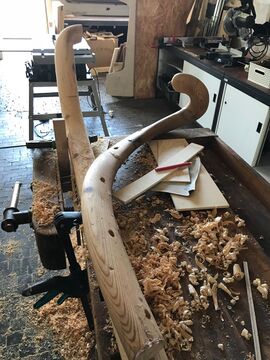
A nice shot of the bottom and top curves lying on the bench. Already hard to imagine the rectangular beams they came from.
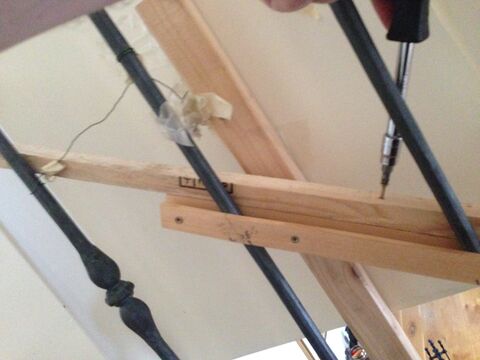
After fixing the wrought iron uprights in place, they were stabilised with wood strips.
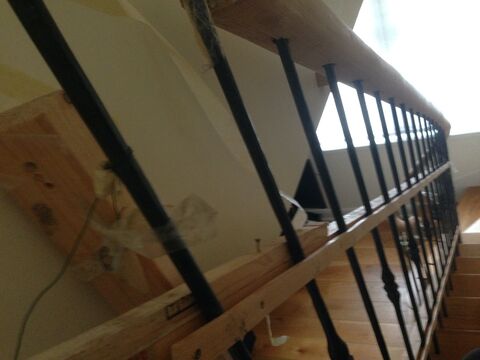
Drilling the holes and fixing the wrought iron uprights in the stairs was another whole load of complexity that slowed down the project but I'll spare the details.
Measuring and marking the uprights for cutting to size.
Very nervously cut the uprights. They were fixed permanently into the stairs so couldn't afford to cut them too short.
Trial fitting the straight-ish mid section with the bottom curve.
Phew! it fits. But quite a lot of refining to do still.
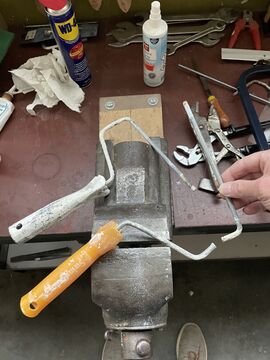
Needed a custom bracket to fix the handrail to the wall. Upcycled two old paint roller handles left over from some earlier DIY projects.
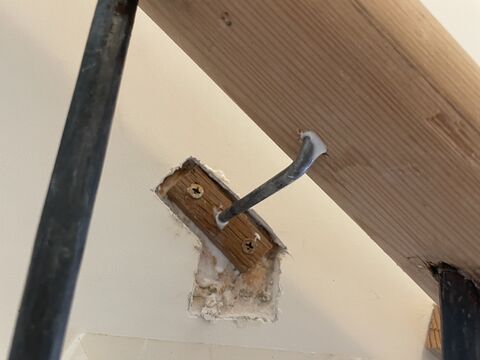
These custom brackets worked out perfectly.
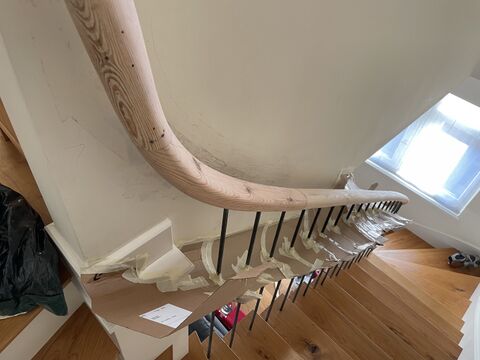
Created a cardboard sculptured crap catcher. Preparation before sanding, staining, waxing and polishing.
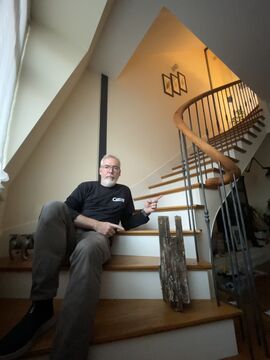
Glad this project is finally finished. Very happy with the results!


Next Steps
- Hopefully no more steps!
- …and no more handrail projects for me.