Project:Laser Engraved Spice Glasses
| ProjectInfoBox Laser Engraved Spice Glasses | |
|---|---|

| |
| Status: | done |
| Release Date: | ~September 2020 |
| Initiator: | Martin |
| Team: | Martin, Patrick |
| Materials Used: | Glass |
| Tools Used: | Laser Cutter |
| Software Used: | LaserCut 5.3, Inkscape |
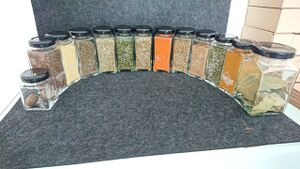
As Kim likes to cook, a custom made set of glasses for his spices seemed like the perfect birthday gift for him!
Since we had a brand-new Laser available at the space, these glasses had to be laser engraved!
Find and prepare images
Find images
In order to find nice images to engrave, Google image search can be of great help.
For this project it was particulary helpful to search for linearts images (DE:Strichzeichnung), which can be set as a search parameter in the options.
As an example, see the following search for parsley: https://www.google.de/search?q=Petersilie&tbm=isch&tbs=itp:lineart
Prepare images
The image search mentioned above will most likely return images with different file formats. You can try to limit your search to vector graphics (add "filetype:svg"), but most likely this will not return nice results.
As a consequence, you will need to convert the pictures to vectore graphics in inkscape after importing them.
To do so, import the image, select it and then select Path-->Trace Bitmap (or press shift+alt+b). This will lead to inkscape redrawing your image as a vector, which can afterwards be used as a regular vector graphic.
Add some text
Position your new vector drawing where it needs to be and add text to it. You can receive nice results by using "Calisto MT" in Italic as Font.
Be careful when using text: In order to be able to use it in LaserCut 5.3, you will need to convert the text into vectors in inkscape before exporting it.
To do so, please select the text nd then navigate to Path-->Object to Path (or press ctrl+shift+c). Afterwards, you can export your file for further usage as usual.
Preparation in LaserCut 5.3
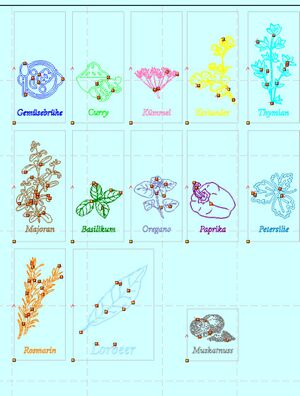
As the project contained quite a few spices, all spices have been put in one file but still engraved one after another.
In order to control, which spice gets engraved when, the different spices where assigned to different layers in LaserCut. The layers can be turned on and off individually. With this method, the LaserCut file had to be built only once.
The final result looked pretty colorful:


