Project:Fish Cages: Difference between revisions
(intro; failed design) |
(completed) |
||
| Line 1: | Line 1: | ||
{{ProjectInfoBox | {{ProjectInfoBox | ||
|project title=Floating Fish Rearing Cages | |project title=Floating Fish Rearing Cages | ||
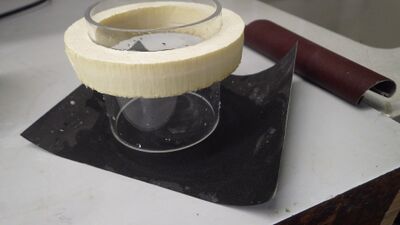
|image= | |image=fishcage0.JPG | ||
|status= | |status=worked fine, but not needed in the end | ||
|date=January 2019 | |date=January 2019 | ||
|initiator={{£}} | |initiator={{£}} | ||
|materials=[[Acrylic Glass|acrylic glass]] tube, [[PLA]], [[XPS]], ''plastic mesh ("VS-Monodur PA 250 N)'' | |materials=[[Acrylic Glass|acrylic glass]] tube, [[PLA]], [[XPS]],<br>''plastic mesh ("VS-Monodur PA 250 N")'' | ||
|tools=[[bandsaw]], [[3D Printers|3D printers]], [[Laser Cutter|laser cutter]] | |tools=[[bandsaw]], [[3D Printers|3D printers]], [[Laser Cutter|laser cutter]] | ||
|software=[[Tinkercad]], [[Slic3r]], [[Inkscape]], [[Visicut]] | |software=[[Tinkercad]], [[Slic3r]], [[Inkscape]], [[Visicut]] | ||
|cost=approx. 3 € apiece | |cost=approx. 3 € apiece | ||
}} | }} | ||
When rearing fish larvae in a regular aquarium, many factors reduce their growth and, ultimately, survival. In addition, it's hard to monitor the larvae when they can spread out and hide, but I wanted to be able to inspect them under a microscope during the first two weeks while still having them in beneficial flow-through conditions with well aerated water. | When rearing fish larvae in a regular aquarium, many factors reduce their growth and, ultimately, survival. In addition, it's hard to monitor the larvae when they can spread out and hide, but I wanted to be able to inspect them under a microscope during the first two weeks while still having them in beneficial flow-through conditions with well aerated water. | ||
Commercial rearing cages do exist but are quite expensive (I | Commercial rearing cages do exist but are quite expensive (I needed 10-20!) and had the wrong dimensions for my use case in the laboratory. | ||
== Acrylic Glass Tube == | == Acrylic Glass Tube == | ||
* 60 mm OD, bought as 1 m stock | |||
** first attempt: 100 mm OD (did not fit into some lab glassware with all parts assembled) | |||
== 3D | [[File:Bandsaw sled.JPG|thumb|left|the tube was cut with a quickly built [[Bandsaw Sled|bandsaw sled]] for safety & accuracy]] | ||
* snap-fit ring to hold | |||
<br clear=left> | |||
== 3D Printed Bottoms == | |||
* snap-fit ring to hold a fine mesh we had around for similar purposes | |||
* low-poly circle in [[Tinkercad]] may actually be beneficial for this purpose - bit more room for error? | * low-poly circle in [[Tinkercad]] may actually be beneficial for this purpose - bit more room for error? | ||
* inside rings seemed easier at first, but appeared to allow fish to get trapped in small "pockets" between low-poly ring and round tube -> switched to outside rings | |||
* designed to be about right (ID = tube OD + 1 mm), but final fitting had to be tried with small adjustments in [[Slic3r]] (P4/P5: 100.4 % scale) | * designed to be about right (ID = tube OD + 1 mm), but final fitting had to be tried with small adjustments in [[Slic3r]] (P4/P5: 100.4 % scale) | ||
* 20 % infill, 0.3 mm layers | * 20 % infill, 0.3 mm layers | ||
== Failed | <gallery mode=packed heights=250> | ||
File:fishcage3.JPG|an early [[3DP|3D printed]] snap ring that was inside & just a bit too large - note the cracks forming in the acrylic glass tube | |||
File:fishcage3D.png|final design - super fancy, I know! | |||
</gallery> | |||
<br clear=left> | |||
== Floaters == | |||
The floating rings at the top were [[Laser Cutting|laser cut]] out of [[XPS]] and fitted quite nicely after just two or three rescaling rounds. | |||
[[File:fishcage4.JPG|laser cutting the floaters|thumb|left]] | |||
<br clear=left> | |||
== Postprocessing & Assembly == | |||
After all the parts were made, some additional steps became necessary: besides the obvious "cut the mesh and squeeze it in place", the floaters had to be washed to get rid of the laser stench and the (bottom) bandsaw cuts hat to be cleaned up for a better seal. | |||
<gallery mode=packed heights=150> | |||
File:fishcage5.JPG|all the parts after the "machine work" at the Space: tubes, floaters and snap rings | |||
File:fishcage6.JPG|the floaters were held underwater for a couple of days after washing with ethanol | |||
File:fishcage7.JPG|the bottom ends of the cages were wet [[Sanding|sanded]] until they were even enough to form a tight seal with the mesh & snap ring | |||
</gallery> | |||
== Failed Designs == | |||
[[File:fishcage2.JPG|thumb|left|The initial plan was to glue the mesh directly onto the cut face of the acrylic tube, but I did not know the material of the mesh (probably a non-gluable [[plastic]]) and therefore failed quickly.]] | |||
I also made a "mesh wall" prototype but quickly discarded this approach because it required [[Silicone Caulk|silicone caulk]] for assembly. Therefore, it was messy to assemble and basically non-recoverable (i.e. properly cleanable/repairable) without any noticeable benefits. | I also made a "mesh wall" prototype but quickly discarded this approach because it required [[Silicone Caulk|silicone caulk]] for assembly. Therefore, it was messy to assemble and basically non-recoverable (i.e. properly cleanable/repairable) without any noticeable benefits. | ||
[[Category:3D Printing]] | |||
[[Category:Labware]] | [[Category:Labware]] | ||
Latest revision as of 11:26, 30 December 2020
| ProjectInfoBox Floating Fish Rearing Cages | |
|---|---|

| |
| Status: | worked fine, but not needed in the end |
| Release Date: | January 2019 |
| Initiator: | Lukas |
| Materials Used: | acrylic glass tube, PLA, XPS, plastic mesh ("VS-Monodur PA 250 N") |
| Tools Used: | bandsaw, 3D printers, laser cutter |
| Software Used: | Tinkercad, Slic3r, Inkscape, Visicut |
| Approx. Cost: | approx. 3 € apiece |
When rearing fish larvae in a regular aquarium, many factors reduce their growth and, ultimately, survival. In addition, it's hard to monitor the larvae when they can spread out and hide, but I wanted to be able to inspect them under a microscope during the first two weeks while still having them in beneficial flow-through conditions with well aerated water.
Commercial rearing cages do exist but are quite expensive (I needed 10-20!) and had the wrong dimensions for my use case in the laboratory.
Acrylic Glass Tube
- 60 mm OD, bought as 1 m stock
- first attempt: 100 mm OD (did not fit into some lab glassware with all parts assembled)

3D Printed Bottoms
- snap-fit ring to hold a fine mesh we had around for similar purposes
- low-poly circle in Tinkercad may actually be beneficial for this purpose - bit more room for error?
- inside rings seemed easier at first, but appeared to allow fish to get trapped in small "pockets" between low-poly ring and round tube -> switched to outside rings
- designed to be about right (ID = tube OD + 1 mm), but final fitting had to be tried with small adjustments in Slic3r (P4/P5: 100.4 % scale)
- 20 % infill, 0.3 mm layers
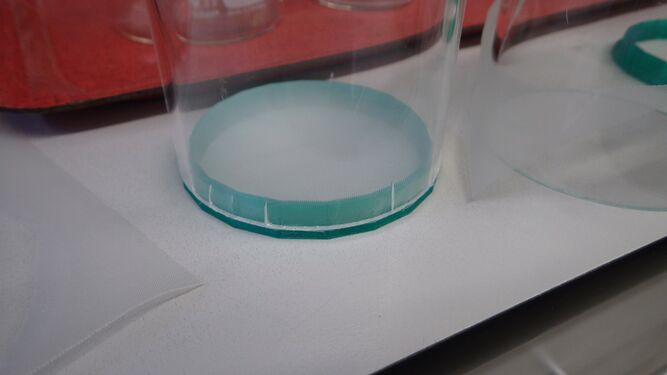
an early 3D printed snap ring that was inside & just a bit too large - note the cracks forming in the acrylic glass tube
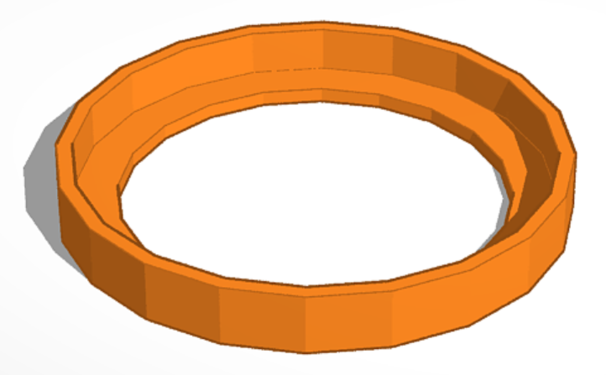
final design - super fancy, I know!


Floaters
The floating rings at the top were laser cut out of XPS and fitted quite nicely after just two or three rescaling rounds.

Postprocessing & Assembly
After all the parts were made, some additional steps became necessary: besides the obvious "cut the mesh and squeeze it in place", the floaters had to be washed to get rid of the laser stench and the (bottom) bandsaw cuts hat to be cleaned up for a better seal.
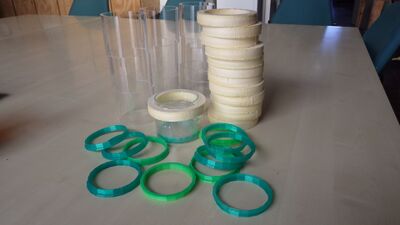
all the parts after the "machine work" at the Space: tubes, floaters and snap rings
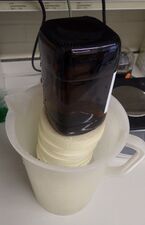
the floaters were held underwater for a couple of days after washing with ethanol
the bottom ends of the cages were wet sanded until they were even enough to form a tight seal with the mesh & snap ring


Failed Designs

I also made a "mesh wall" prototype but quickly discarded this approach because it required silicone caulk for assembly. Therefore, it was messy to assemble and basically non-recoverable (i.e. properly cleanable/repairable) without any noticeable benefits.