Project:Airlag Chess Figures: Difference between revisions
No edit summary |
m (Lukas moved page Project:Airlag chess figures to Project:Airlag Chess Figures: consistent capitalization) |
||
| (17 intermediate revisions by 3 users not shown) | |||
| Line 1: | Line 1: | ||
{{ProjectInfoBox | {{ProjectInfoBox | ||
|project title=Chess Figures | |project title=Geopolymer Chess Figures | ||
|image=Airlag chess figures 20191004 185618.png | |image=Airlag chess figures 20191004 185618.png | ||
|status=in progress | |status=in progress | ||
| Line 9: | Line 9: | ||
|tools=sharp knife, [[Drying Oven|drying oven]] | |tools=sharp knife, [[Drying Oven|drying oven]] | ||
|software= | |software= | ||
|cost= | |cost= 80 € | ||
}} | }} | ||
This is my first project I'm doing in the CoMakingSpace for real. I thought about a few other projects but those never made it past the thinking and sketching part. | This is my first project I'm doing in the CoMakingSpace for real. I thought about a few other projects but those never made it past the thinking and sketching part. | ||
| Line 18: | Line 18: | ||
*[https://www.youtube.com/watch?v=Whjpa8rhe-M YouTube -> Cement From Trash: Green Alkali-Activated Cements] | *[https://www.youtube.com/watch?v=Whjpa8rhe-M YouTube -> Cement From Trash: Green Alkali-Activated Cements] | ||
*[https://ger.gillmanbuilders.com/geopolimernyj-beton-svoimi-rukami-v-domashnih gillmanbuilders -> Was ist Geopolymer Beton und wie man es selbst kocht] | *[https://ger.gillmanbuilders.com/geopolimernyj-beton-svoimi-rukami-v-domashnih gillmanbuilders -> Was ist Geopolymer Beton und wie man es selbst kocht] | ||
*[https://aip.scitation.org/doi/pdf/10.1063/1.5003505?class=pdf scitation.org -> A Review in Geopolymer Binder with Dry Mixing Method] | |||
and several more. | and several more. | ||
<small>(In this context it is irrelevant whether it is historical correct if the pyramids were partly | <small>(In this context it is irrelevant whether it is historical correct if the pyramids were partly built using concrete or not)</small> | ||
The recipe varies from website to website. Wiki explains that there is a wide variety of ingedients that can replace each other. Therefore I started my own experimental research with available or easily accessable materials. | The recipe varies from website to website. Wiki explains that there is a wide variety of ingedients that can replace each other. Therefore I started my own experimental research with available or easily accessable materials. | ||
| Line 26: | Line 27: | ||
<span style="color: red>One of the ingredients is soda lye (NaOH). This chemical is corrosive.</span> | <span style="color: red>One of the ingredients is soda lye (NaOH). This chemical is corrosive.</span> | ||
The materials and chemicals aren't expensive. The most expensive is definitely the silicone rubber. | The materials and chemicals aren't expensive. The most expensive is definitely the silicone rubber. I'm not finished jet but I expect there will be lots of leftovers. | ||
==Portland Cement Free Concrete== | ==Portland Cement Free Concrete== | ||
| Line 36: | Line 37: | ||
add 25g sodium silicate | add 25g sodium silicate | ||
'''the aggregate''': | '''the aggregate''':<br /> | ||
185g sand (unknown origin, turned out it contained lots of limestone)<br /> | 185g sand (unknown origin, turned out it contained lots of limestone)<br /> | ||
add 100g Zeolith powder | add 100g Zeolith powder | ||
| Line 60: | Line 61: | ||
'''the aggregate''':<br /> | '''the aggregate''':<br /> | ||
200g | 200g trass powder (Trass is the local name of a volcanic tuff occurring in the Eifel, Germany)<br /> | ||
100g white sand from a pet shop | 100g white sand from a pet shop | ||
| Line 69: | Line 70: | ||
Baking it in a drying oven at 80°C for 3 hours turned it to a rock.<br /> | Baking it in a drying oven at 80°C for 3 hours turned it to a rock.<br /> | ||
After another week I discovered that the reference body shows some cracks.<br /> | After another week I discovered that the reference body shows some cracks.<br /> | ||
Several weeks later it seems to sweat out some kind of nearly white powder. The cracks seem get smaller. | Several weeks later it seems to sweat out some kind of nearly white powder. The cracks seem to get smaller. | ||
[[File:Airlag chess figures 20190906 170024.png|100px]] | [[File:Airlag chess figures 20190906 170024.png|100px]] | ||
| Line 82: | Line 83: | ||
'''the aggregate''':<br /> | '''the aggregate''':<br /> | ||
200g | 200g trass powder<br /> | ||
100g white sand | add 100g white sand | ||
add the activator to the aggregate | add the activator to the aggregate | ||
The resulting mixture is creamy but still not pourable. However, I tried this mixture for a first atempt on the chess figures ([[#Figures Trial 1 from Material Trial 3|see below]]).<br /> | The resulting mixture is creamy but still not pourable. However, I tried this mixture for a first atempt on the chess figures ([[#Figures Trial 1 from Material Trial 3|see below]]).<br /> | ||
This time I put it immediately into the drying oven at about 60°C for 3 hours. The resulting reference body seemed hard but it isn't entirely. Hitting the edge of a table caused a dent in the reference body. One week later nothing has changed. The | This time I put it immediately into the drying oven at about 60°C for 3 hours. The resulting reference body seemed hard but it isn't entirely. Hitting the edge of a table caused a dent in the reference body. One week later nothing has changed. The hardened material is as durable as chalk. | ||
[[File:Airlag chess figures 20190914 134952.png|100px]] | [[File:Airlag chess figures 20190914 134952.png|100px]] | ||
[[File:Airlag chess figures 20191010 152704.png|100px]] | [[File:Airlag chess figures 20191010 152704.png|100px]] | ||
===Trial 4=== | |||
'''the activator''':<br /> | |||
30g water<br /> | |||
add 18g NaOH<br /> | |||
add 40g sodium silicate | |||
'''the aggregate''':<br /> | |||
140g trass powder<br /> | |||
add 200g white sand<br /> | |||
add 4g titan white (just for the color)<br /> | |||
add 80g water<br /> | |||
add the activator to the aggregate | |||
This recipe was from another web page. In my opinion there are two main differences. The mix ratios differ greatly. There is way more water involved as needed to dissolve the lye. And the aggregate is mixed with water before the activator is added. | |||
The aggregate was creamy after mixing with water. When I added the activator it turned into a pourable liquid. That looked promising - at first. | |||
I filled the cases and baked them in the drying oven at 70°C for about two days. The result was not durable at all. [[#Figures Trial 2 from Material Trial 4|It crumbled literally at sight]]. | |||
==The Chess Figures== | ==The Chess Figures== | ||
| Line 99: | Line 120: | ||
To make casts I need prototype figures. | To make casts I need prototype figures. | ||
I decided to use styrene foam | I decided to use styrene foam, a penknife and glue to create my prototypes. I had some square meters of 5mm panels lying around. So I used that material. It's very easy to cut but it's hard to carve tiny details. The material tends to crumble if you don't use the sharpest possible knife.<br /> | ||
I wasn't satisfied with the first set of figures, so I made a second set. | I wasn't satisfied with the first set of figures, so I made a second set. | ||
| Line 121: | Line 142: | ||
And then I threw them away. Next try will be better :-) | And then I threw them away. Next try will be better :-) | ||
===Figures Trial 2 from Material Trial 4=== | |||
A total fail. | |||
[[File:Airlag chess figures 20191013 161728.png|100px]] | |||
===One Year later=== | |||
As you can imagine, I wasn't pleased by the results I documented above. I wasn't even writing about my last attempt with Material Trial 3, what had been the most promising. | |||
No photos, sorry ;) | |||
As far as I remember, I filled my cases as good as possible, baked them at about 60° and waited for a week or so. Then I carefully removed the figures from the cases. Still no better result. The material was just as hard as chalk. | |||
So I put the figures aside in a bookcase and forgot about them. For a whole year. | |||
Recently I stumbled over the figures. Just out of curiosity or maybe to finally throw them away, I took one. It felt hard. Totally not like chalk. The figures are hard as stone. Maybe not as hard as concrete but definitely no longer crumbling. | |||
So the basic chemistry works! It just takes way longer than expected to turn solid. | |||
[[Category:Casting]] | |||
[[Category:Toys & Games]] | |||
Latest revision as of 19:45, 22 September 2022
| ProjectInfoBox Geopolymer Chess Figures | |
|---|---|

| |
| Status: | in progress |
| Release Date: | christmas time - maybe |
| Initiator: | Airlag |
| Materials Used: | styrene foam, silicone rubber, alkali activates silicates |
| Tools Used: | sharp knife, drying oven |
| Approx. Cost: | 80 € |
This is my first project I'm doing in the CoMakingSpace for real. I thought about a few other projects but those never made it past the thinking and sketching part.
A few months ago I stumbled over some information about Geopolymers in the internet:
- wikipedia -> Geopolymer
- YouTube -> Vulkanstein, der Baustoff der Zukunft?
- YouTube -> Cement From Trash: Green Alkali-Activated Cements
- gillmanbuilders -> Was ist Geopolymer Beton und wie man es selbst kocht
- scitation.org -> A Review in Geopolymer Binder with Dry Mixing Method
and several more. (In this context it is irrelevant whether it is historical correct if the pyramids were partly built using concrete or not)
The recipe varies from website to website. Wiki explains that there is a wide variety of ingedients that can replace each other. Therefore I started my own experimental research with available or easily accessable materials.
One of the ingredients is soda lye (NaOH). This chemical is corrosive.
The materials and chemicals aren't expensive. The most expensive is definitely the silicone rubber. I'm not finished jet but I expect there will be lots of leftovers.
Portland Cement Free Concrete
Trial 1
the activator:
6g water
add 4g NaOH slowly because the chemical reaction produces heat
add 25g sodium silicate
the aggregate:
185g sand (unknown origin, turned out it contained lots of limestone)
add 100g Zeolith powder
add the activator to the aggregate
Zeolith is a relatively cheap mineral. I ordered some powder. I got granumate instead. I tried anyways.
The resulting mixture was in no way pourable. I tried to pack it, then I let the chemistry magic do its job.
After a week it was hard but porose and crumbly.
Trial 2
the activator: same as above
6g water
add 4g NaOH
add 25g sodium silicate
the aggregate:
200g trass powder (Trass is the local name of a volcanic tuff occurring in the Eifel, Germany)
100g white sand from a pet shop
add the activator to the aggregate
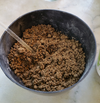
The resulting mixture looked like moist sand but was very squashy. The mixture was not pourable.
After a week it was still moist and squashy.
Baking it in a drying oven at 80°C for 3 hours turned it to a rock.
After another week I discovered that the reference body shows some cracks.
Several weeks later it seems to sweat out some kind of nearly white powder. The cracks seem to get smaller.
Trial 3
the activator: same as above just 4 times more of it
24g water
add 16g NaOH
add 100g sodium silicate
the aggregate:
200g trass powder
add 100g white sand
add the activator to the aggregate
The resulting mixture is creamy but still not pourable. However, I tried this mixture for a first atempt on the chess figures (see below).
This time I put it immediately into the drying oven at about 60°C for 3 hours. The resulting reference body seemed hard but it isn't entirely. Hitting the edge of a table caused a dent in the reference body. One week later nothing has changed. The hardened material is as durable as chalk.
Trial 4
the activator:
30g water
add 18g NaOH
add 40g sodium silicate
the aggregate:
140g trass powder
add 200g white sand
add 4g titan white (just for the color)
add 80g water
add the activator to the aggregate
This recipe was from another web page. In my opinion there are two main differences. The mix ratios differ greatly. There is way more water involved as needed to dissolve the lye. And the aggregate is mixed with water before the activator is added.
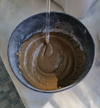
The aggregate was creamy after mixing with water. When I added the activator it turned into a pourable liquid. That looked promising - at first.
I filled the cases and baked them in the drying oven at 70°C for about two days. The result was not durable at all. It crumbled literally at sight.
The Chess Figures
I want to make chess figures out of liquid stone.
For this I need casts.
To make casts I need prototype figures.
I decided to use styrene foam, a penknife and glue to create my prototypes. I had some square meters of 5mm panels lying around. So I used that material. It's very easy to cut but it's hard to carve tiny details. The material tends to crumble if you don't use the sharpest possible knife.
I wasn't satisfied with the first set of figures, so I made a second set.
Next I created small boxes for each figure out of the same material. I glued one figure to the bottom of each box, then I poured silicone rubber in the box. Two hours later I removed the box and cut the silicone rubber in half. After removing the remains of the prototype figure the reusable cases for the stone figures are finished.
I didn't make much pictures. Shame on me. I only have this picture of the first set of prototype figures.
Figures Trial 1 from Material Trial 3
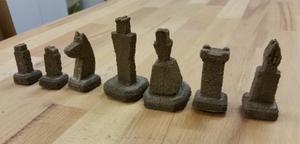
Material Trial 3 seemed promising enough, so I poured it as good as possible into the silicone cases. The material was creamy, not liquid. So I ended up with several bubbles. The horse has no chin. The queen broke in half. Anyways, it's the first attempt. So here are the results.
And then I threw them away. Next try will be better :-)
Figures Trial 2 from Material Trial 4
A total fail.
One Year later
As you can imagine, I wasn't pleased by the results I documented above. I wasn't even writing about my last attempt with Material Trial 3, what had been the most promising. No photos, sorry ;) As far as I remember, I filled my cases as good as possible, baked them at about 60° and waited for a week or so. Then I carefully removed the figures from the cases. Still no better result. The material was just as hard as chalk. So I put the figures aside in a bookcase and forgot about them. For a whole year. Recently I stumbled over the figures. Just out of curiosity or maybe to finally throw them away, I took one. It felt hard. Totally not like chalk. The figures are hard as stone. Maybe not as hard as concrete but definitely no longer crumbling.
So the basic chemistry works! It just takes way longer than expected to turn solid.


